Configure GitLab
You need to set up an SSH key with GitLab. While you can also set up personal access tokens (HTTPS), this requires you to enter your token on every operation. SSH is a more convenient and secure way to work with GitLab.Create Repository on GitLab
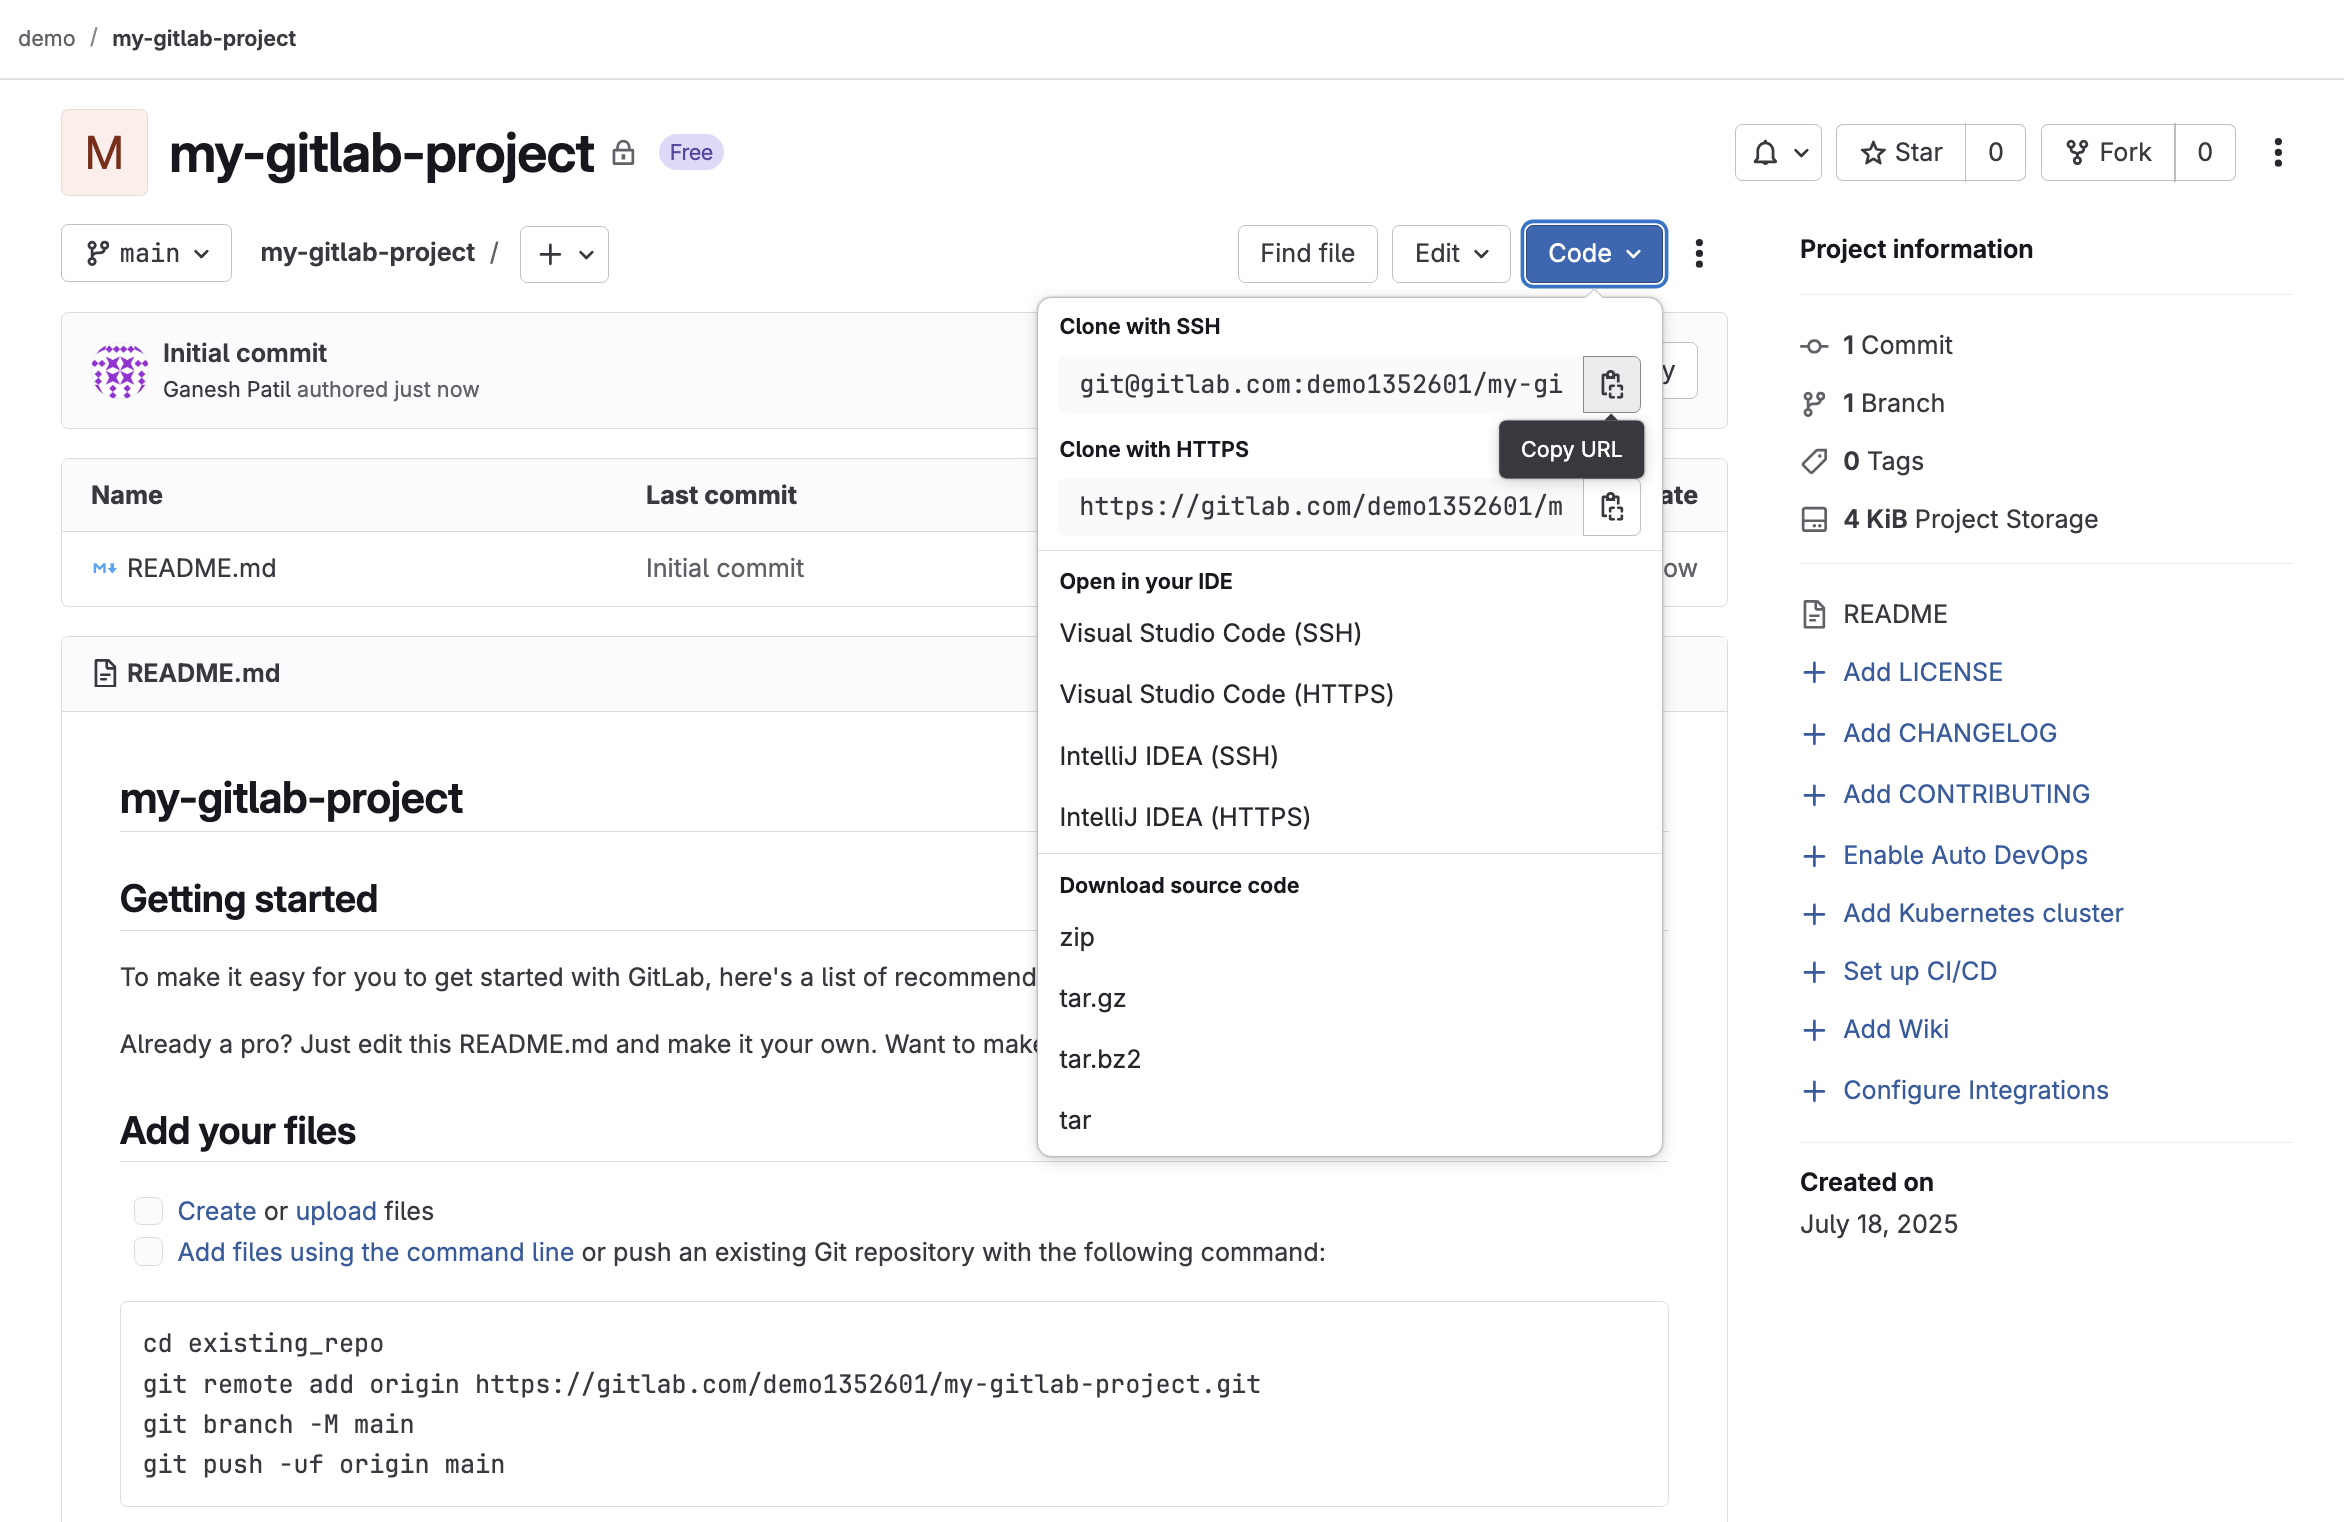
To get started, you have to create a project/repository on GitLab. Follow these steps:- Log into your GitLab account (create one if you don’t have one)
- Click on the New Project button
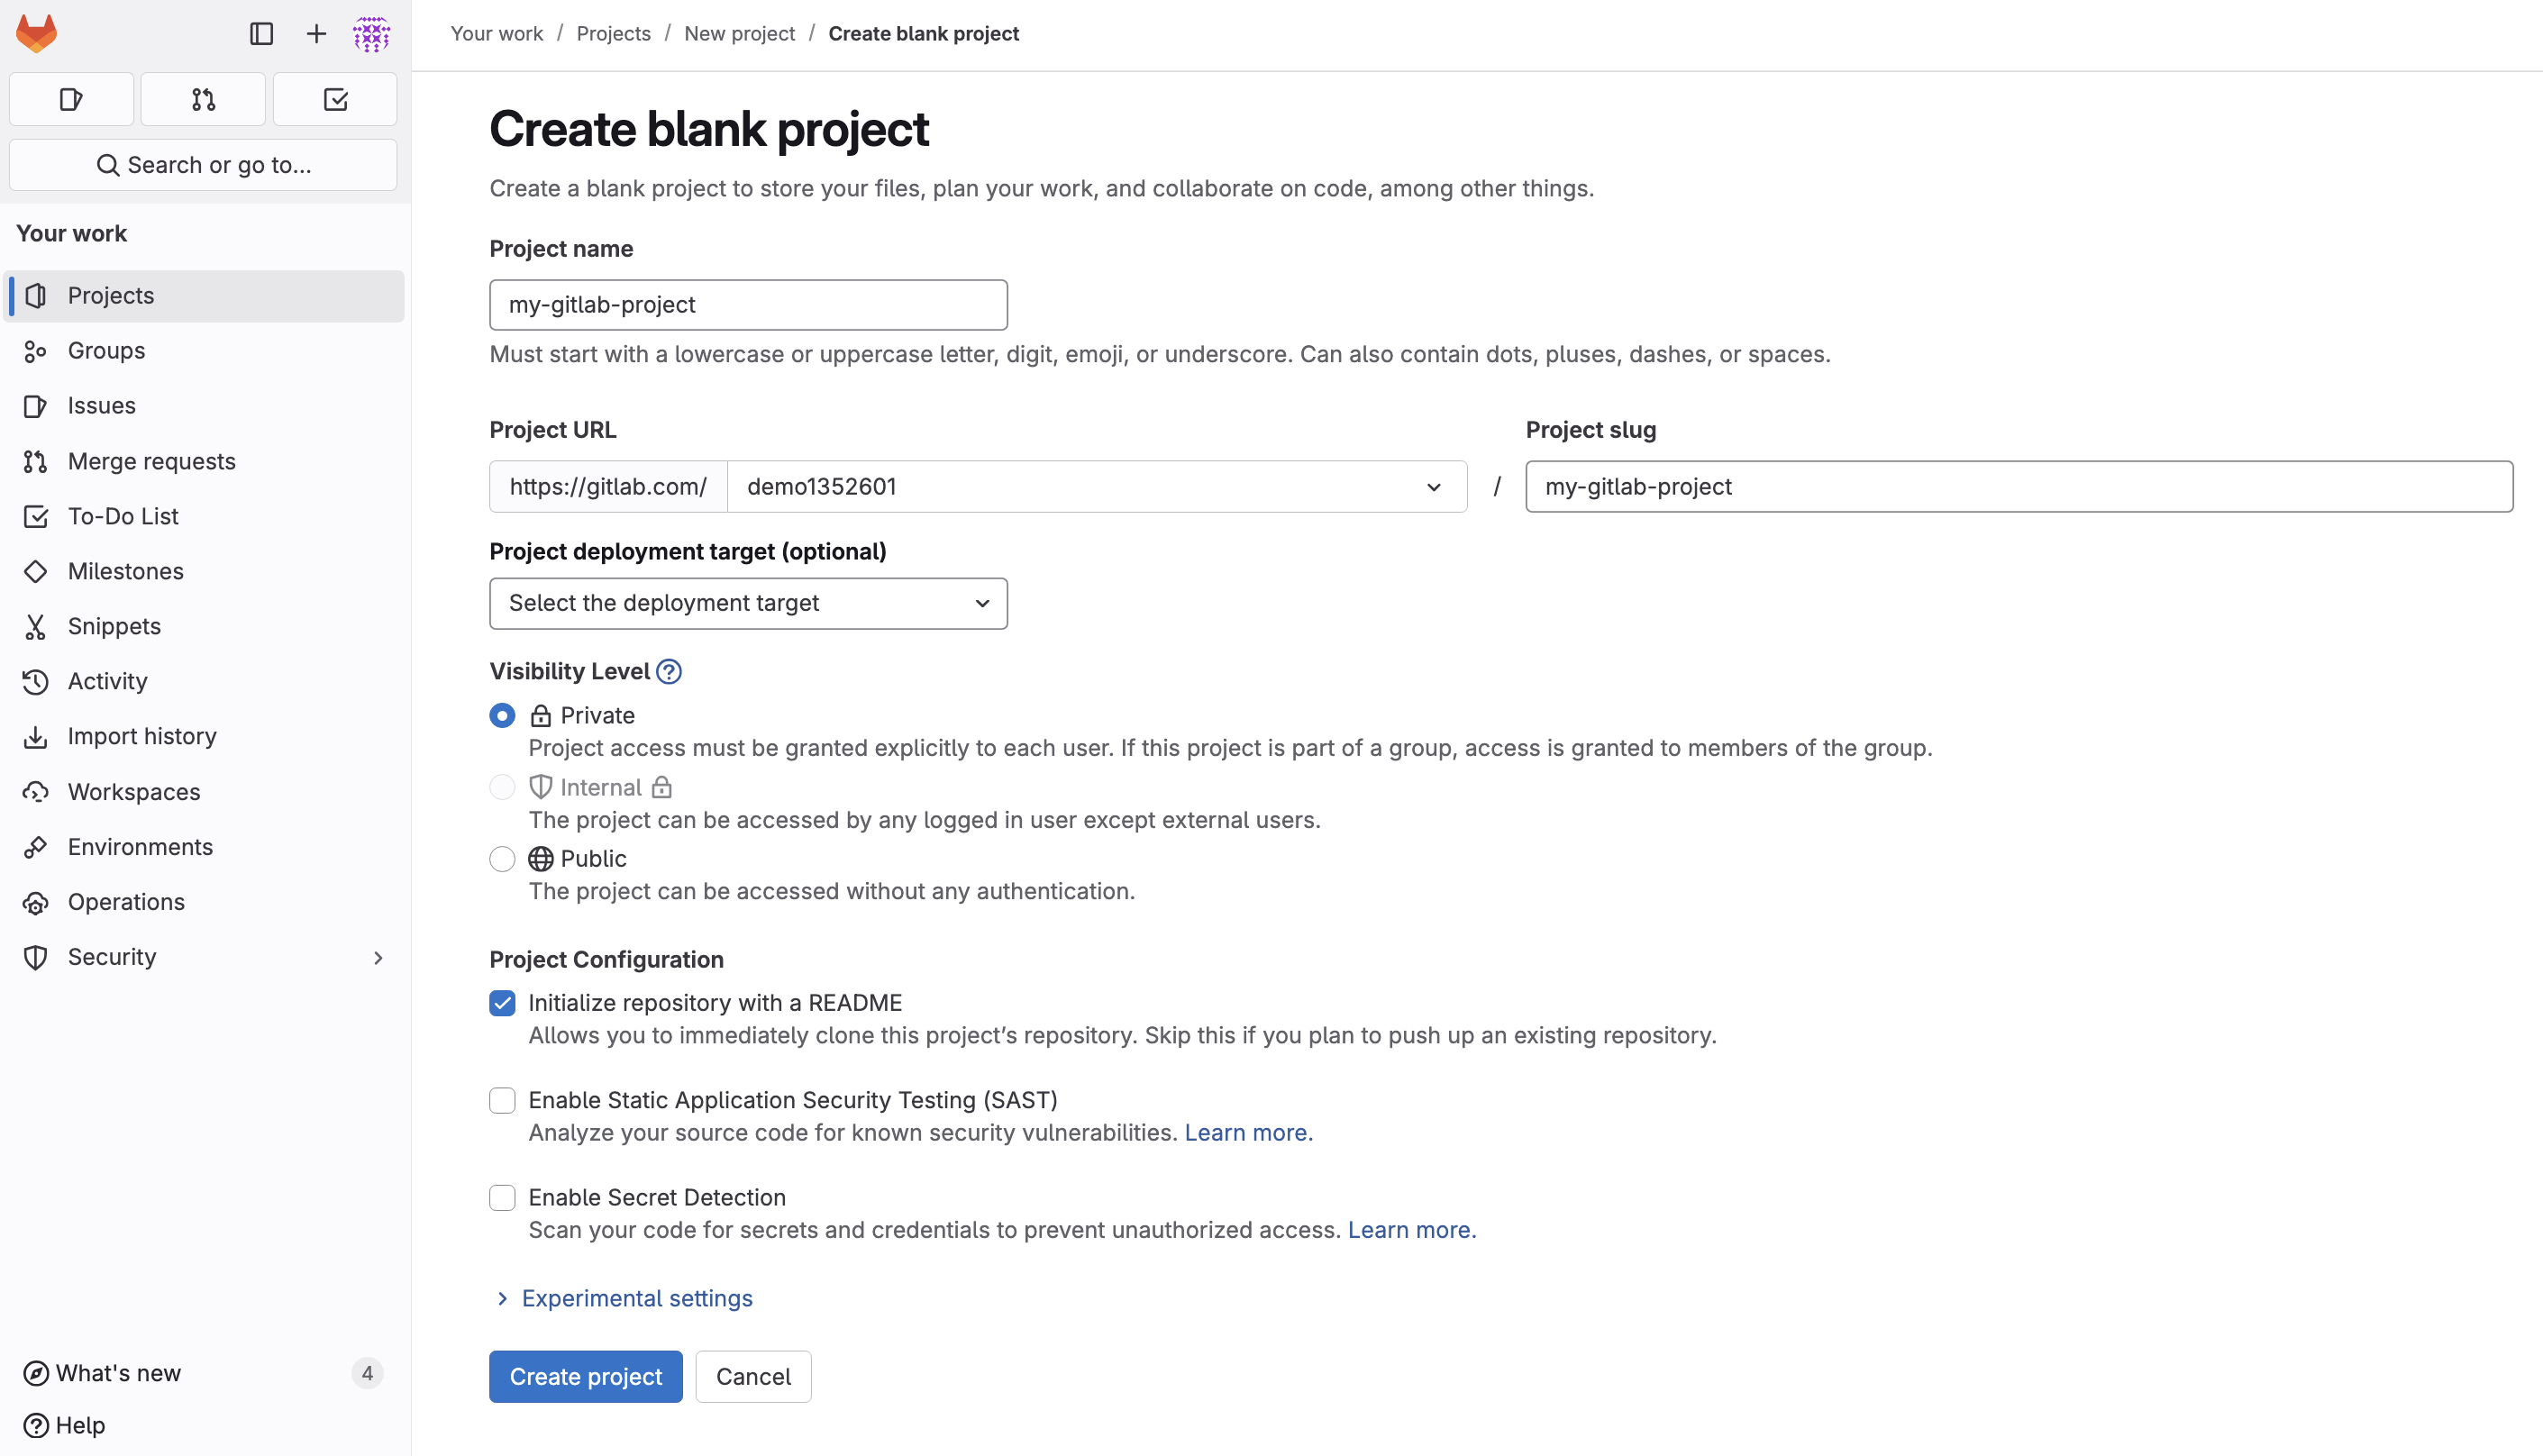
- Choose Create blank project or Create from template
- Fill in all required fields (Project name, Description, Visibility level)
- Click Create project
Configure SSH Key
Follow these steps to configure an SSH key on your local system:1. Generate SSH Key
Open your terminal and execute:2. Add SSH Key to SSH Agent
Add the SSH key to your SSH agent so it can be used for authentication:3. Add the SSH Key to Your GitLab Account
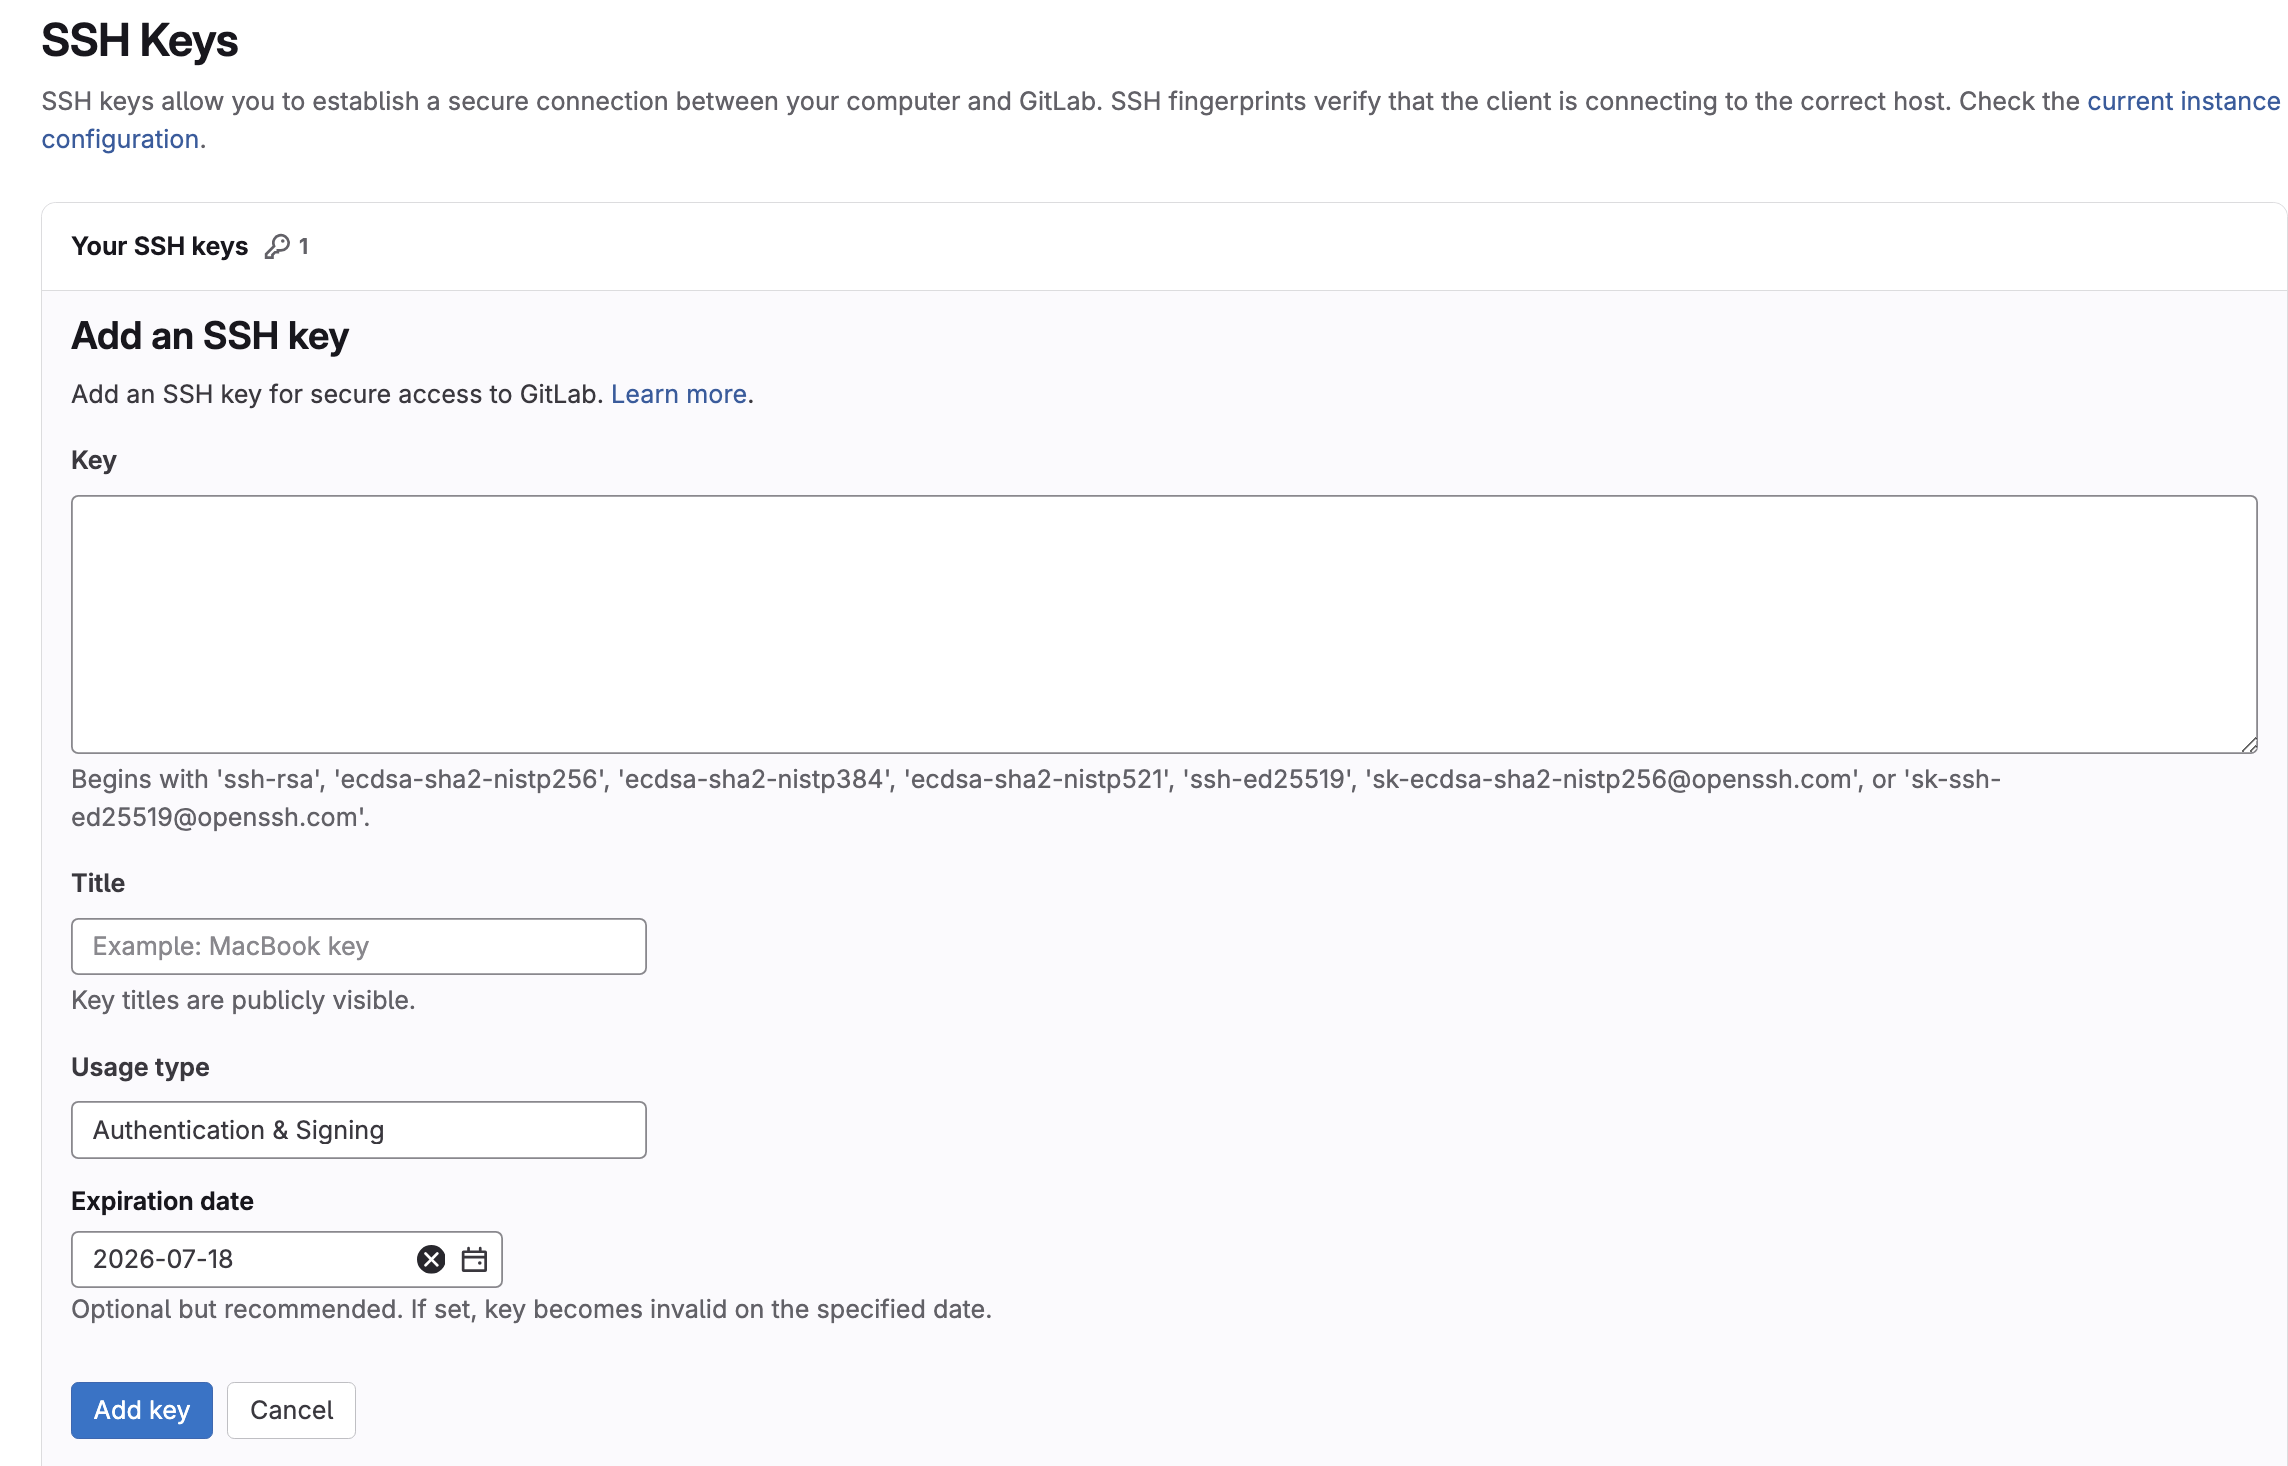
- Go to GitLab > User Settings (click your avatar) > SSH Keys
- Click Add new key
- Paste your
id_ed25519_gitlab.pubcontent - Give your key a title (e.g., “Bruno Development”)
- Click Add key
Use GitLab with Bruno
- Create a Collection inside Bruno (if you haven’t already)
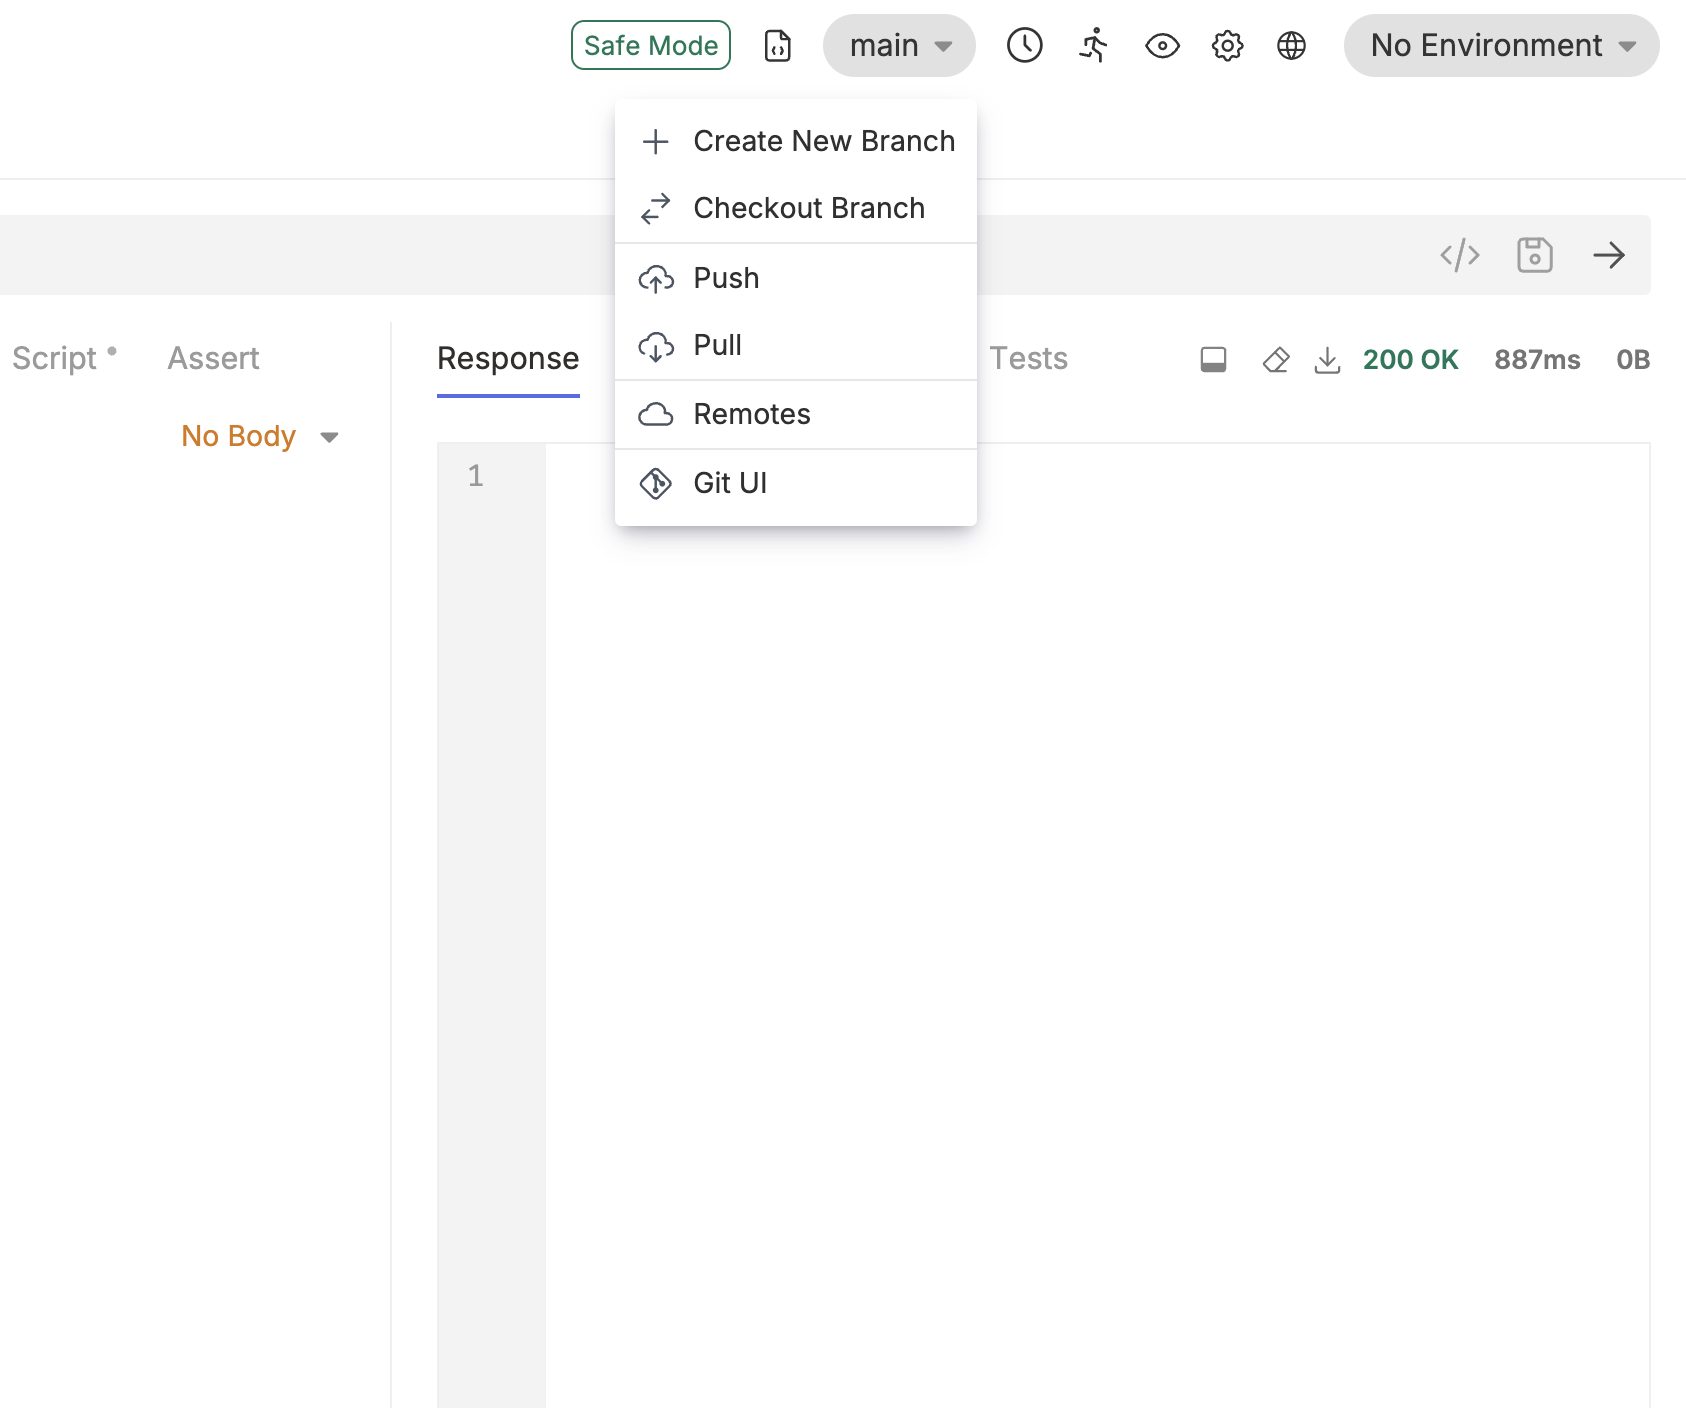
- Click on the Git icon (next to Safe Mode) and select Initialize repo
- Click on main and select Remotes from the dropdown
- Add origin as the name of the remote and paste your repository URL (copied previously)