OAuth 2.0 Configuration
Overview
Bruno allows you to configure OAuth2 authentication at multiple levels: collection, folder, and request. This guide explains how to set up and use OAuth2 authentication effectively across your API testing workflow.
The configuration process and all settings are identical across all levels. The only difference is where you access the settings and the scope of the configuration.
Setting Up OAuth2
-
Access Settings
- Collection Level: Open your collection and navigate to Collection Settings > Auth tab
- Folder Level: Right-click on the folder and select Folder Settings > Auth tab
- Request Level: Open your request and navigate to Auth tab
-
Configure OAuth2
- Choose “OAuth 2.0” from the authentication dropdown
- Select your preferred grant type
- Fill in the required OAuth2 parameters
Supported Grant Types
Bruno supports three OAuth2 grant types:
Managing Access Tokens
Generating Tokens
- Configure OAuth2 parameters as per grant type.
- You can choose where to add this token in the request by selecting the “Add token to” dropdown:
- Headers
- Adds the token to the request headers
- Configure the header prefix (defaults to “Bearer”)
- URL
- Adds the token to the request URL
- Configure the query parameter name (defaults to “access_token”)
- Headers
- Click “Get Access Token” to obtain and store the token.
Auto-fetch and Auto-refresh Settings
Bruno provides two important token management features:
-
Auto-fetch: When enabled, Bruno will automatically fetch a new token when you try to access a resource and don’t have a valid token. This eliminates the need to manually retrieve a token before making API calls.
-
Auto-refresh: When enabled, Bruno will automatically refresh your token using the refresh URL when it expires. This ensures continuous access to protected resources without manual intervention.
These settings can be found in the OAuth2 configuration panel and provide significant convenience for API testing workflows.
You may optionally assign a Token ID to your token. If you do, you can reference this token in requests using the format {{$oauth2.<tokenId>.access_token}} (replace <tokenId> with your Token ID).
If you use the same Token ID in multiple OAuth requests, Bruno will overwrite the existing token data. Make sure to use unique Token IDs for different OAuth configurations.
Authentication Inheritance
Once you configure OAuth2 at the collection or folder level, you can inherit the authentication at the request level without duplicating the configuration.
How to Inherit Authentication
- Open your request and navigate to Auth tab
- Select Inherit from the authentication dropdown
Bruno will automatically determine the source level:
- Inherit from Collection: Uses the collection-level OAuth2 configuration
- Inherit from Folder: Uses the folder-level OAuth2 configuration (if available)
The token will be automatically added to your request according to the inherited configuration.
Inheritance Hierarchy
Bruno follows a specific hierarchy for authentication inheritance:
- Request-level configuration (highest priority)
- Folder-level configuration (if no request-level config)
- Collection-level configuration (if no folder-level config)
- No authentication (if no configuration at any level)
Folder-level OAuth2 configuration overrides collection-level settings for requests within that folder. If no folder-level auth is configured, requests will inherit from the collection level.
Using OAuth2 Tokens
Method 1: Collection/Folder Inheritance
When a collection or folder has OAuth2 configured, individual requests can inherit the authentication:
- Open request settings
- Select “Auth” tab
- Choose “Inherit from collection” or “Inherit from folder”
- The token will be automatically added to the request according to your configuration (Headers or URL)
Method 2: Direct Token Reference
You can manually reference OAuth2 tokens in your requests using the variable format {{$oauth2.<tokenId>.access_token}} in headers or query parameters.
Example
As shown in the video above, the Token ID value will be {{$oauth2.credentials.access_token}}
You can click the ‘Clear Cache’ button to remove the stored token and request a new one at any time.
Configuration Comparison
| Feature | Collection Level | Folder Level | Request Level |
|---|---|---|---|
| Scope | All requests in collection | Requests in specific folder | Individual request |
| Inheritance | Inherit from collection | Inherit from folder | Override collection/folder |
| Configuration | Collection settings | Folder settings | Request settings |
| Use Case | Collection-wide authentication | Folder-specific authentication | Request-specific authentication |
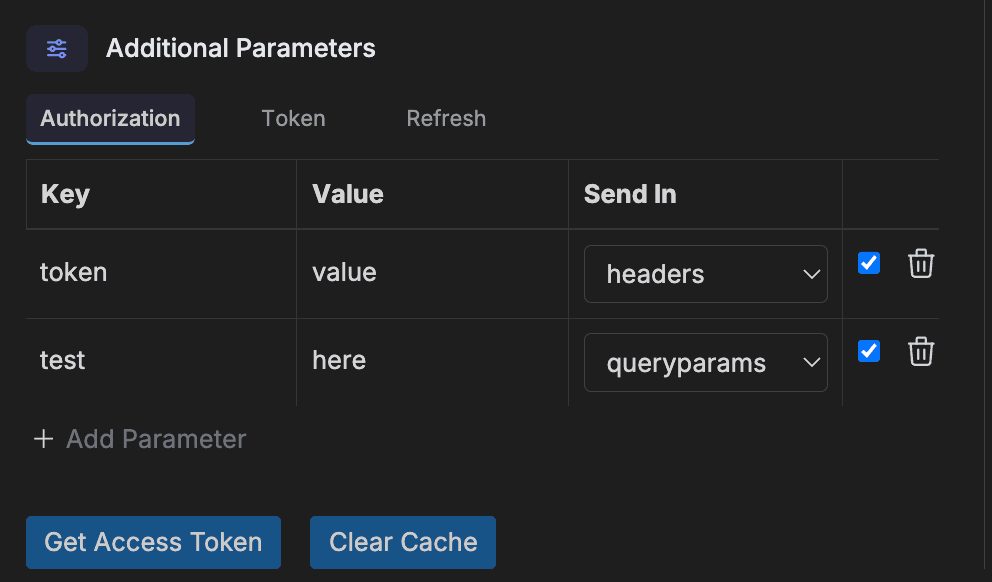
Additional Parameters
Bruno supports adding custom headers, query parameters, and body parameters to OAuth2 requests, providing flexibility similar to Bruno v1.x. This feature allows you to customize OAuth2 requests to meet specific provider requirements.
