Prerequisites: Before configuring Okta, you must first enable SCIM provisioning in Bruno and generate an API key. Follow the Enabling SCIM Provisioning section in the overview page to complete this setup and save your API key for use in the steps below.
Create your Okta App
Already have an Okta App for SSO? If you previously set up a Bruno Okta application for SAML SSO, you can reuse it for SCIM provisioning. Skip to the Configure your Okta App section to add provisioning to your existing application.
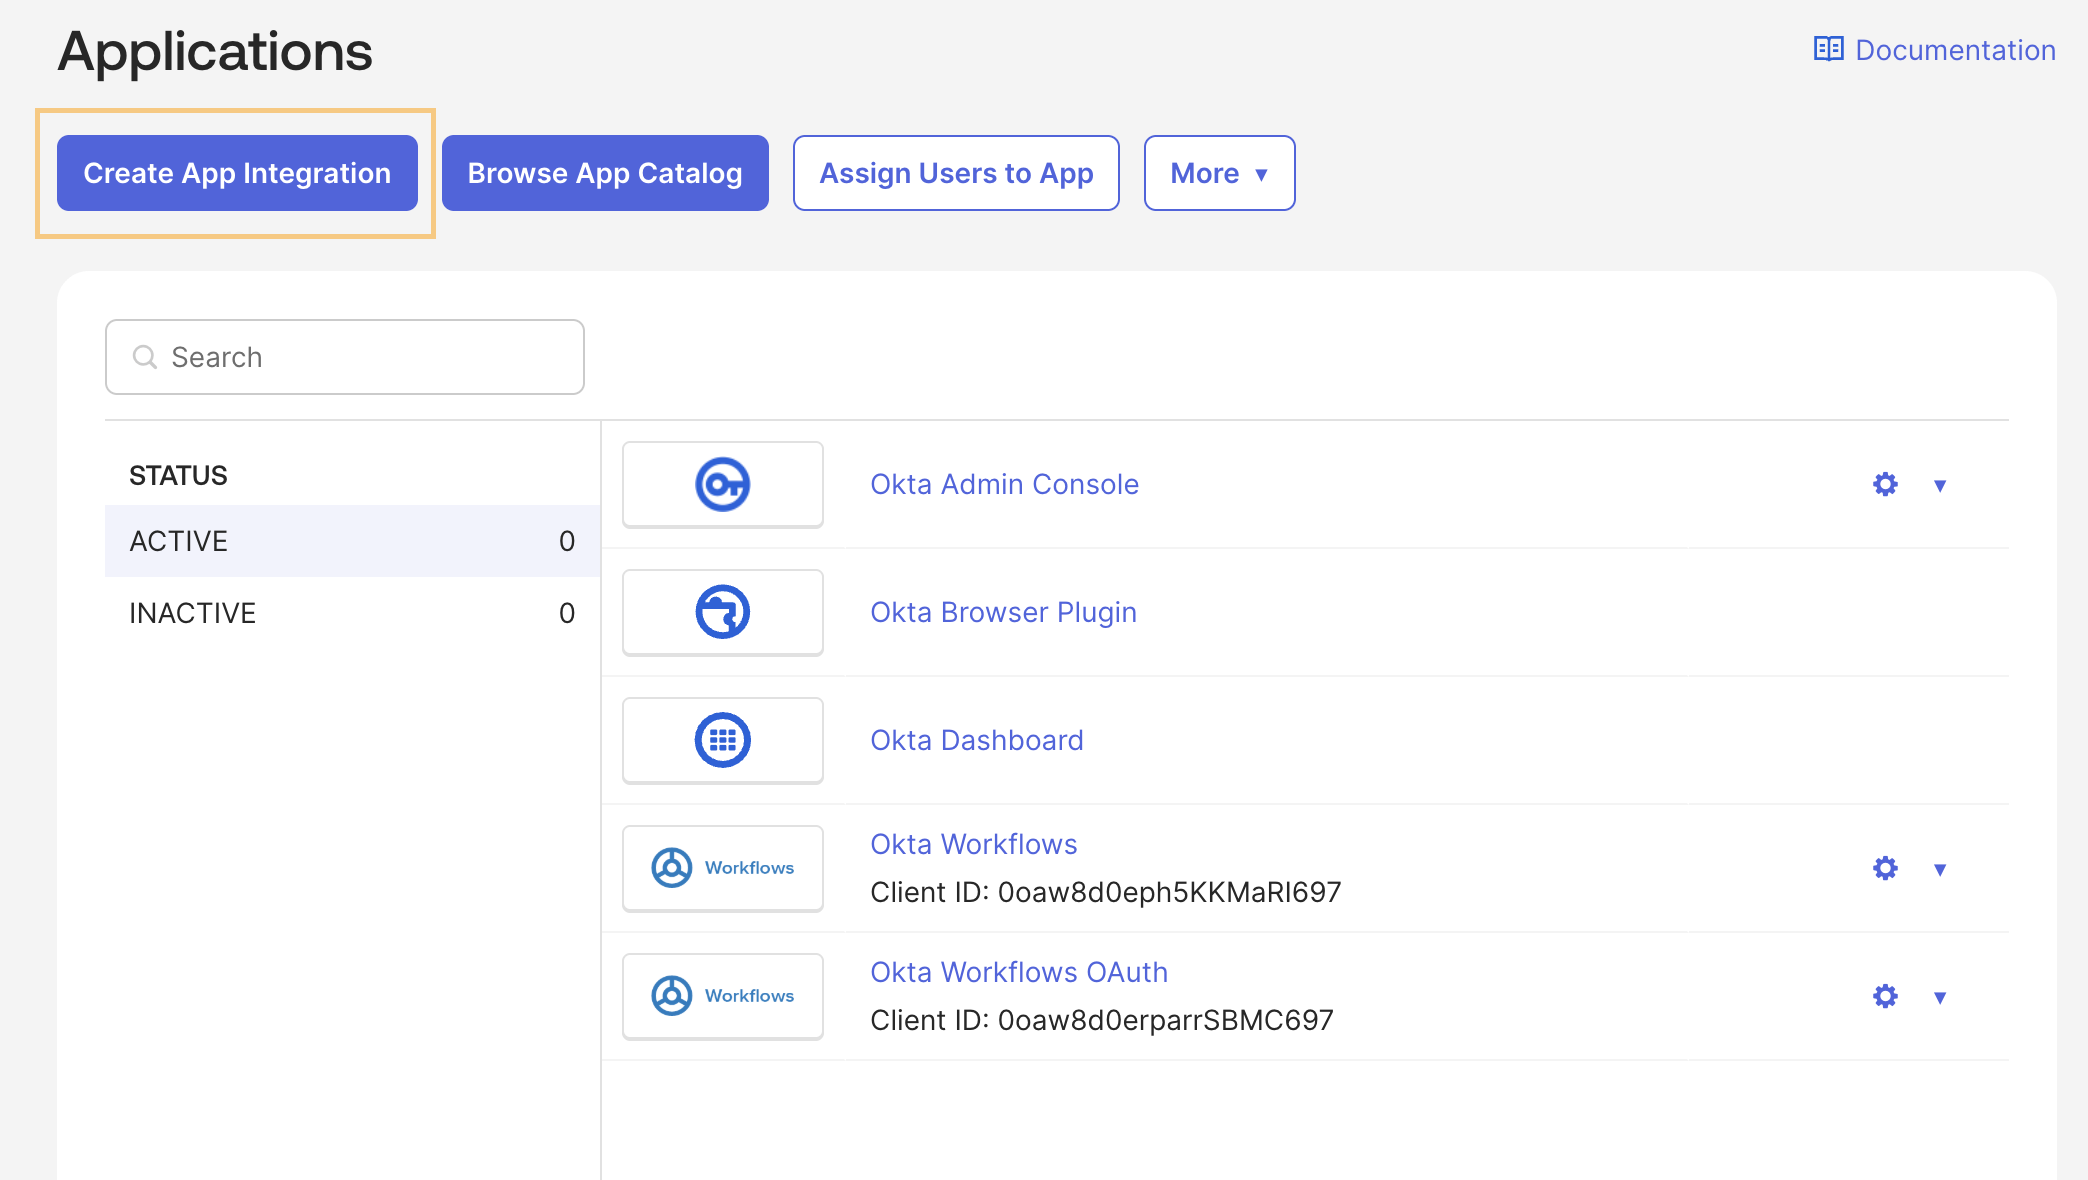
- As an Okta admin, navigate to Applications and click Create App Integration
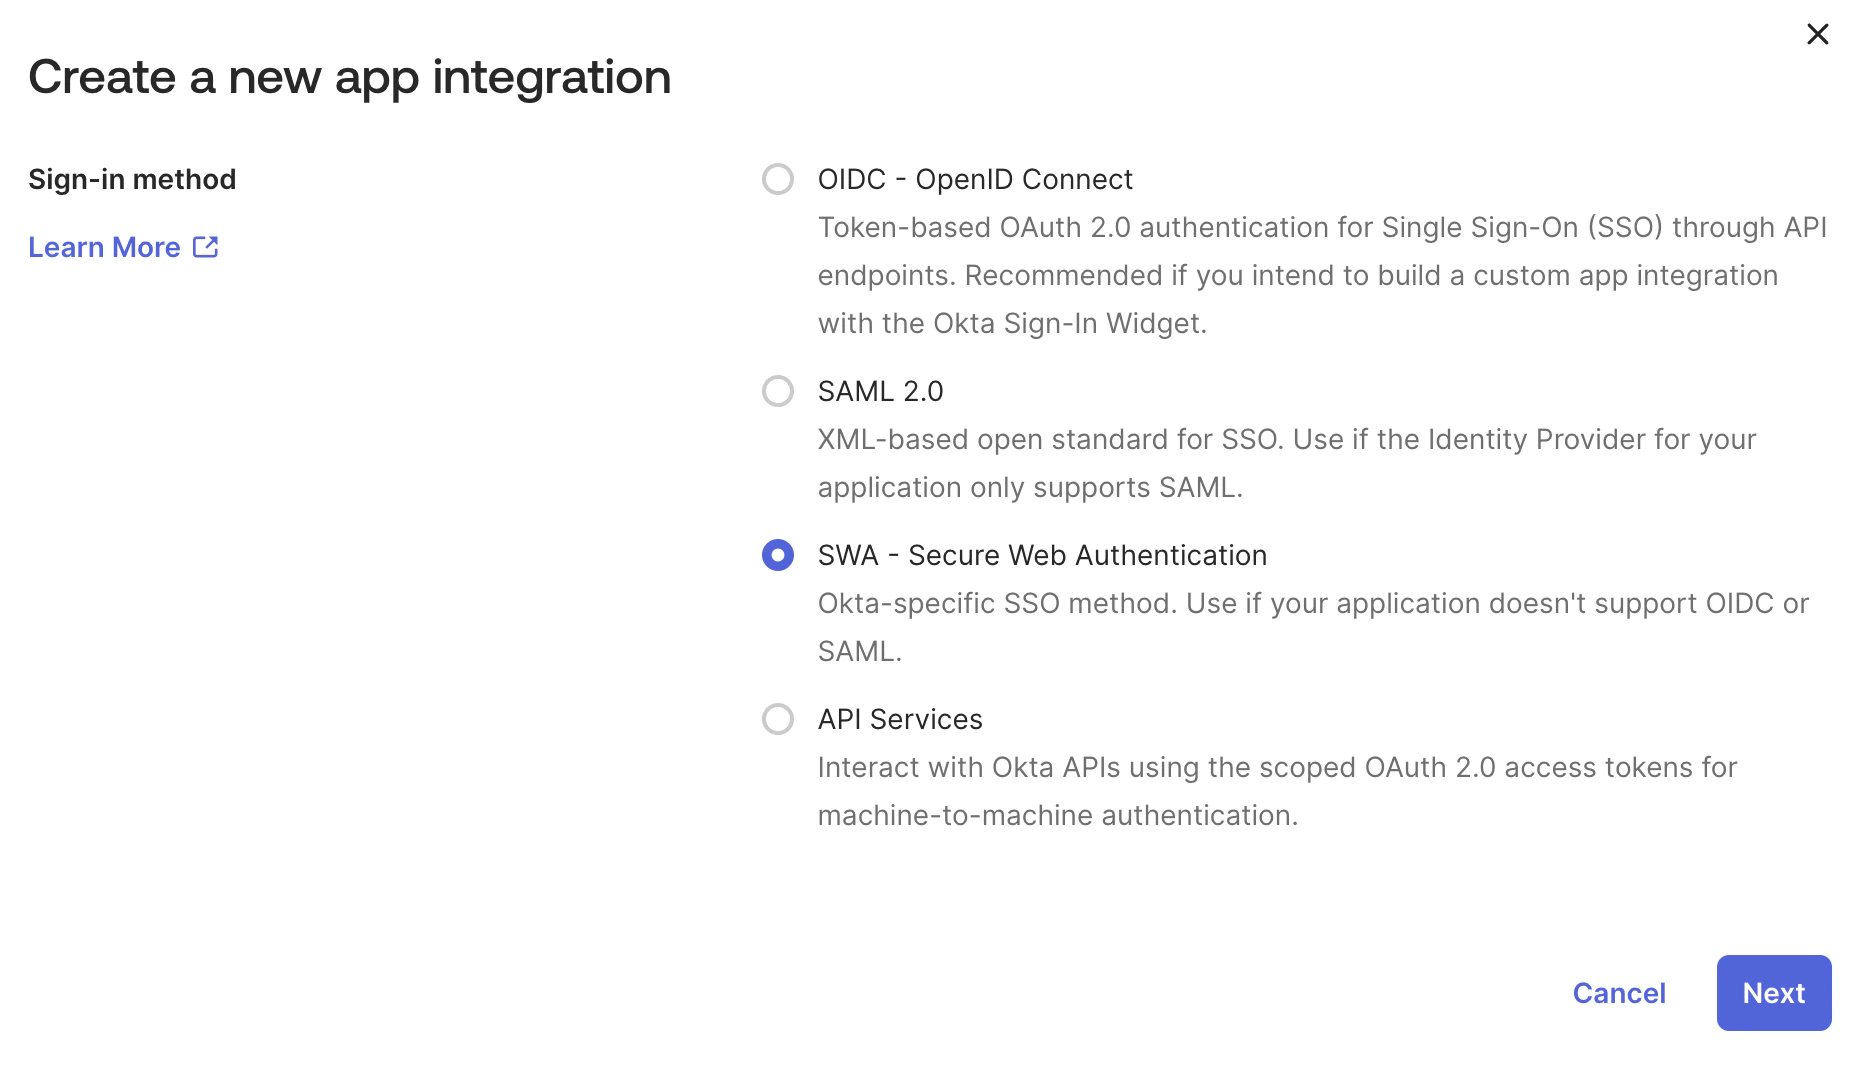
- Select SWA - Secure Web Authentication and click Next
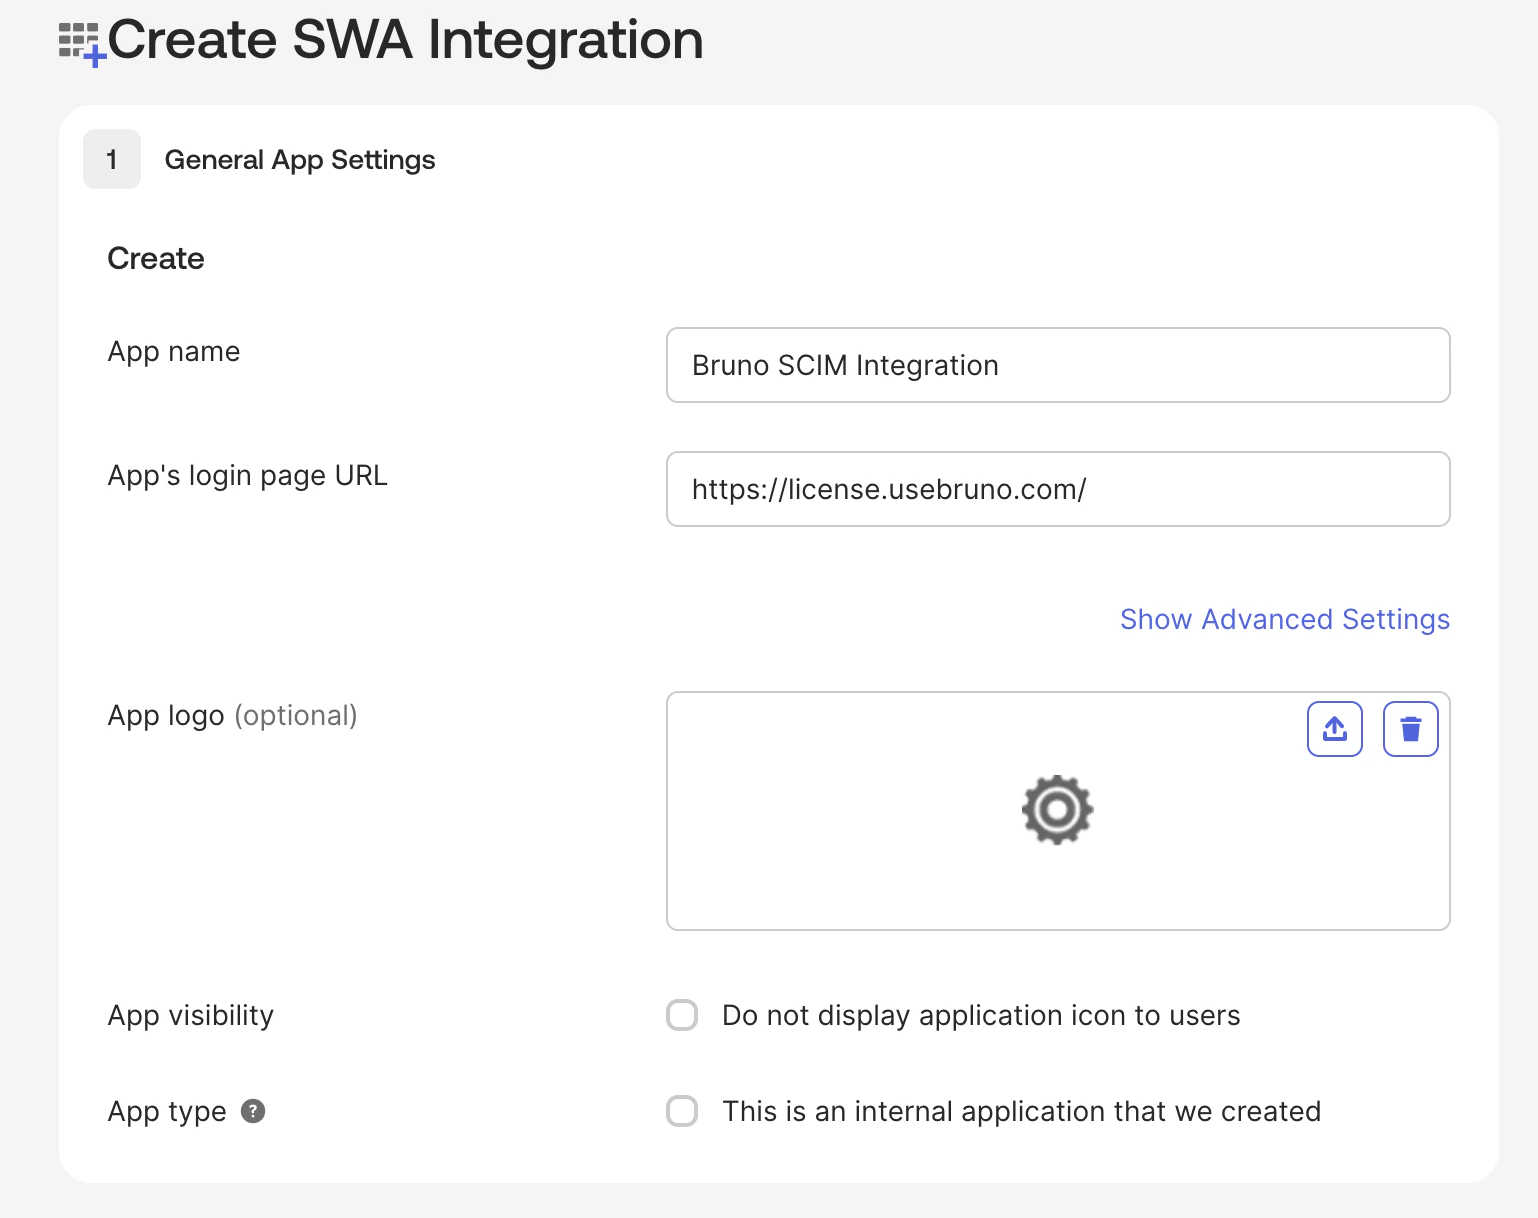
- On the Create SWA Integration page, add the following values and click Finish:
- App name: (Unique App Name - e.g. Bruno SCIM Integration)
- App’s login page URL:
https://license.usebruno.com/
Configure your Okta App
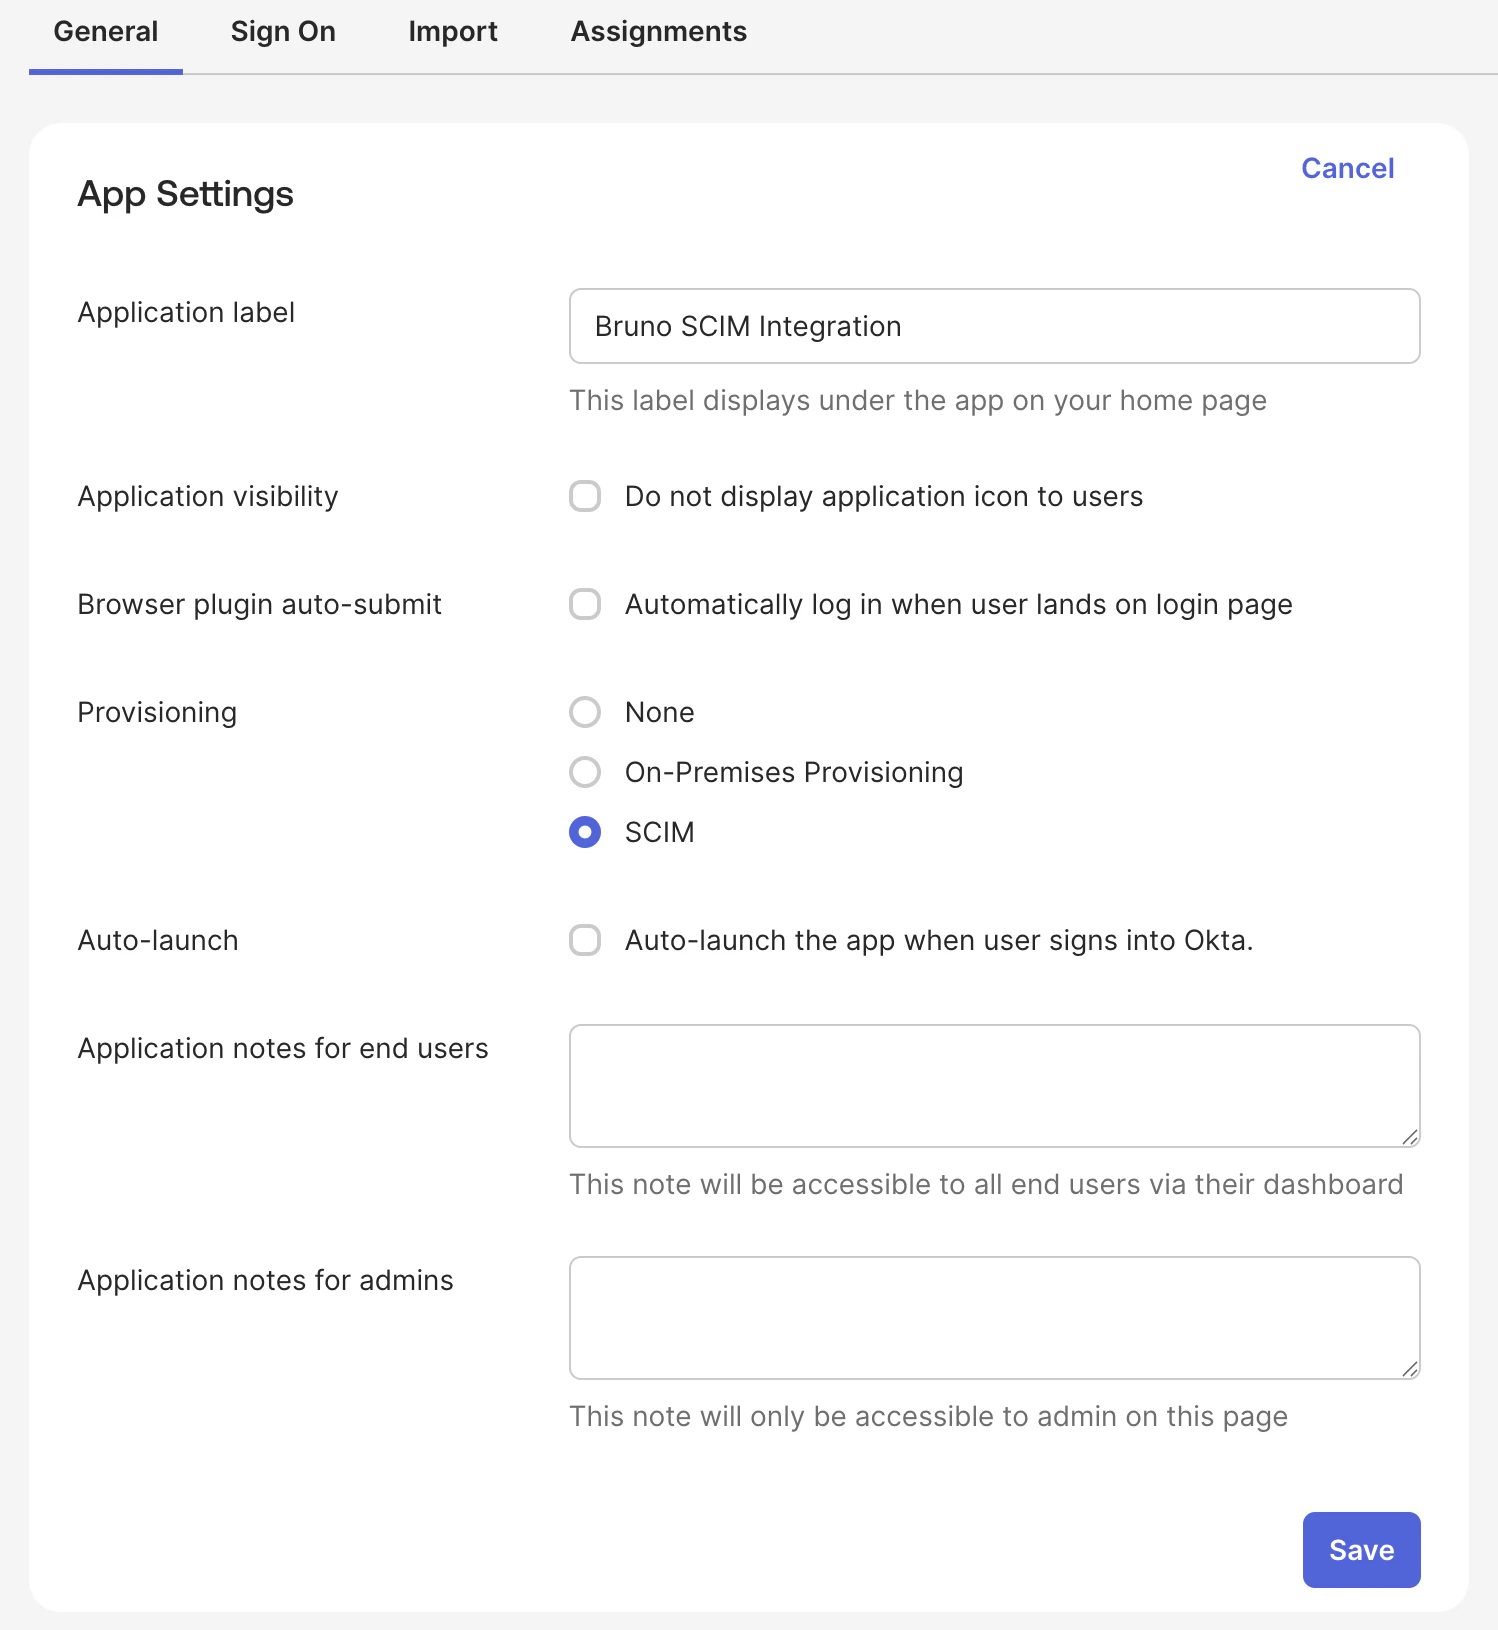
- On your newly created application page, select the General tab
- Under App Settings, select Edit, and check the Provisioning option SCIM and click Save
- Return to your Okta app, select the Provisioning tab, under SCIM Connection select Edit and configure the following values:
- SCIM connector base URL:
https://license.usebruno.com/scim/v2 - Unique identifier field for users:
email - Supported provisioning actions: Check the following options:
Import New Users and Profile UpdatesPush New UsersPush Profile UpdatesPush Groups
- Authentication: set to HTTP Header
- Under HTTP Header, for token: add the generated API Key value from the prerequisites step
- SCIM connector base URL:
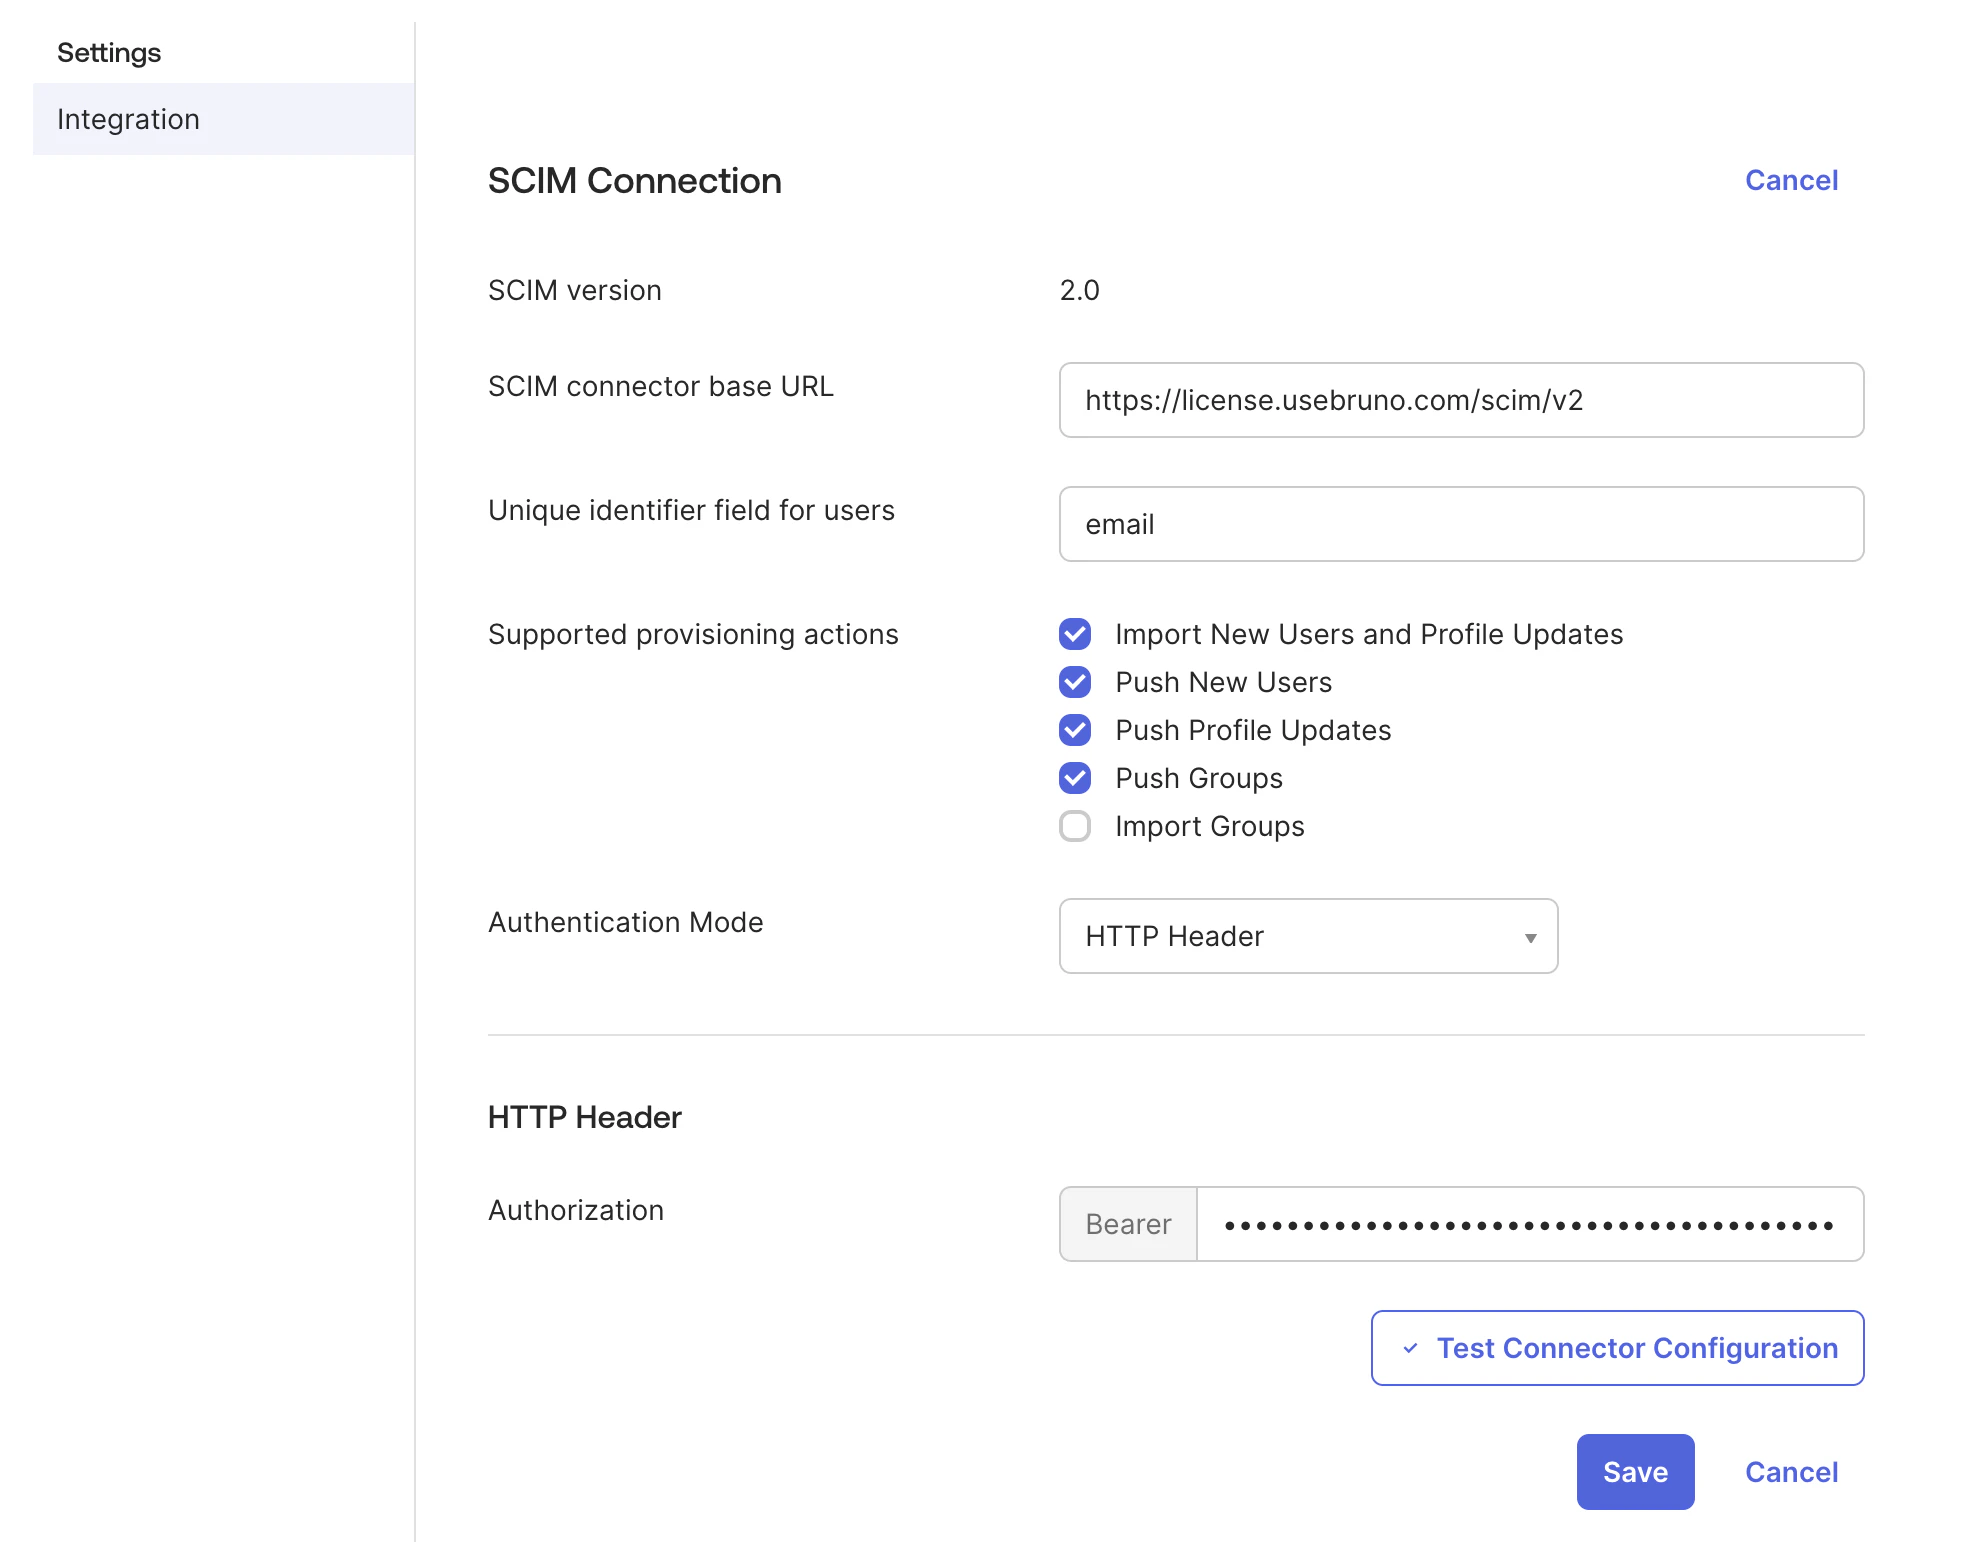
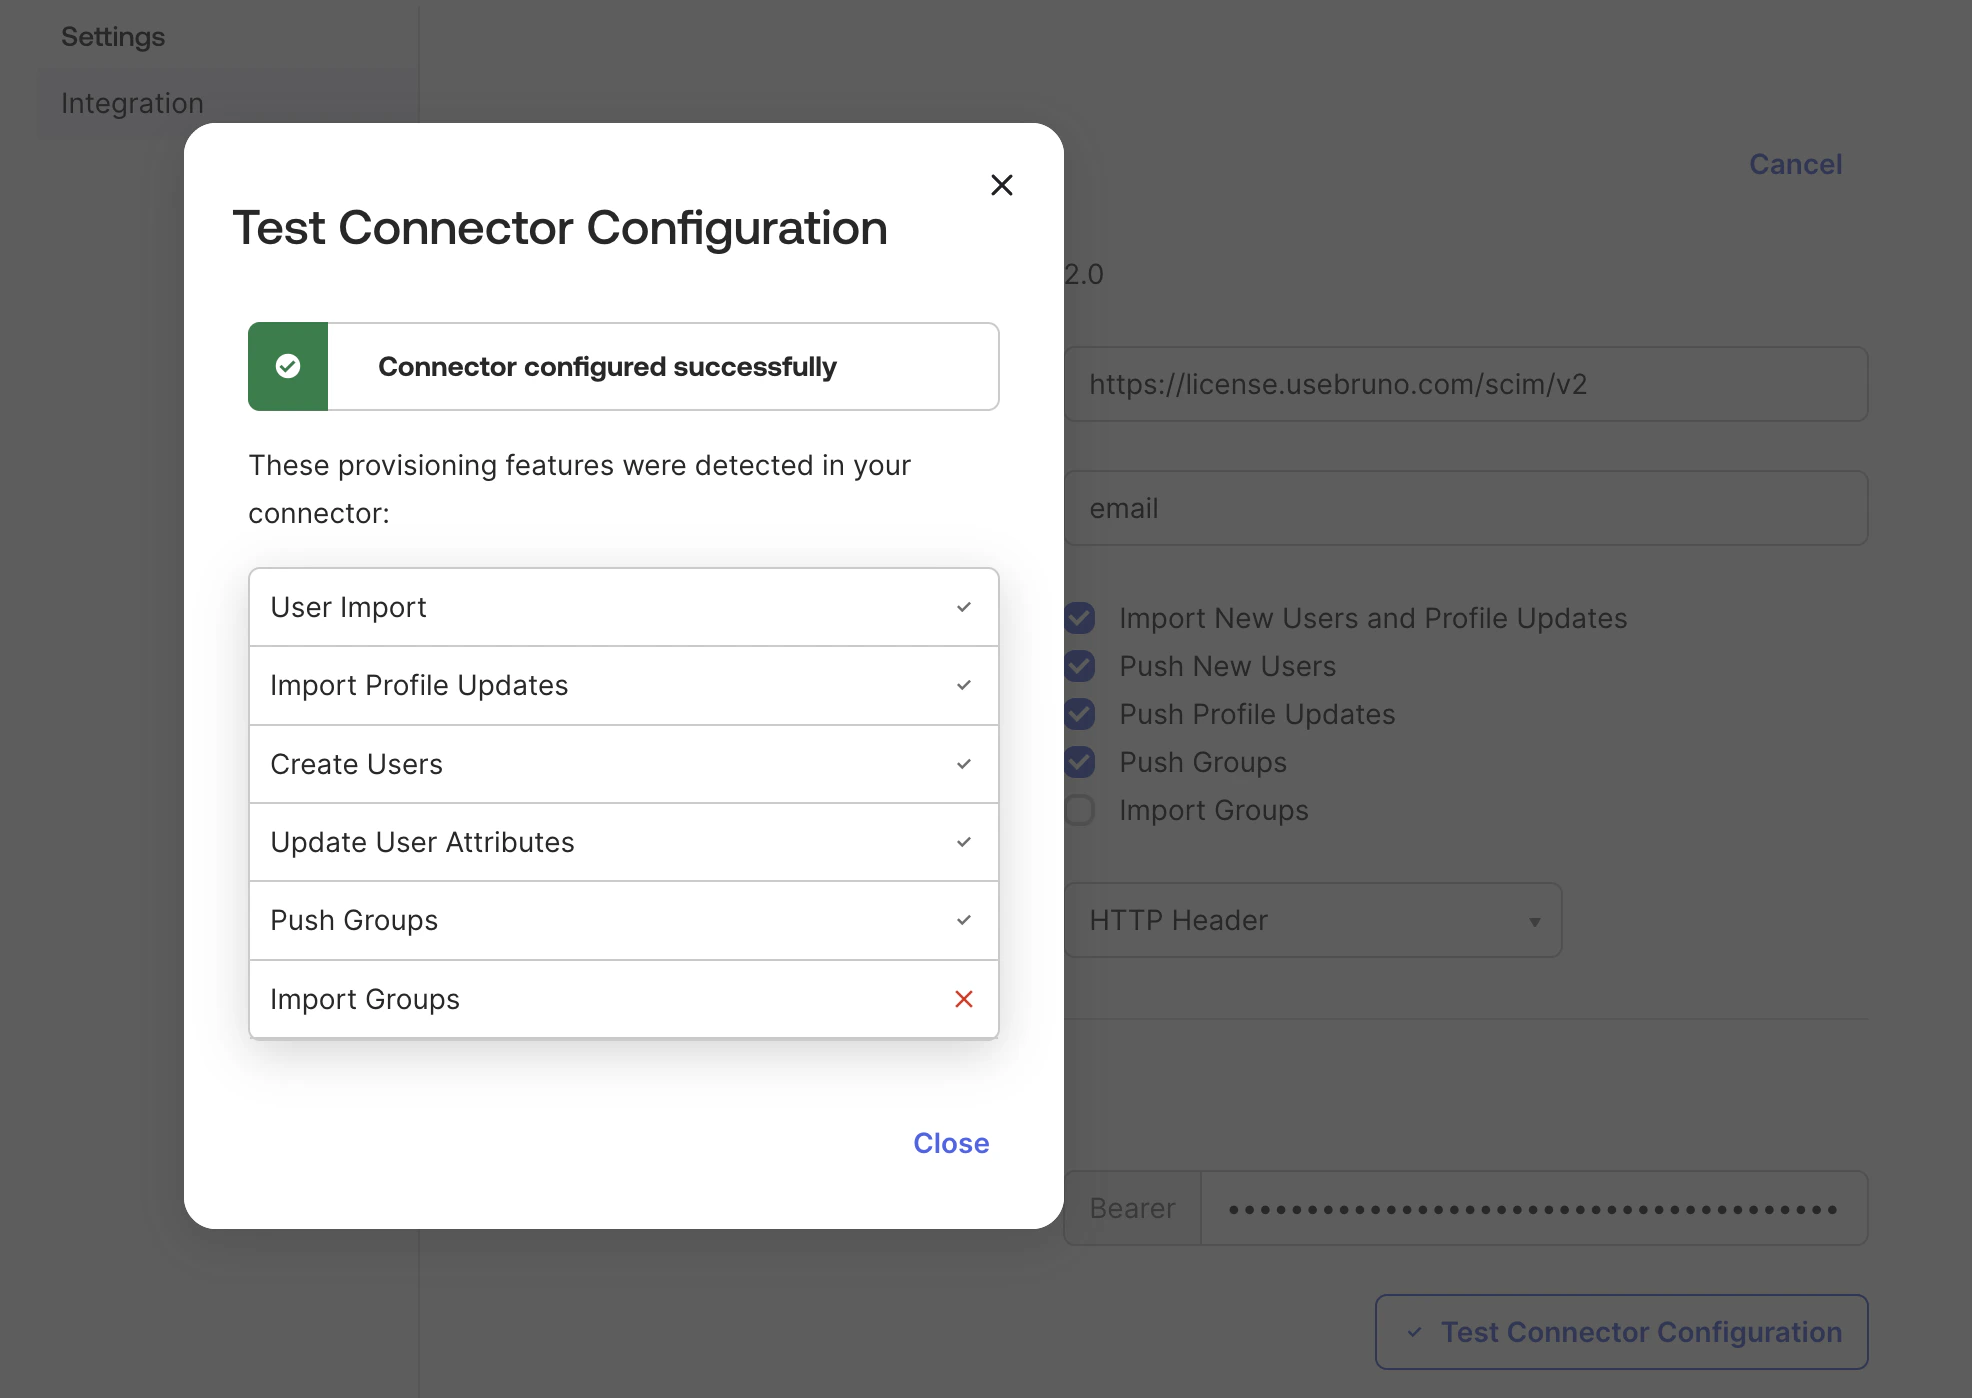
- Click Test Connector Configuration. If successful, a Connector configured successfully message dialogue appears.
- Click Save to complete the Provisioning integration.
-
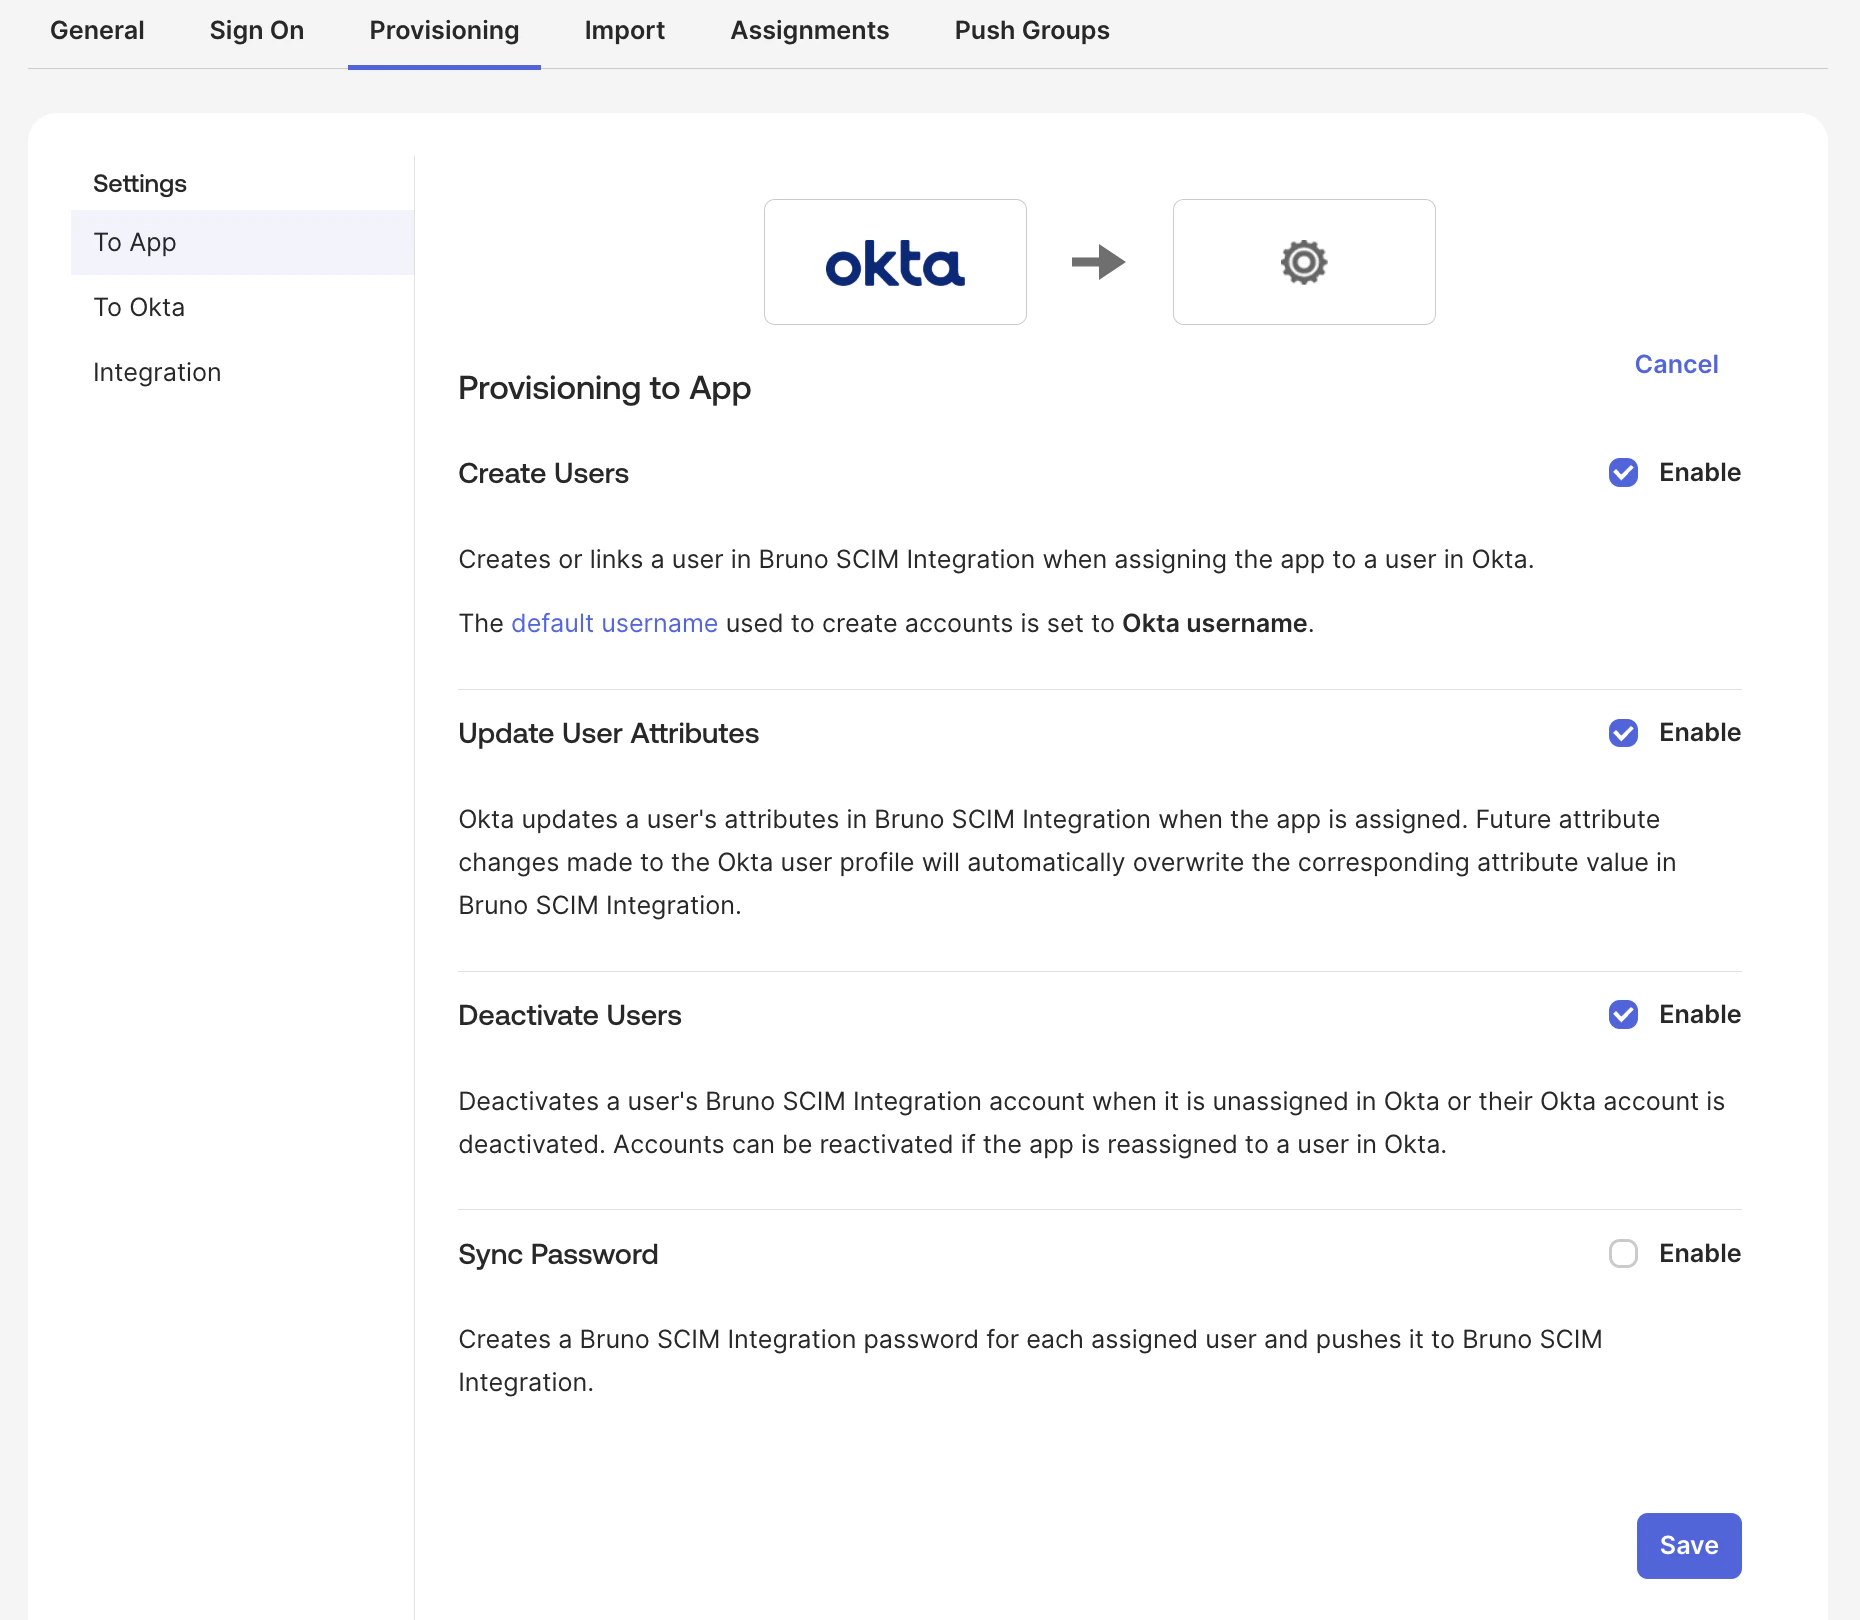
Under the Provisioning tab, select the To Apps setting, edit and enable the following options and click Save:
Create UsersUpdate User AttributesDeactivate Users
Configure Admin Role Mapping
Admin Role Mapping lets you provision specific Okta users as Bruno License Manager admins. Admins provisioned this way get portal access, do not consume a license seat, and do not appear in the Users list.This section is optional. Skip it if you only want to provision regular licensed users.
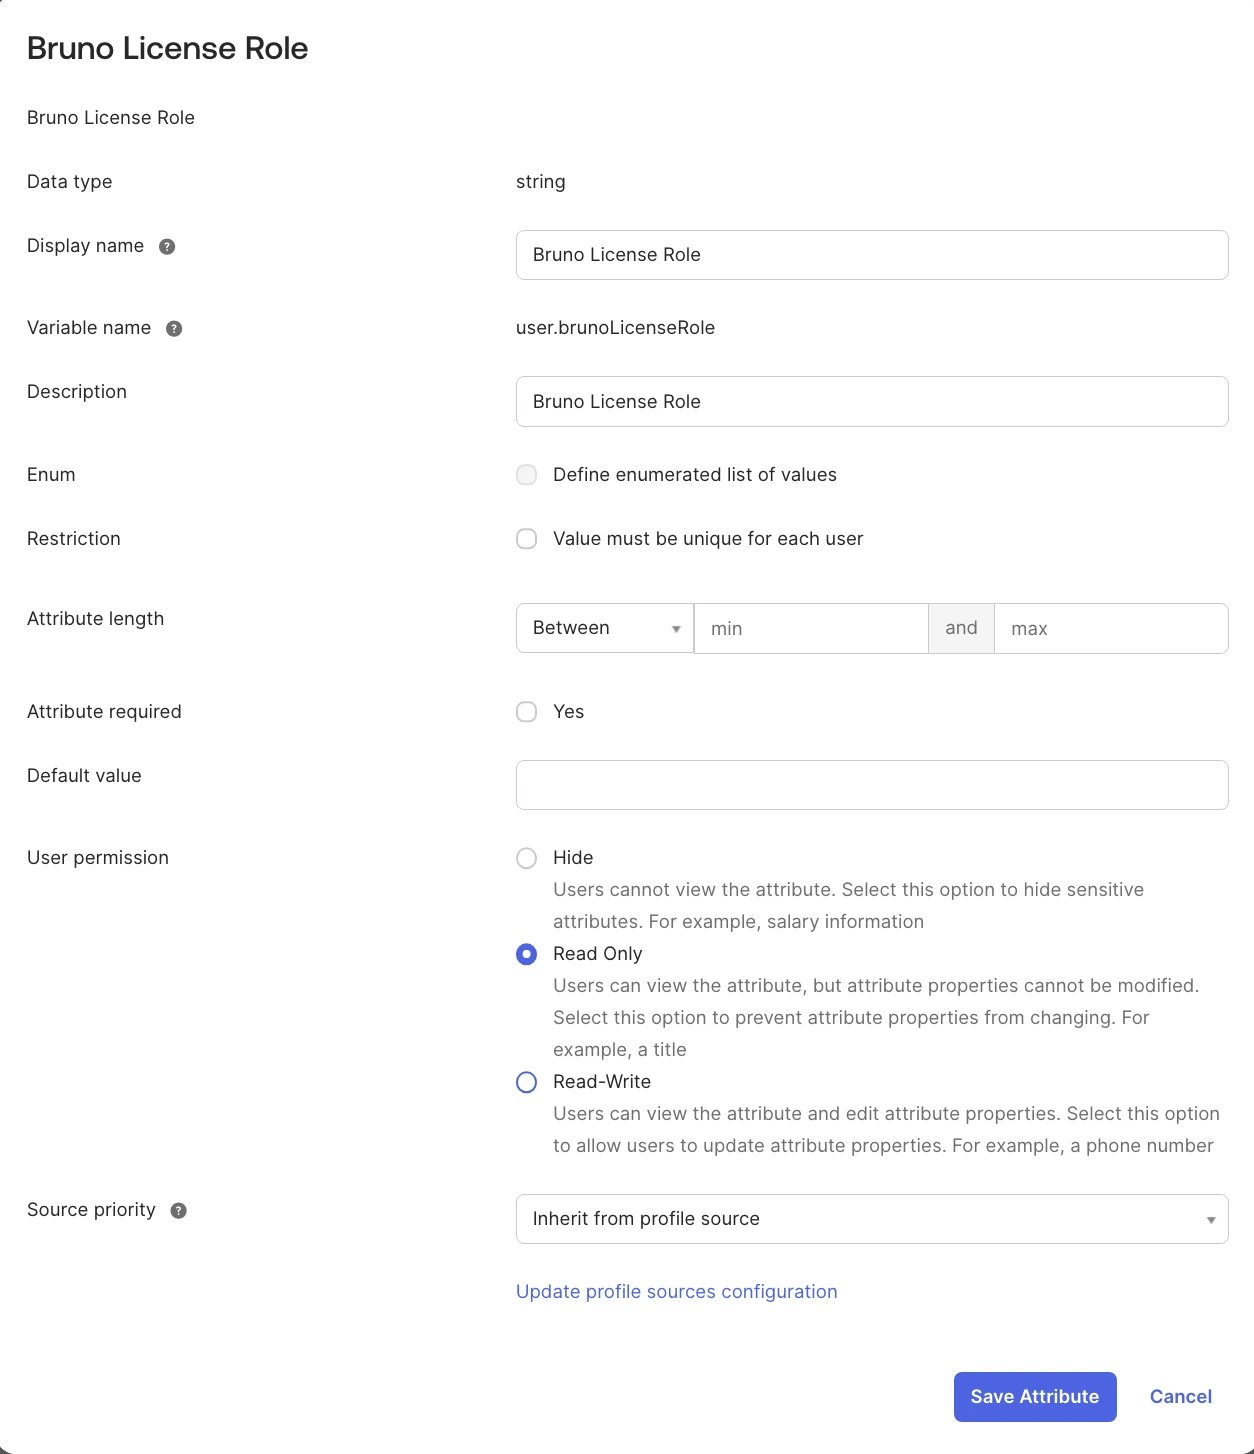
Add a custom attribute to the Okta user profile
- Go to Directory → Profile Editor
- Select Okta (the default/base user profile, not this app’s own profile)
- Click Add Attribute
- Fill in:
- Data type:
string - Display name:
Bruno License Role - Variable name:
brunoLicenseRole - Attribute type:
Personal
- Data type:
- Click Save
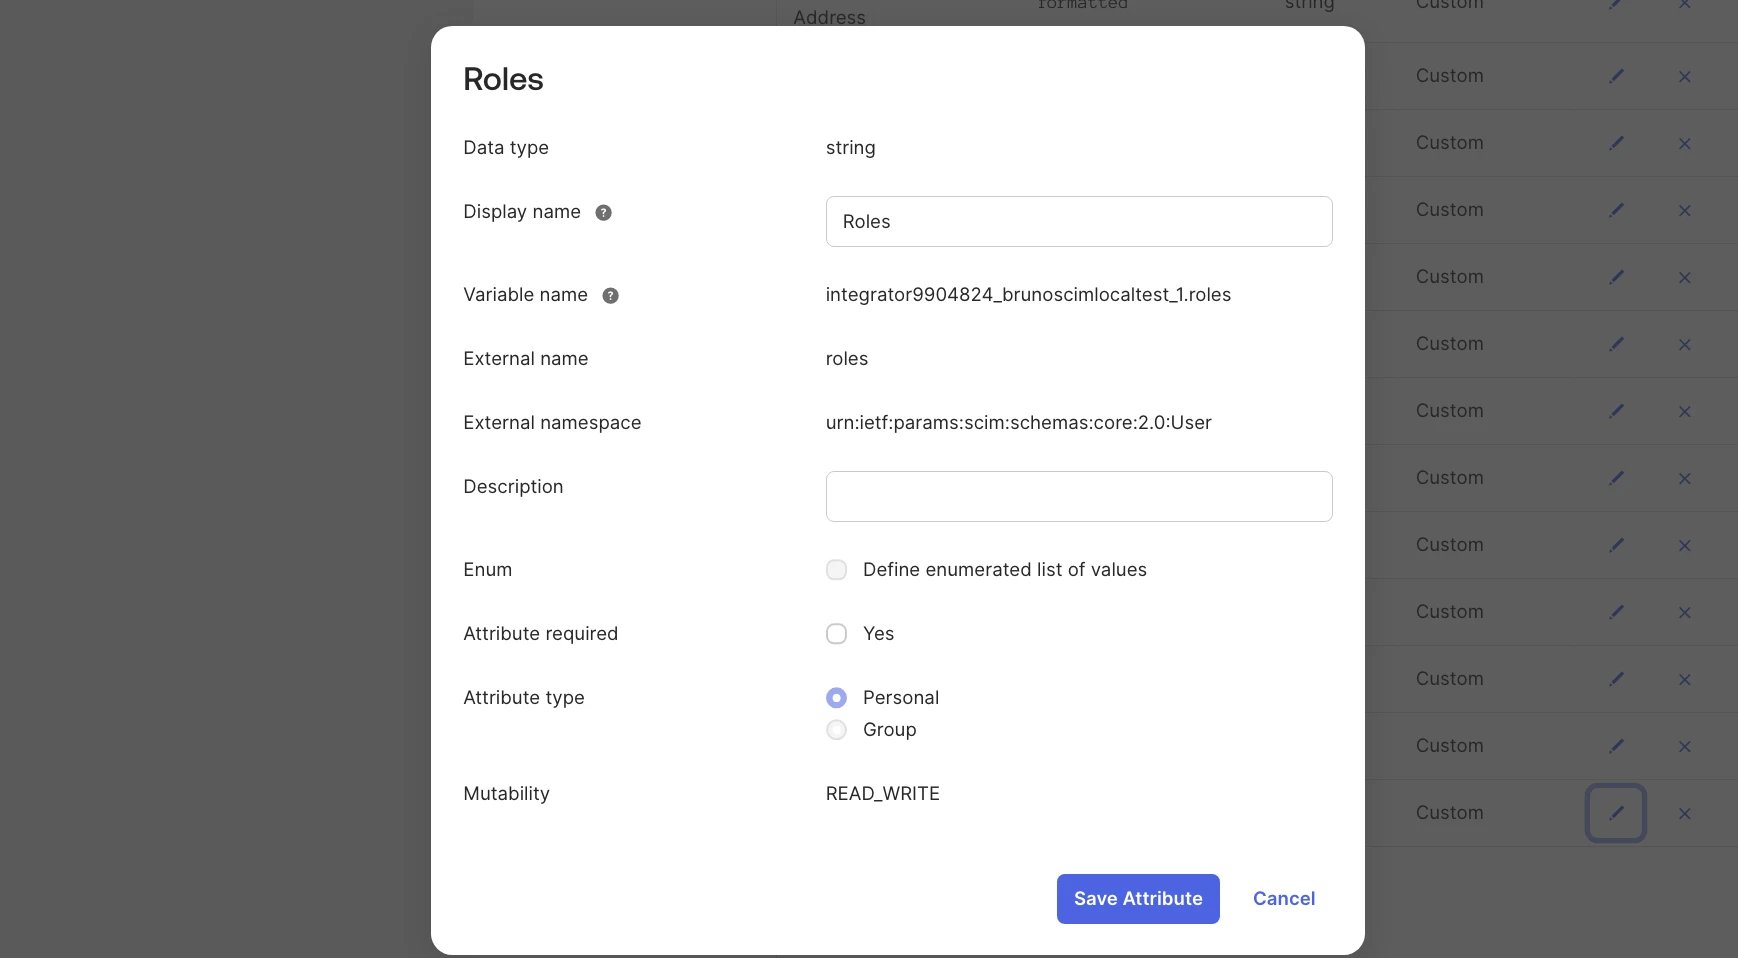
Add a roles attribute to your Bruno app’s profile
- Go to your Bruno SCIM app → Provisioning → To App, click Go to Profile Editor
- Click Add Attribute
- Fill in:
- Data type:
string - Display name:
Roles - Variable name:
roles
- Data type:
- Click Save
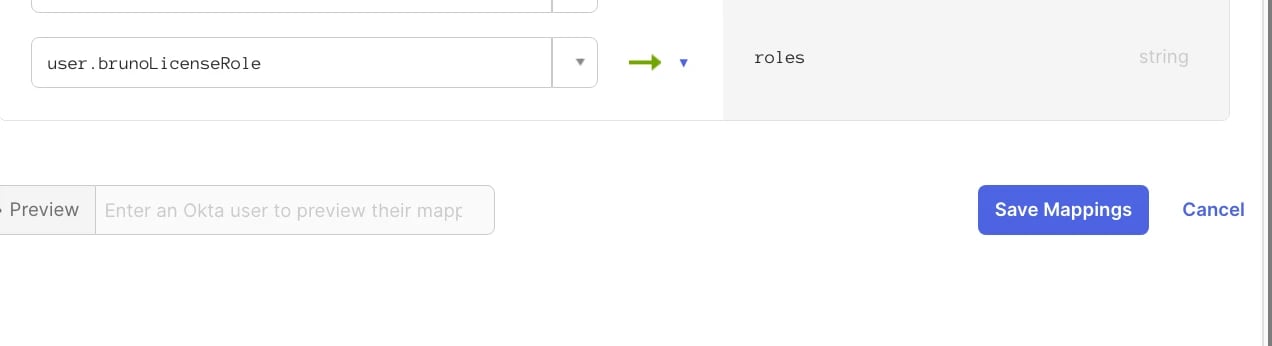
Map the attribute to the roles field
- Go to your Bruno SCIM app → Provisioning → To App → Attribute Mappings
- Find the
rolesrow and click the pencil icon - Set Attribute value to Expression and enter:
- Set Apply on to Create and update
- Click Save
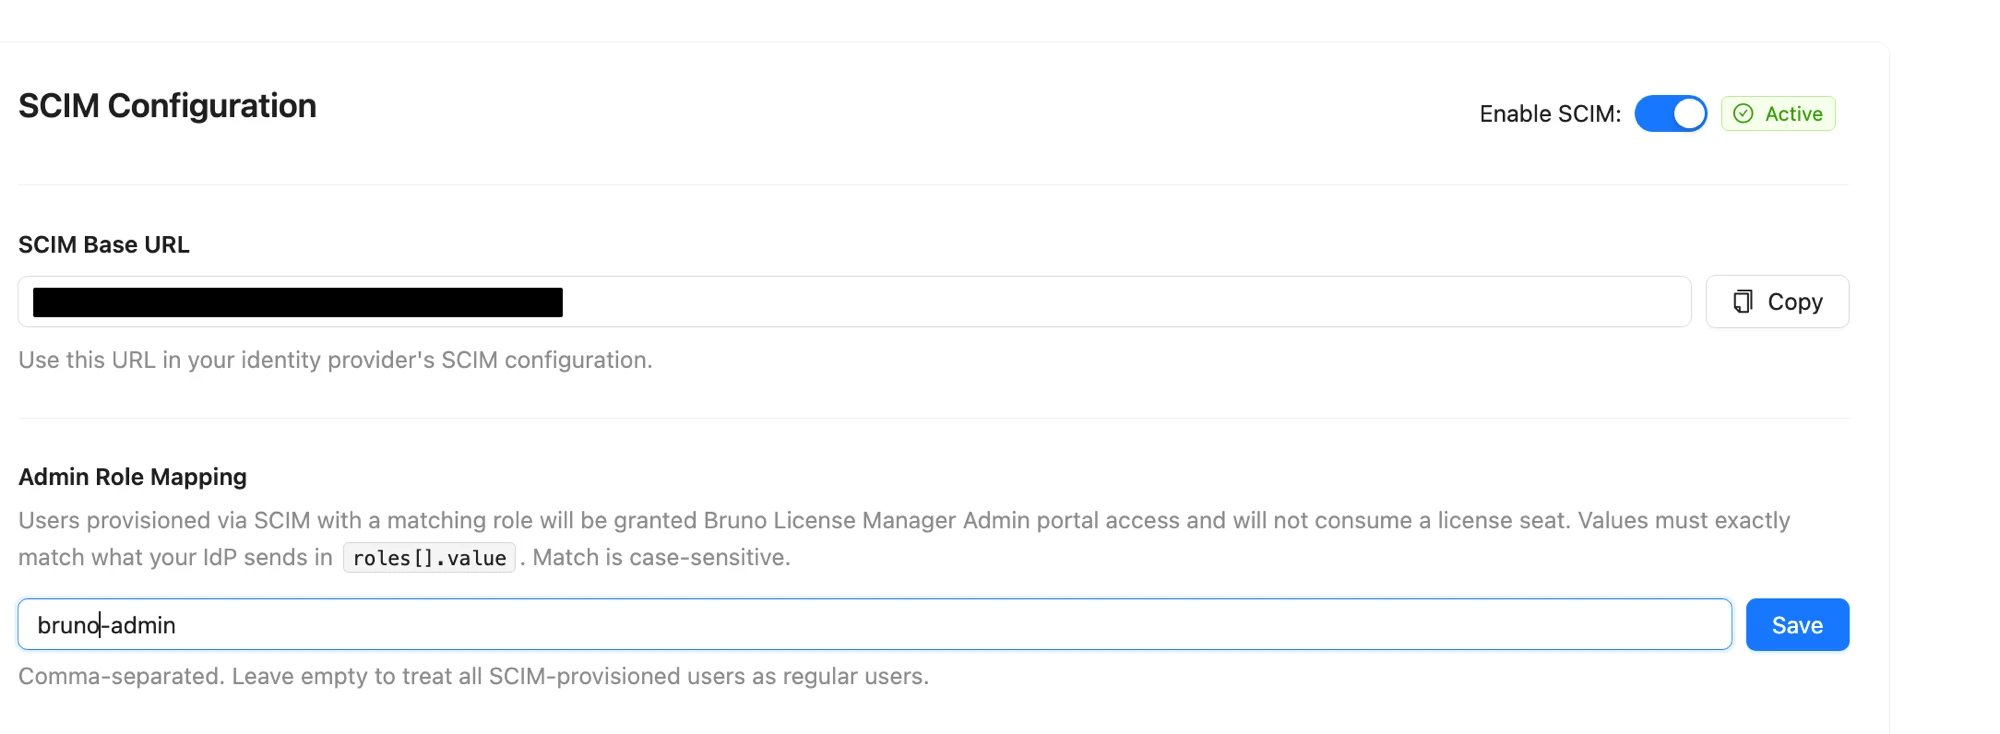
Configure Admin Role Mapping in Bruno
- In the Bruno LM portal, go to Settings → SCIM → Admin Role Mapping
- Enter the role value(s) that should grant admin access, for example:
- Multiple values are supported comma-separated (e.g.
bruno-admin, admin). Any match grants admin access. - Values must exactly match what you set on users in Okta (case-sensitive)
- Click Save
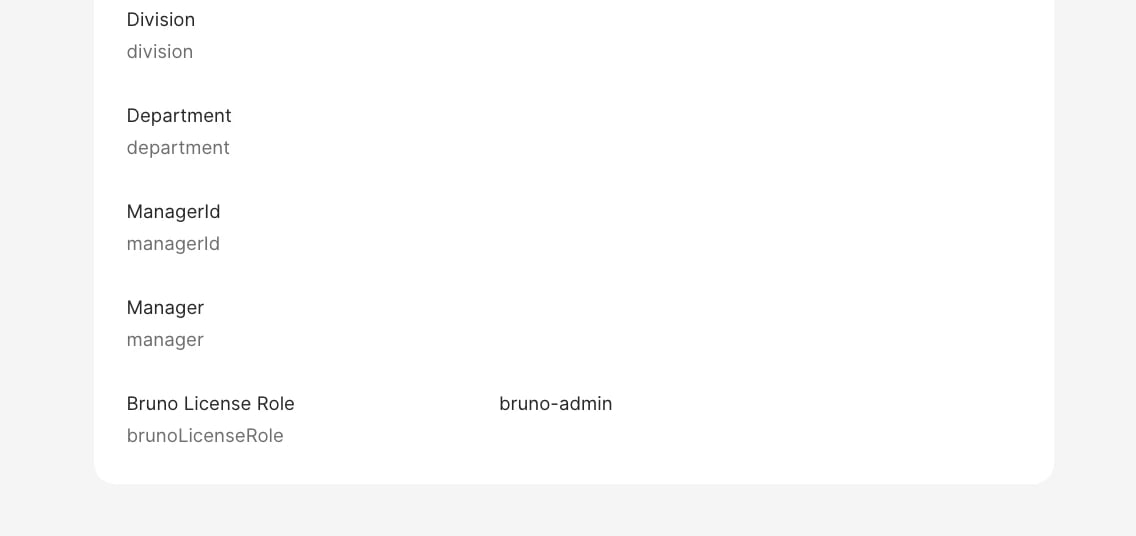
Set the role on users in Okta
For each user you want to provision as a License Manager admin:- Go to Directory → People → [user] → Profile tab → Edit
- Find Bruno License Role and set the value to
bruno-admin(or whatever you configured above) - Click Save
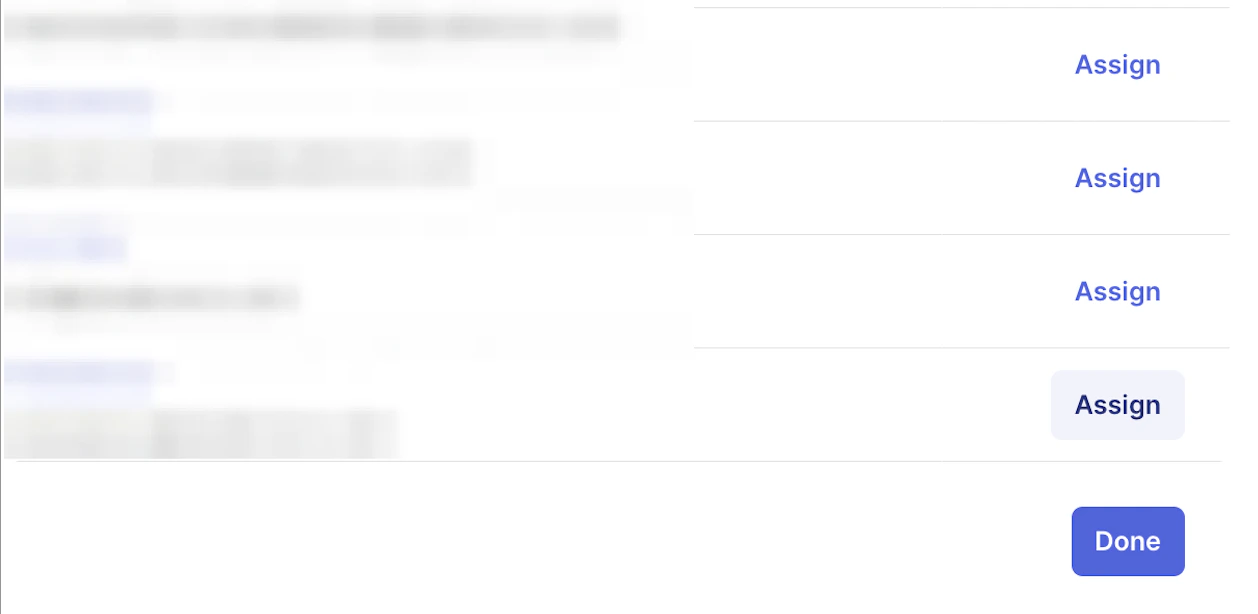
Assign people and groups to Bruno in Okta
- Under your created Bruno Application, navigate to the Assignments tab
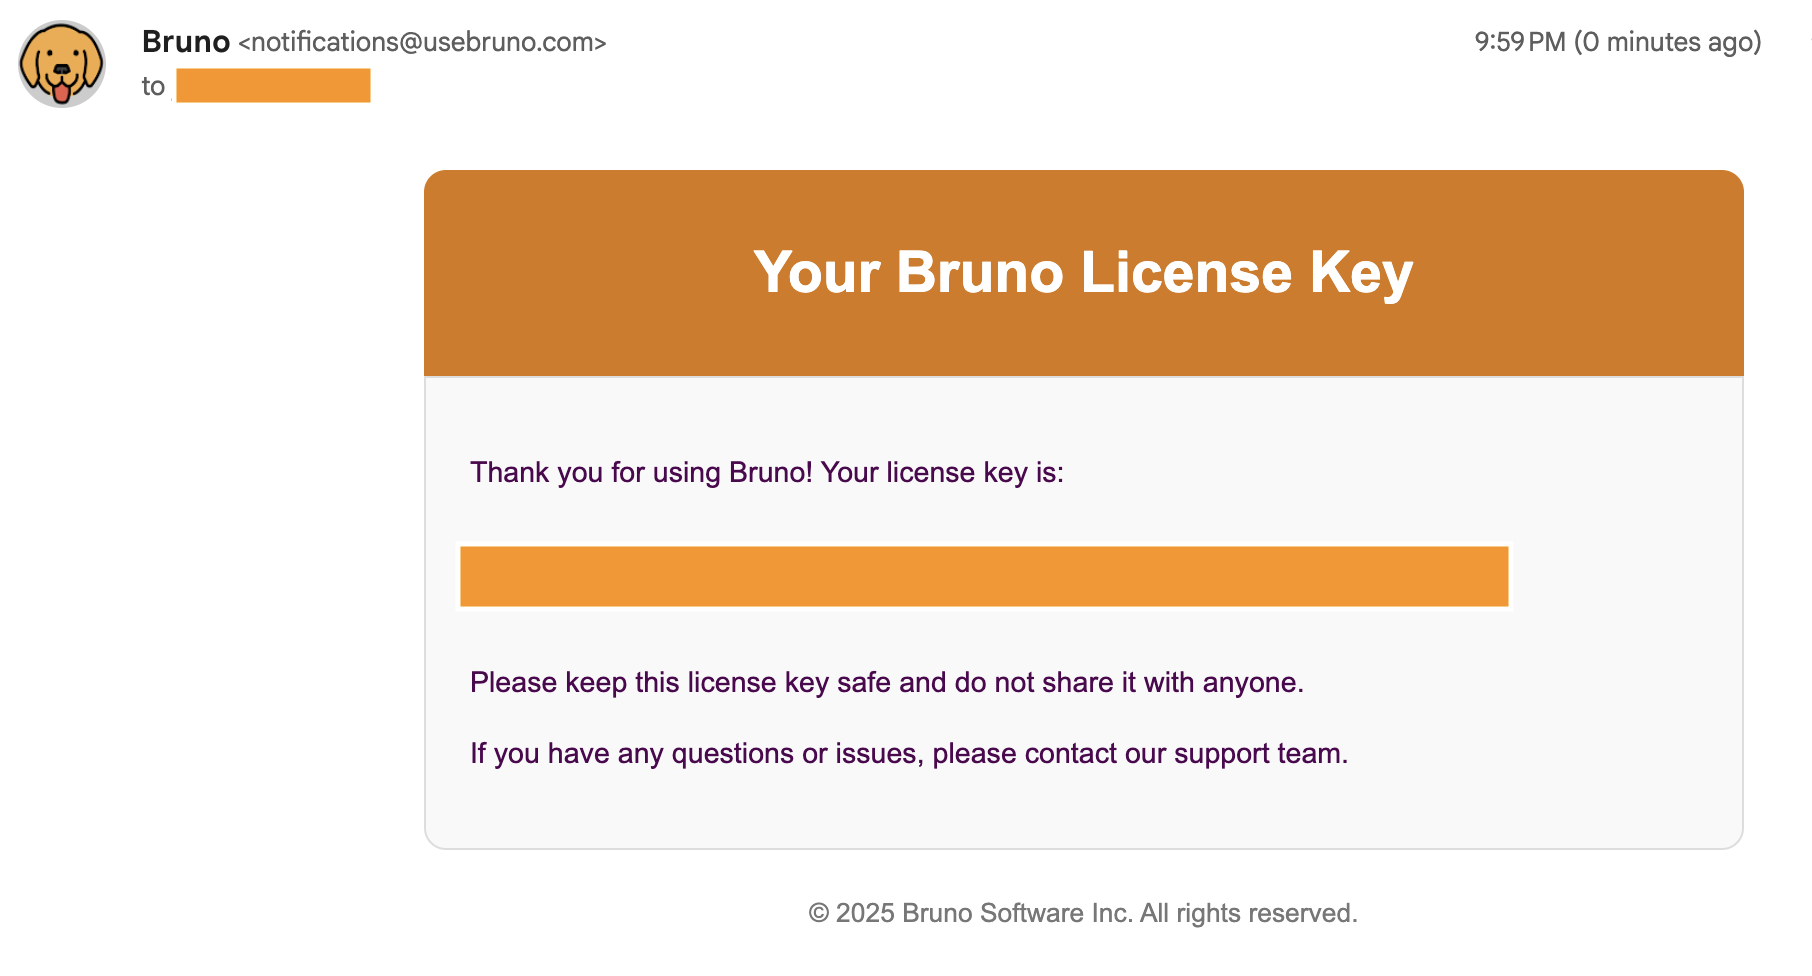
- Select Assign and either Assign to People or Assign to Groups to provision Bruno license keys. If you configured Admin Role Mapping, make sure the assigned user’s Bruno License Role attribute is set first
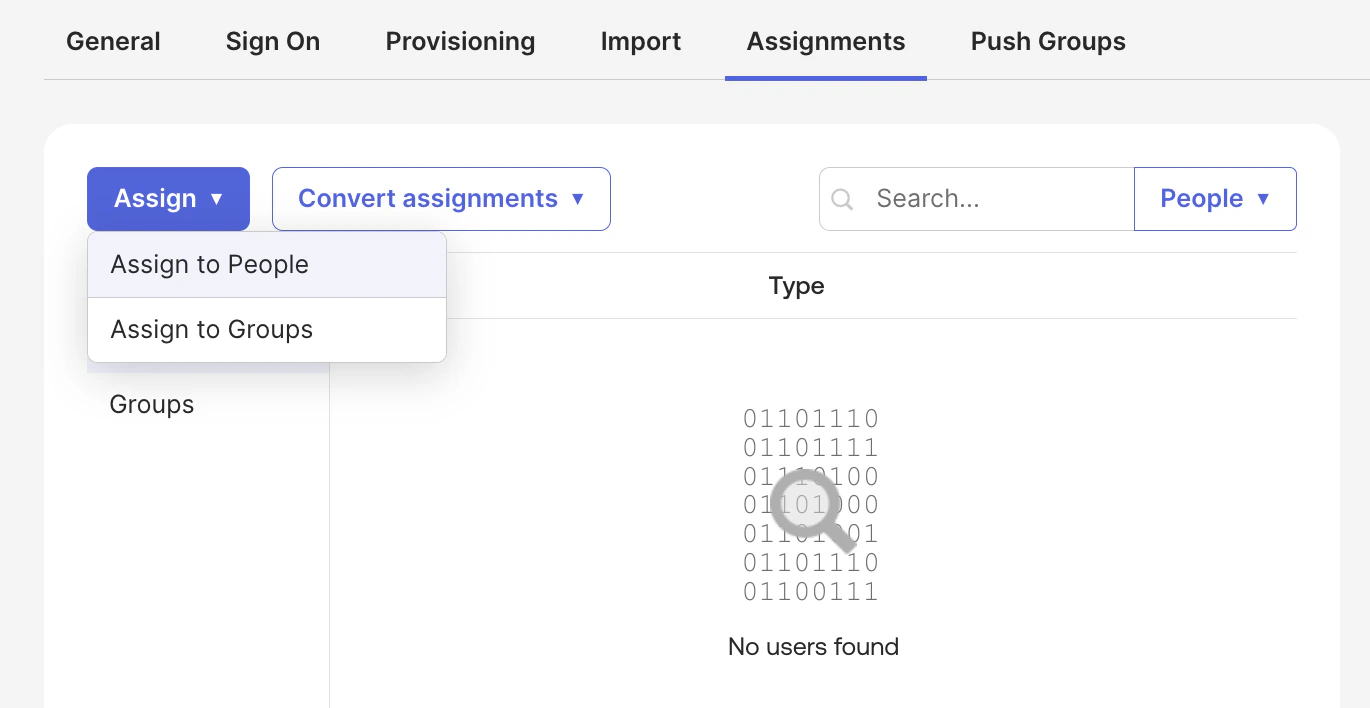
- Assigned users with a matching admin role get portal access directly, with no license key or email. All other assigned users receive an email with their License Key
Deprovision users from Bruno in Okta
- Under your created Bruno Application, navigate to the Assignments tab
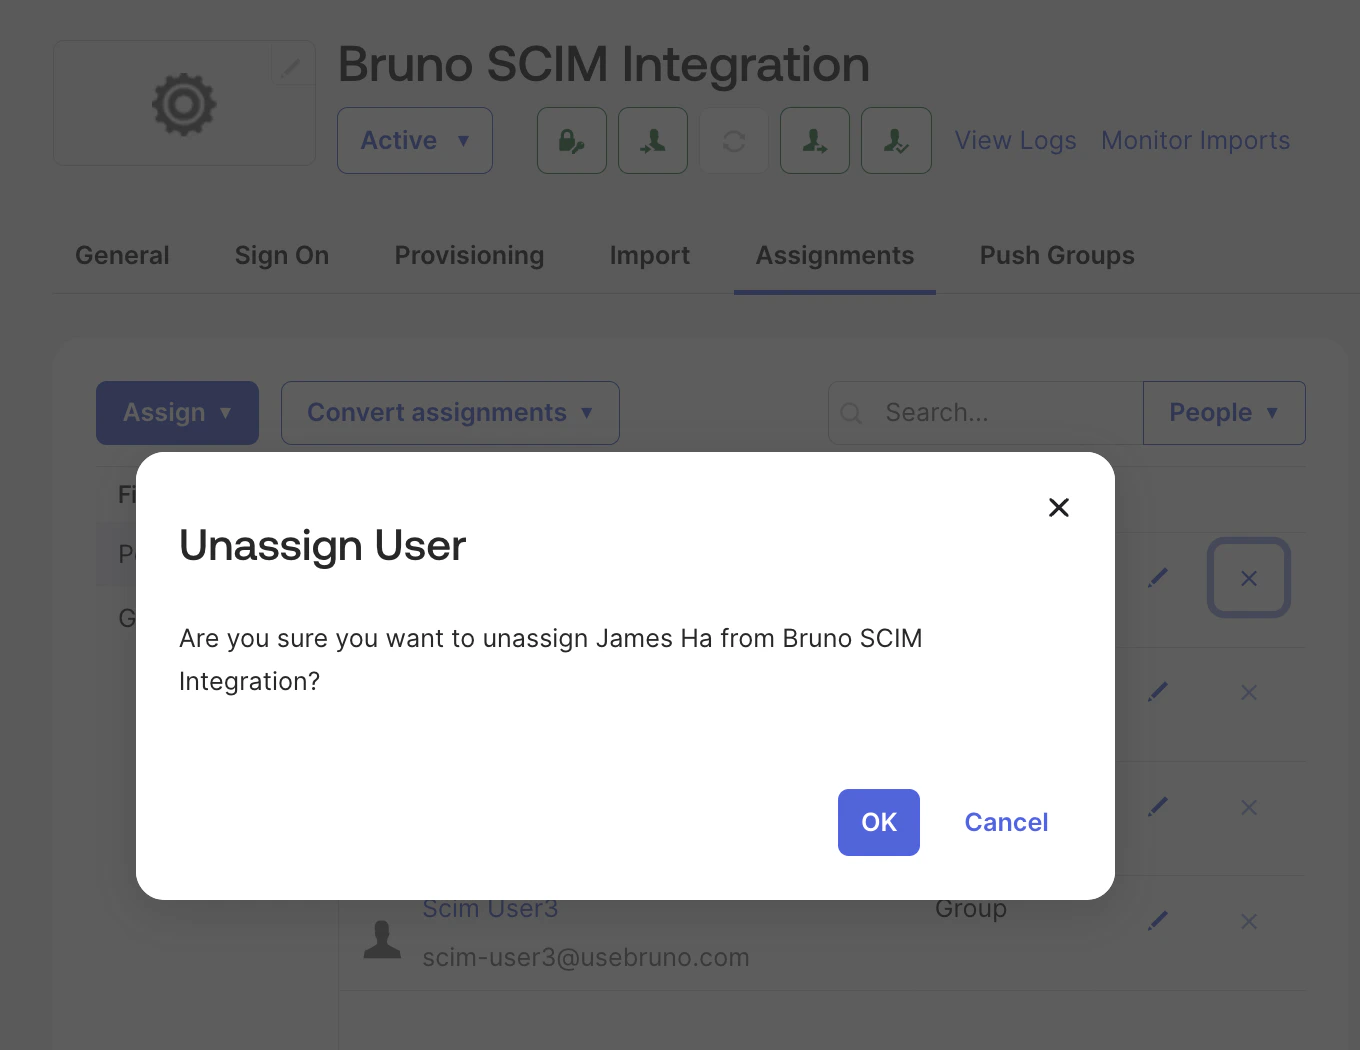
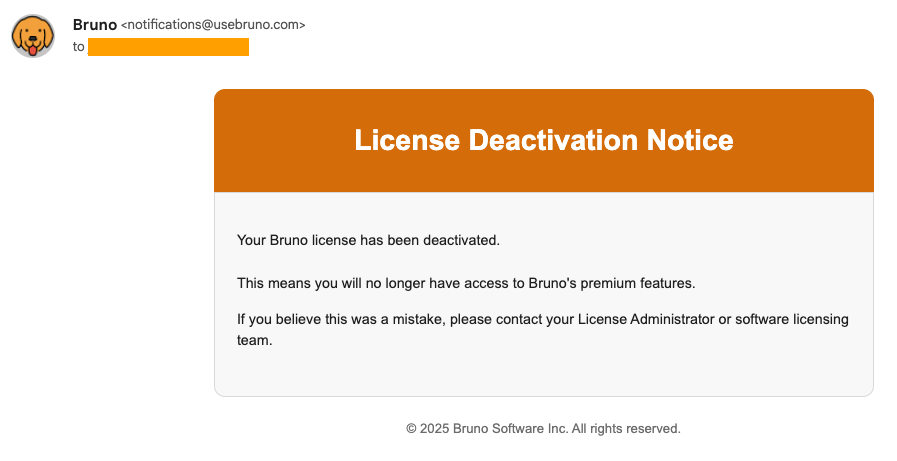
- Remove the desired users or groups, their license key(s) will be deactivated and they will receive an email notification
Related Resources
For more information about configuring SCIM provisioning with Okta, refer to these Okta documentation resources:- Add SCIM provisioning to app integrations - Step-by-step guide for adding SCIM provisioning to Okta applications
- SCIM 2.0 protocol overview - Reference for SCIM 2.0 messages and provisioning operations
- On-premises provisioning with SCIM - Architecture and setup for SCIM provisioning
- Test SCIM connectors - Guide for testing SCIM connectors and servers
- Okta provisioning documentation - Comprehensive provisioning documentation and best practices