

Prerequisites: Before configuring Microsoft Entra ID, you must first enable SCIM provisioning in Bruno and generate an API key. Follow the Enabling SCIM Provisioning section in the overview page to complete this setup and save your API key for use in the steps below.
Create a custom application in Microsoft Entra ID
Already have an Enterprise Application for SSO? If you previously set up a Bruno Enterprise Application for SAML SSO, you can reuse it for SCIM provisioning. Skip to the Configure automatic provisioning section to add provisioning to your existing application.
- Sign in to the Microsoft Entra admin center
- On the left sidebar, navigate to Enterprise apps → + New application
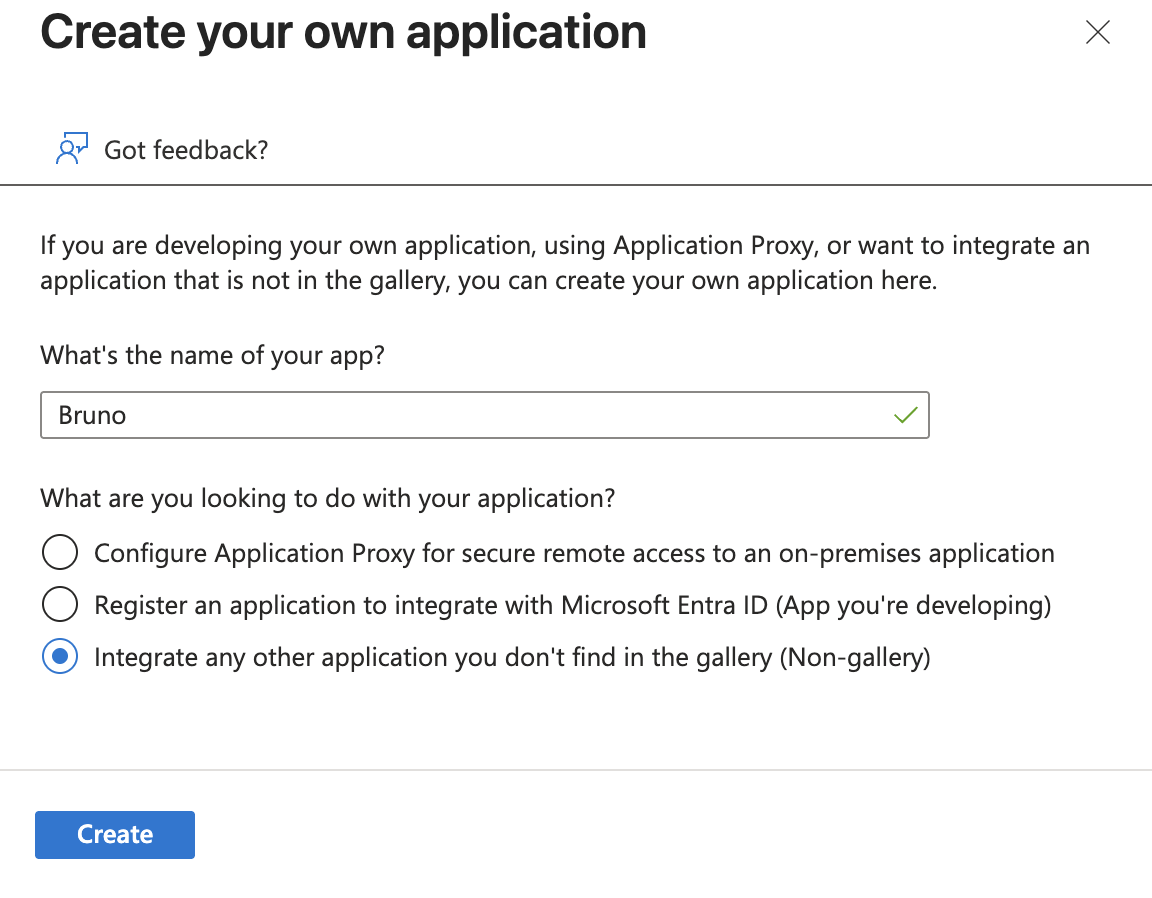
- Click Create your own application
-
In the Create your own application panel:
- Enter a name for your application (e.g., “Bruno SCIM Integration”)
- Select Integrate any other application you don’t find in the gallery (Non-gallery)
- Click Create
Configure automatic provisioning
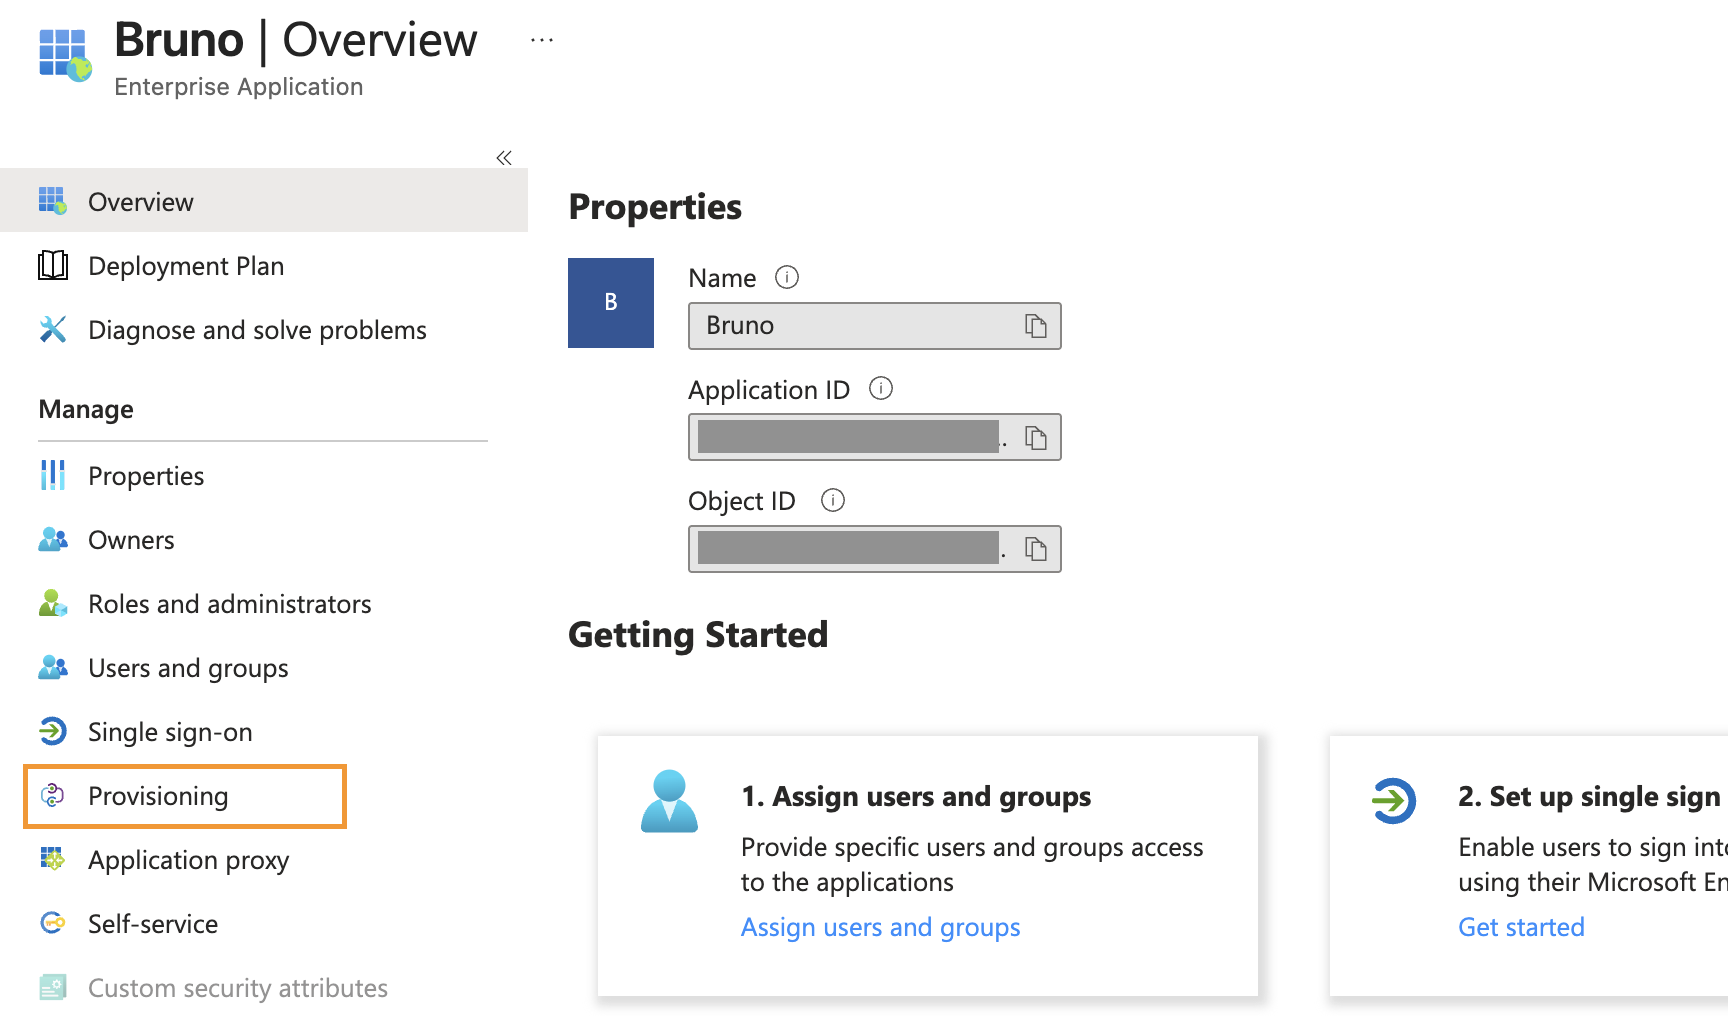
- In your newly created (or existing) Enterprise Application, select Provisioning from the left navigation menu
- In the Provisioning Mode dropdown, select Automatic
-
Under Admin Credentials, configure the following:
- Tenant URL:
https://license.usebruno.com/scim/v2 - Secret Token: Enter the SCIM API key you generated in the prerequisites step
- Tenant URL:
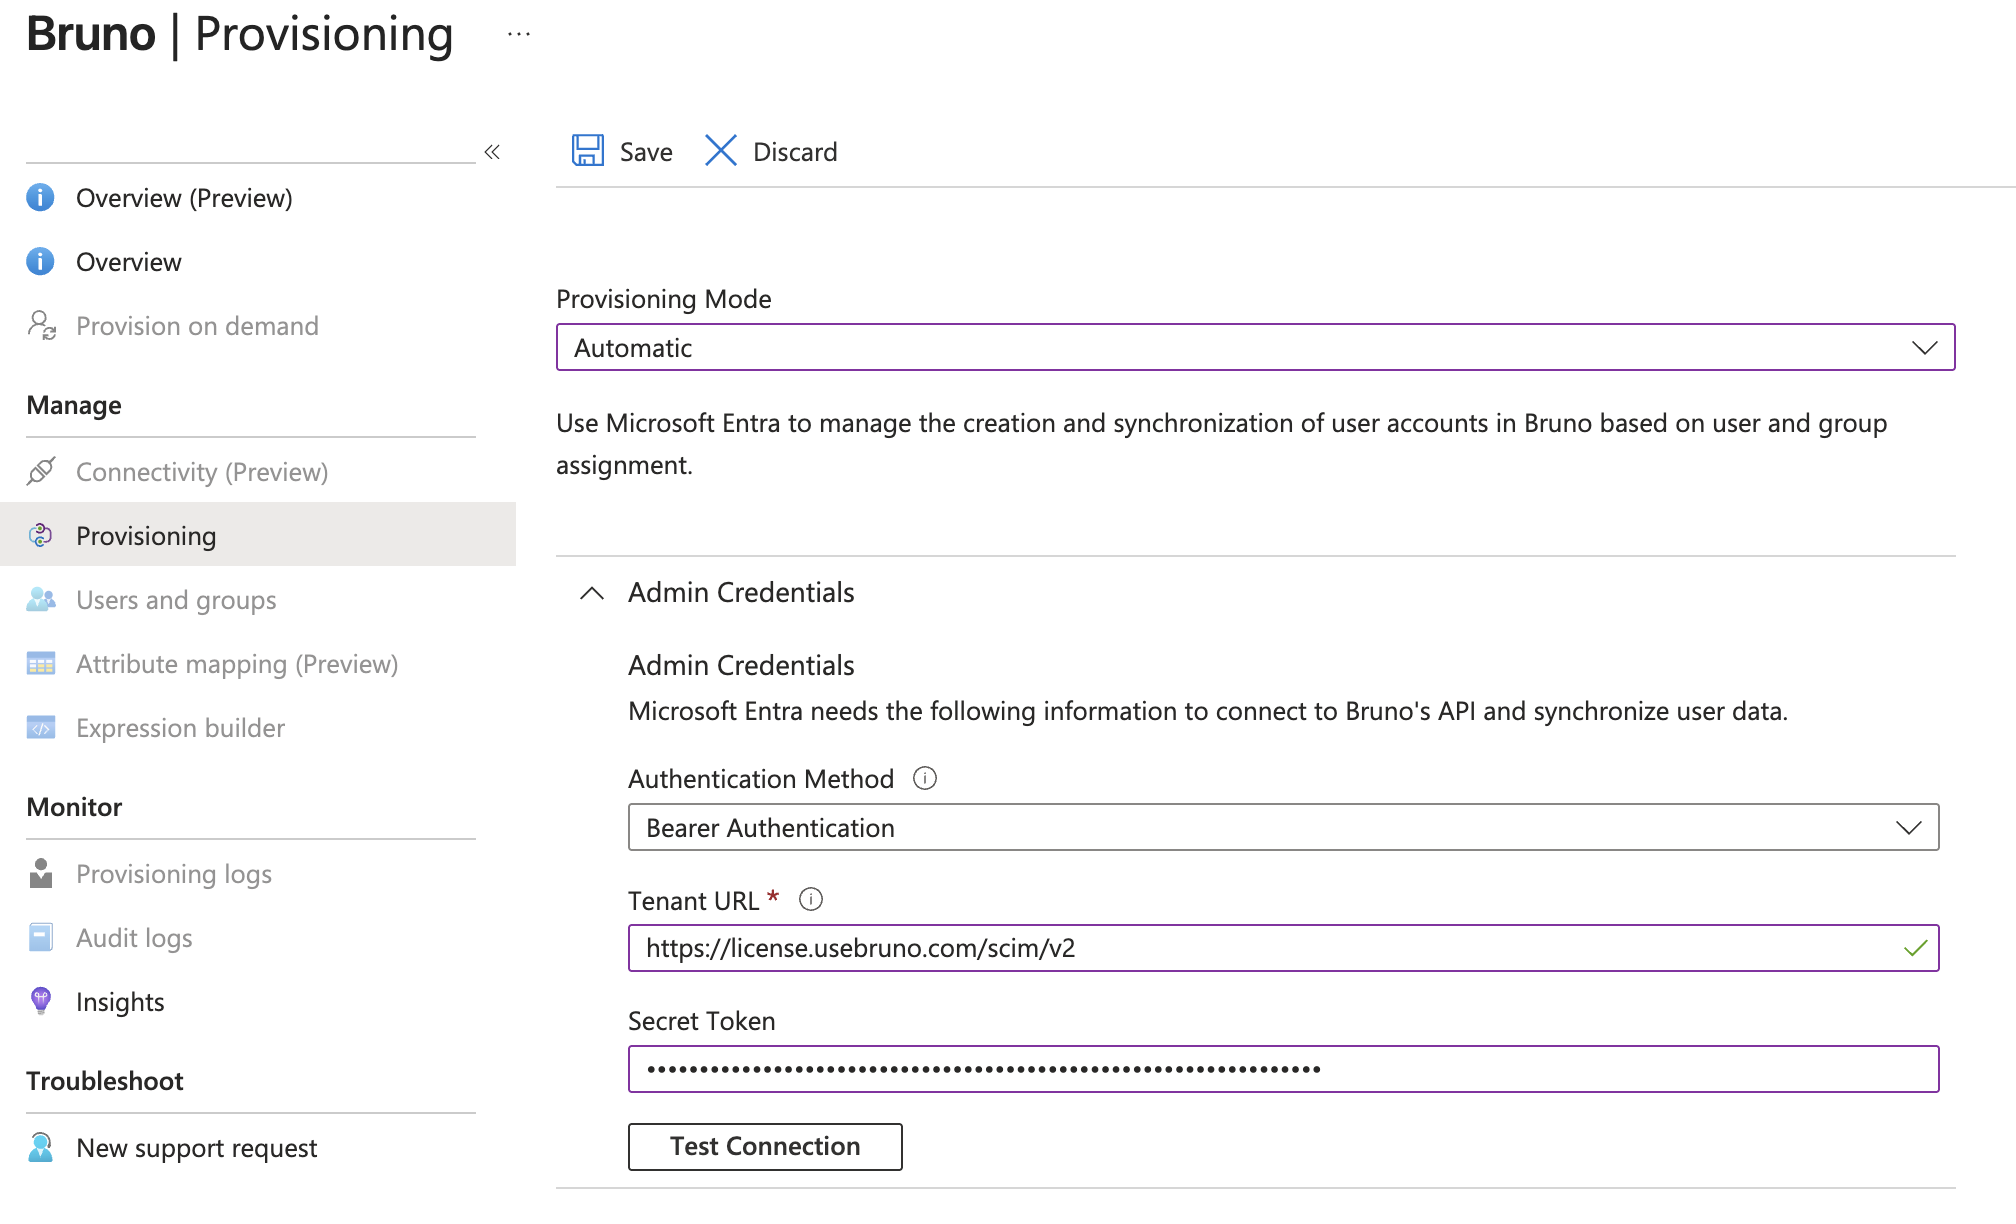
- Click Test Connection to verify that Microsoft Entra ID can connect to Bruno’s SCIM endpoint
- If the test is successful, click Save to save the admin credentials
Configure attribute mappings
Attribute mappings control how user data from Microsoft Entra ID is mapped to Bruno user accounts.Configure user attribute mappings
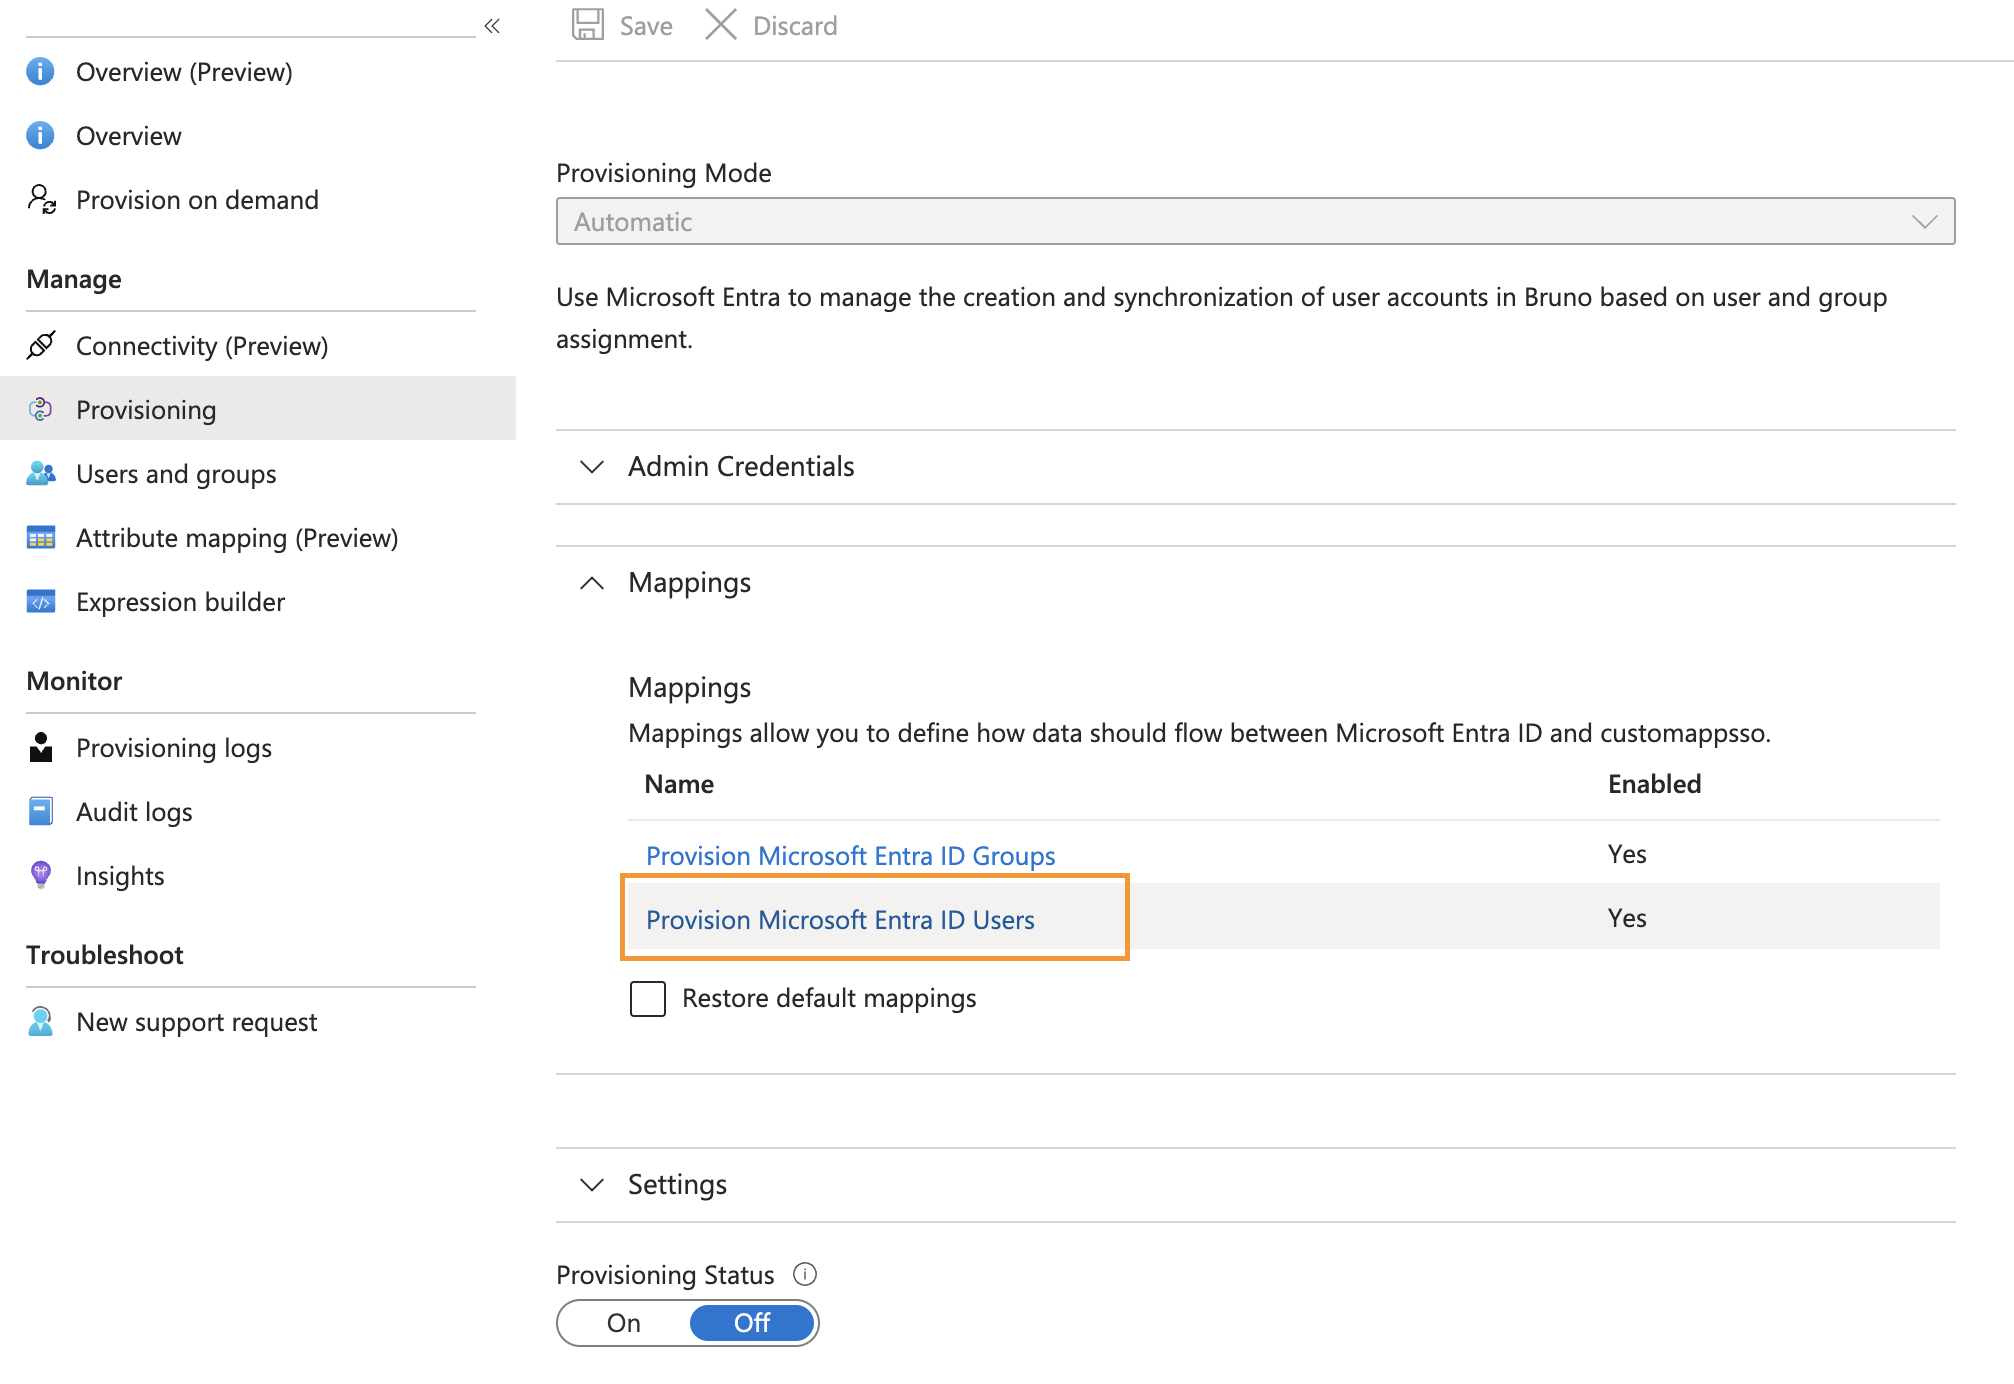
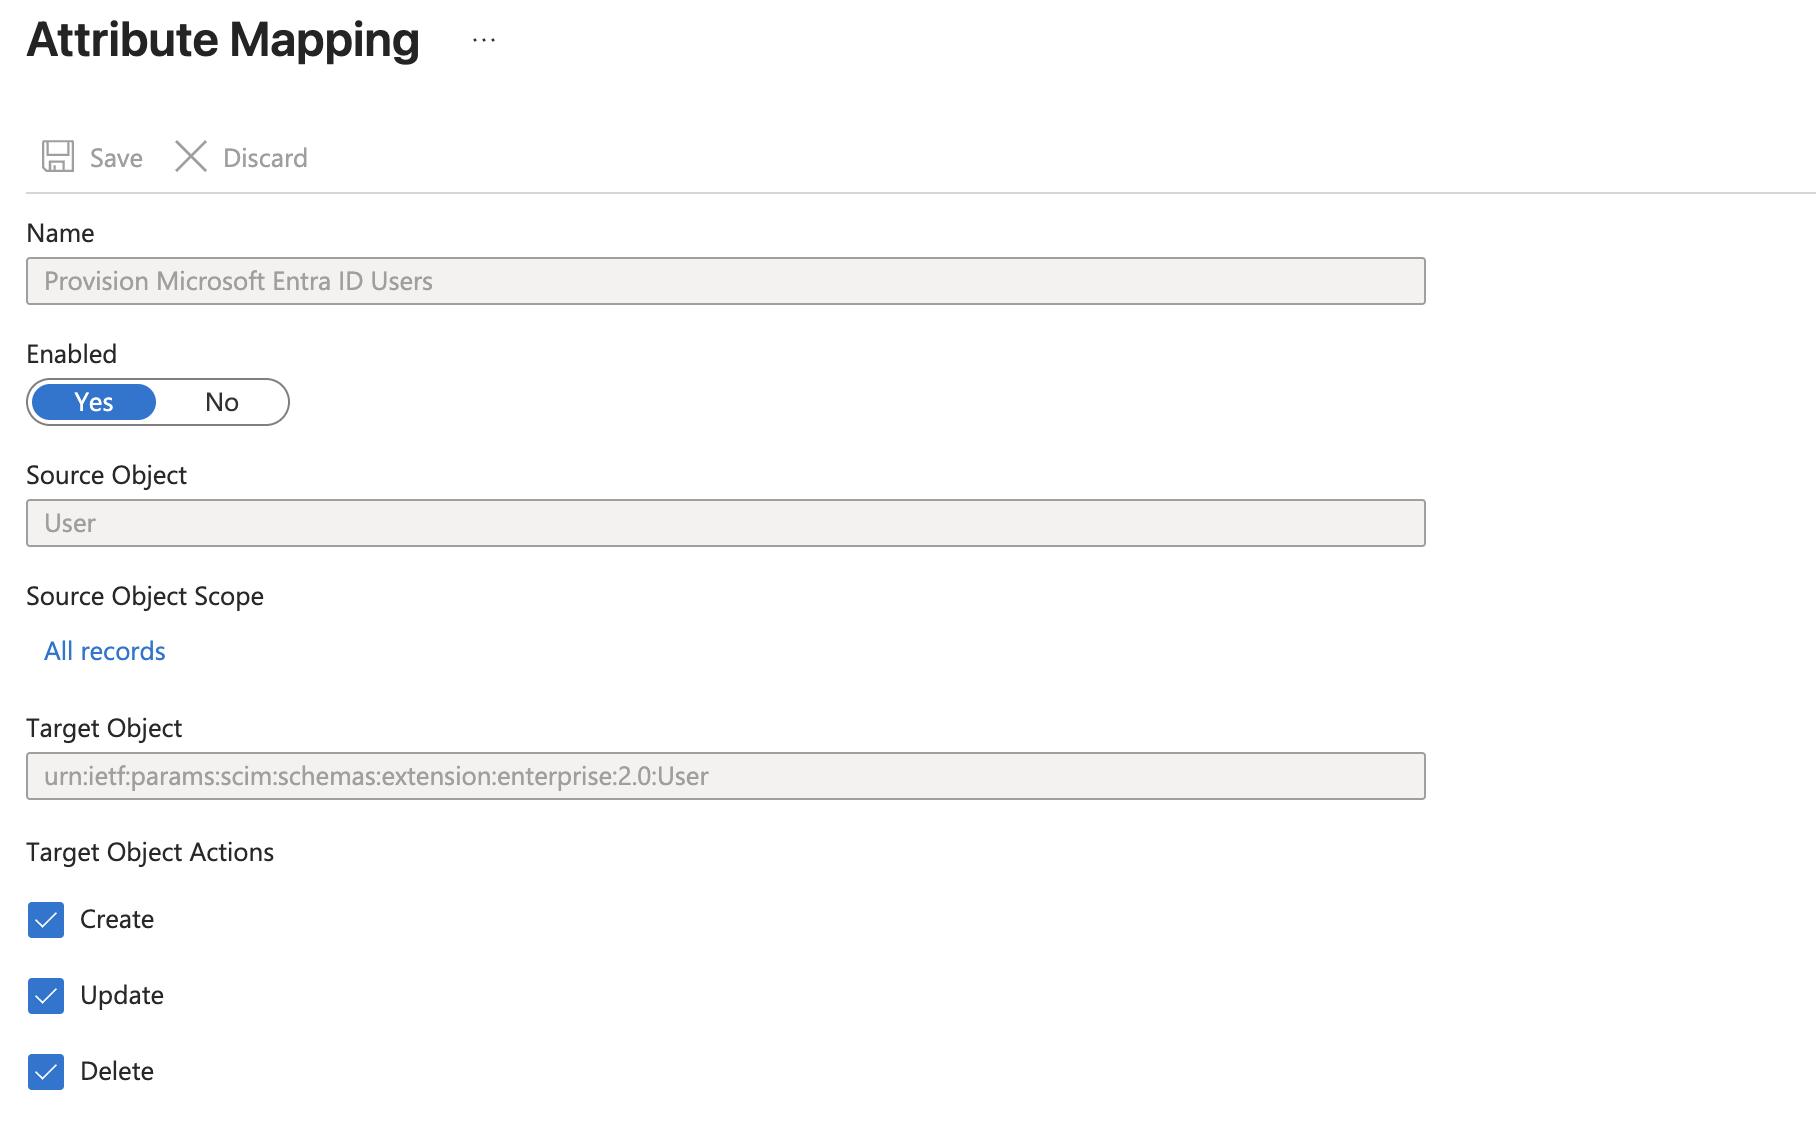
- Under the Mappings section, click Provision Microsoft Entra ID Users
- Under Target Object Actions, ensure the following are enabled:
- Create
- Update
- Delete
-
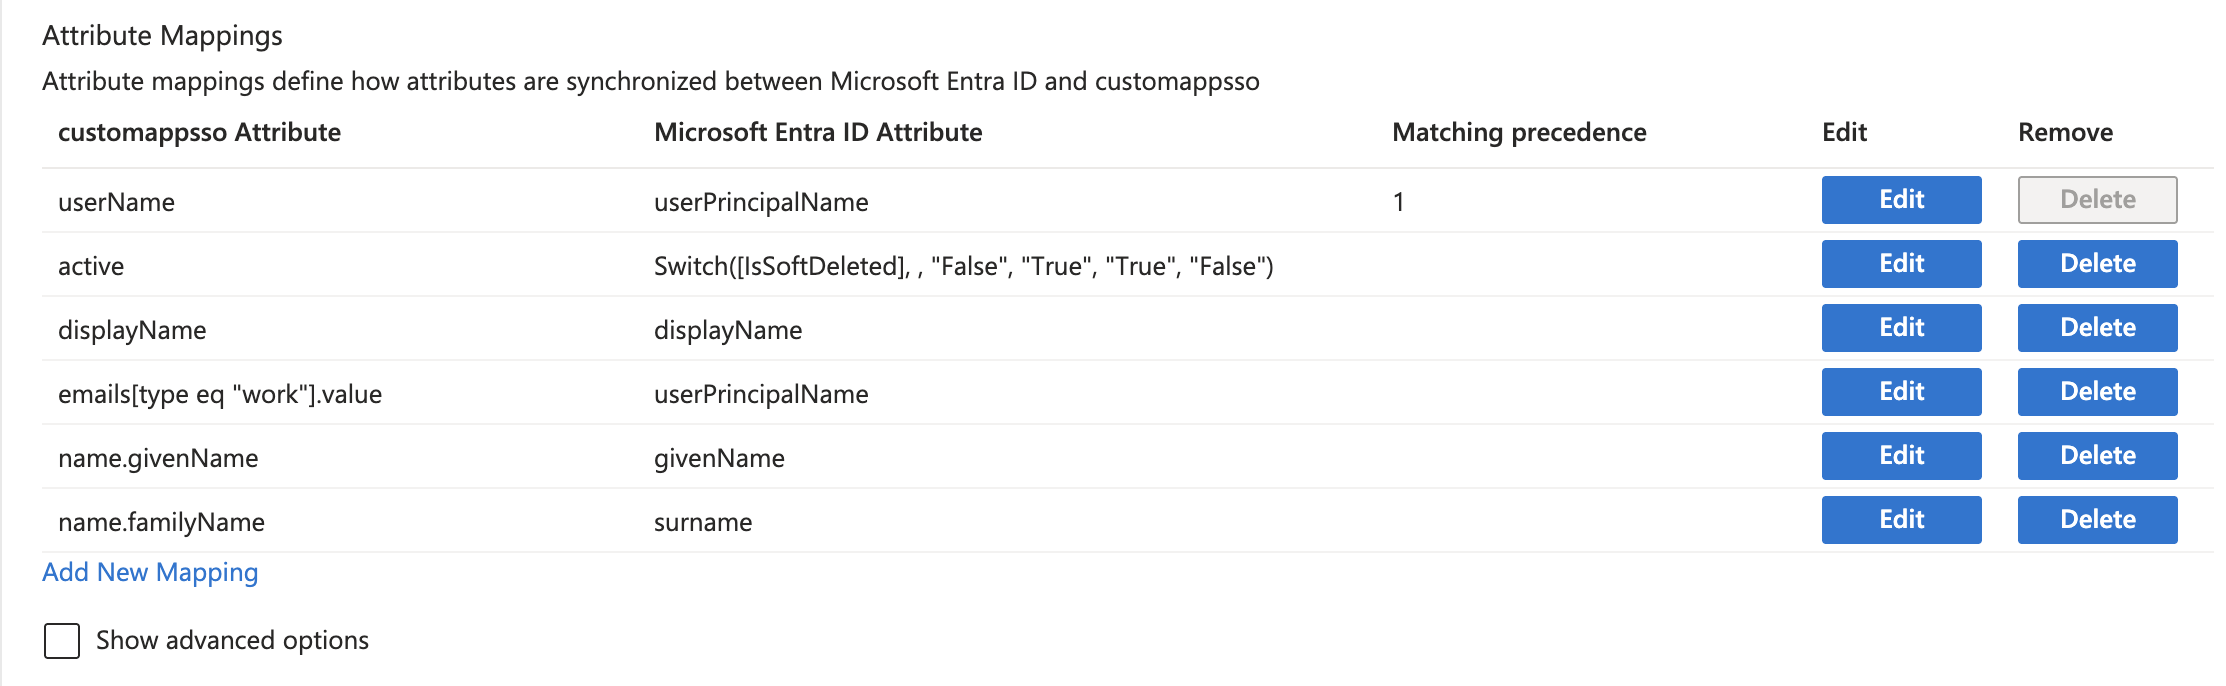
Under Attribute Mappings, configure the following mappings. You must remove any existing attribute mappings that are not on this list to avoid conflicts:
- Click Save to save the attribute mappings
Configure Admin Role Mapping
Admin Role Mapping lets you provision specific Entra ID users as Bruno License Manager admins. Admins provisioned this way get portal access, do not consume a license seat, and do not appear in the Users list.This section is optional. Skip it if you only want to provision regular licensed users.
Define an App Role
- In the Microsoft Entra admin center, go to Identity → Applications → App registrations
- Find the app registration linked to your enterprise application (same name) and open it
- Go to App roles → Create app role
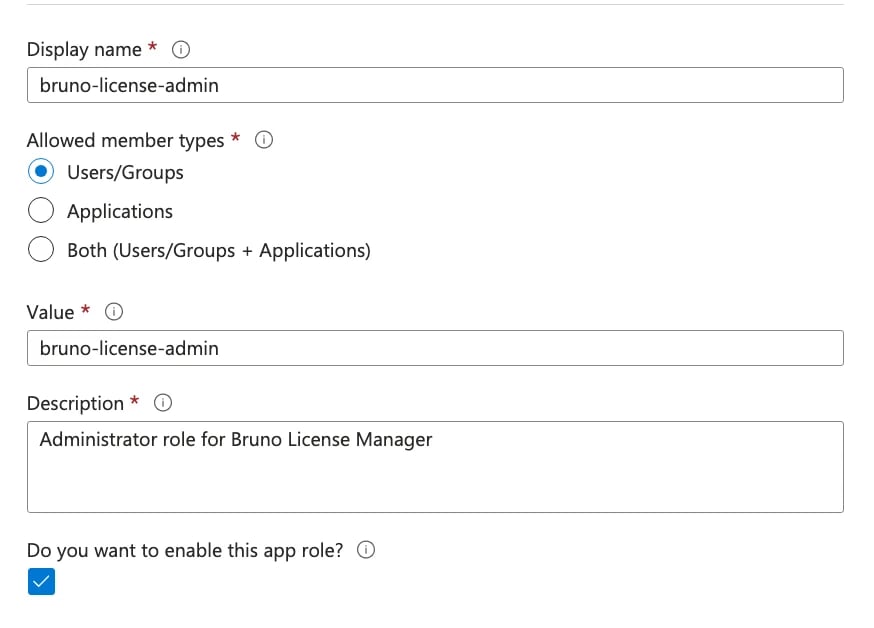
- Fill in:
- Display name: any name, e.g.
bruno_admin(cosmetic only, not sent to Bruno) - Allowed member types:
Users/Groups - Value: the role identifier Bruno will receive, e.g.
bruno-license-admin— this exact string is what must match your Admin Role Mapping configuration in Bruno - Description: optional
- Display name: any name, e.g.
- Enable the role and click Apply
Add the roles attribute mapping
- Under your Enterprise Application’s Provisioning → Mappings → Provision Microsoft Entra ID Users, click Add New Mapping
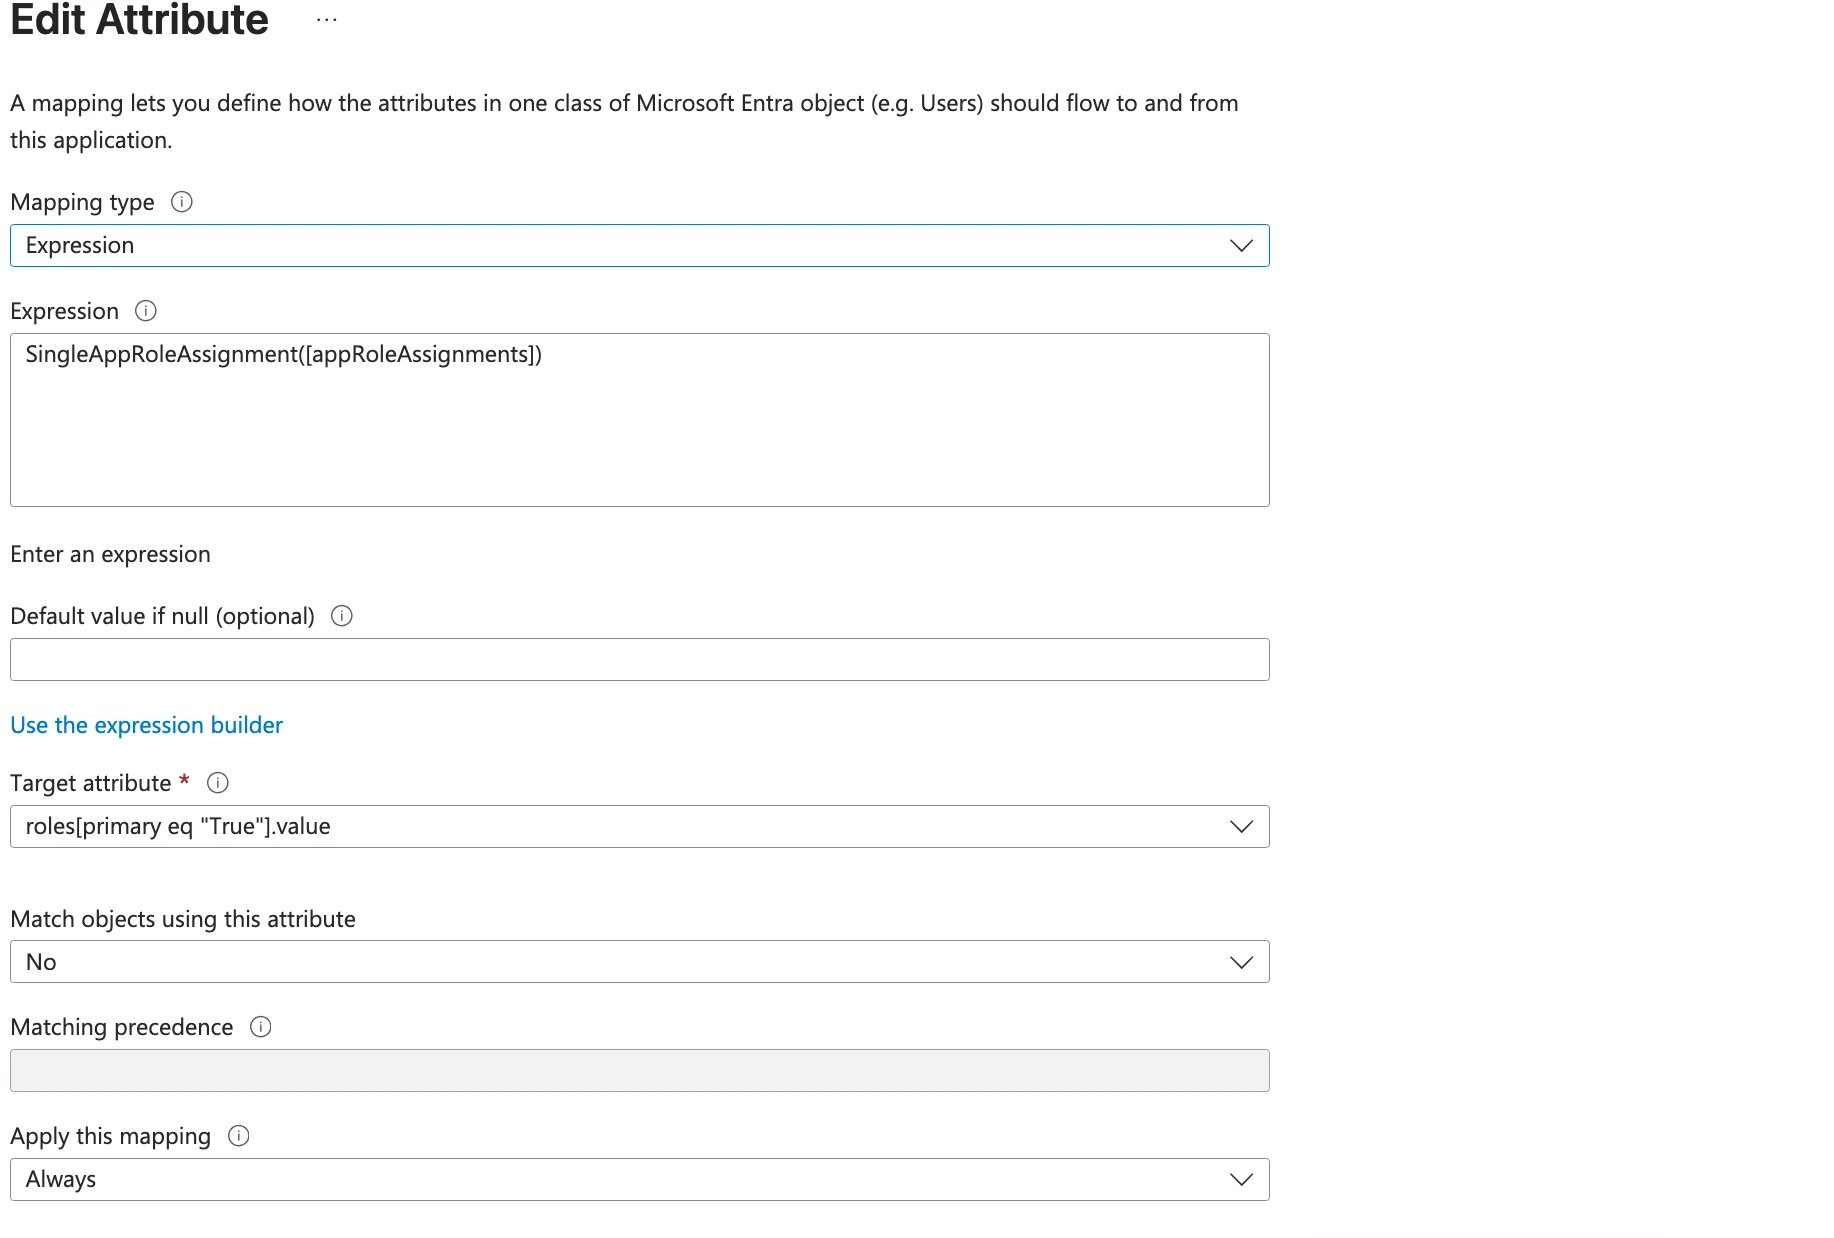
- Configure:
- Mapping type:
Expression - Expression:
SingleAppRoleAssignment([appRoleAssignments]) - Target attribute:
roles[primary eq "True"].value - Match objects using this attribute: No
- Apply this mapping: Always
- Mapping type:
- Click Ok, then Save on the main attribute mapping page
Configure Admin Role Mapping in Bruno
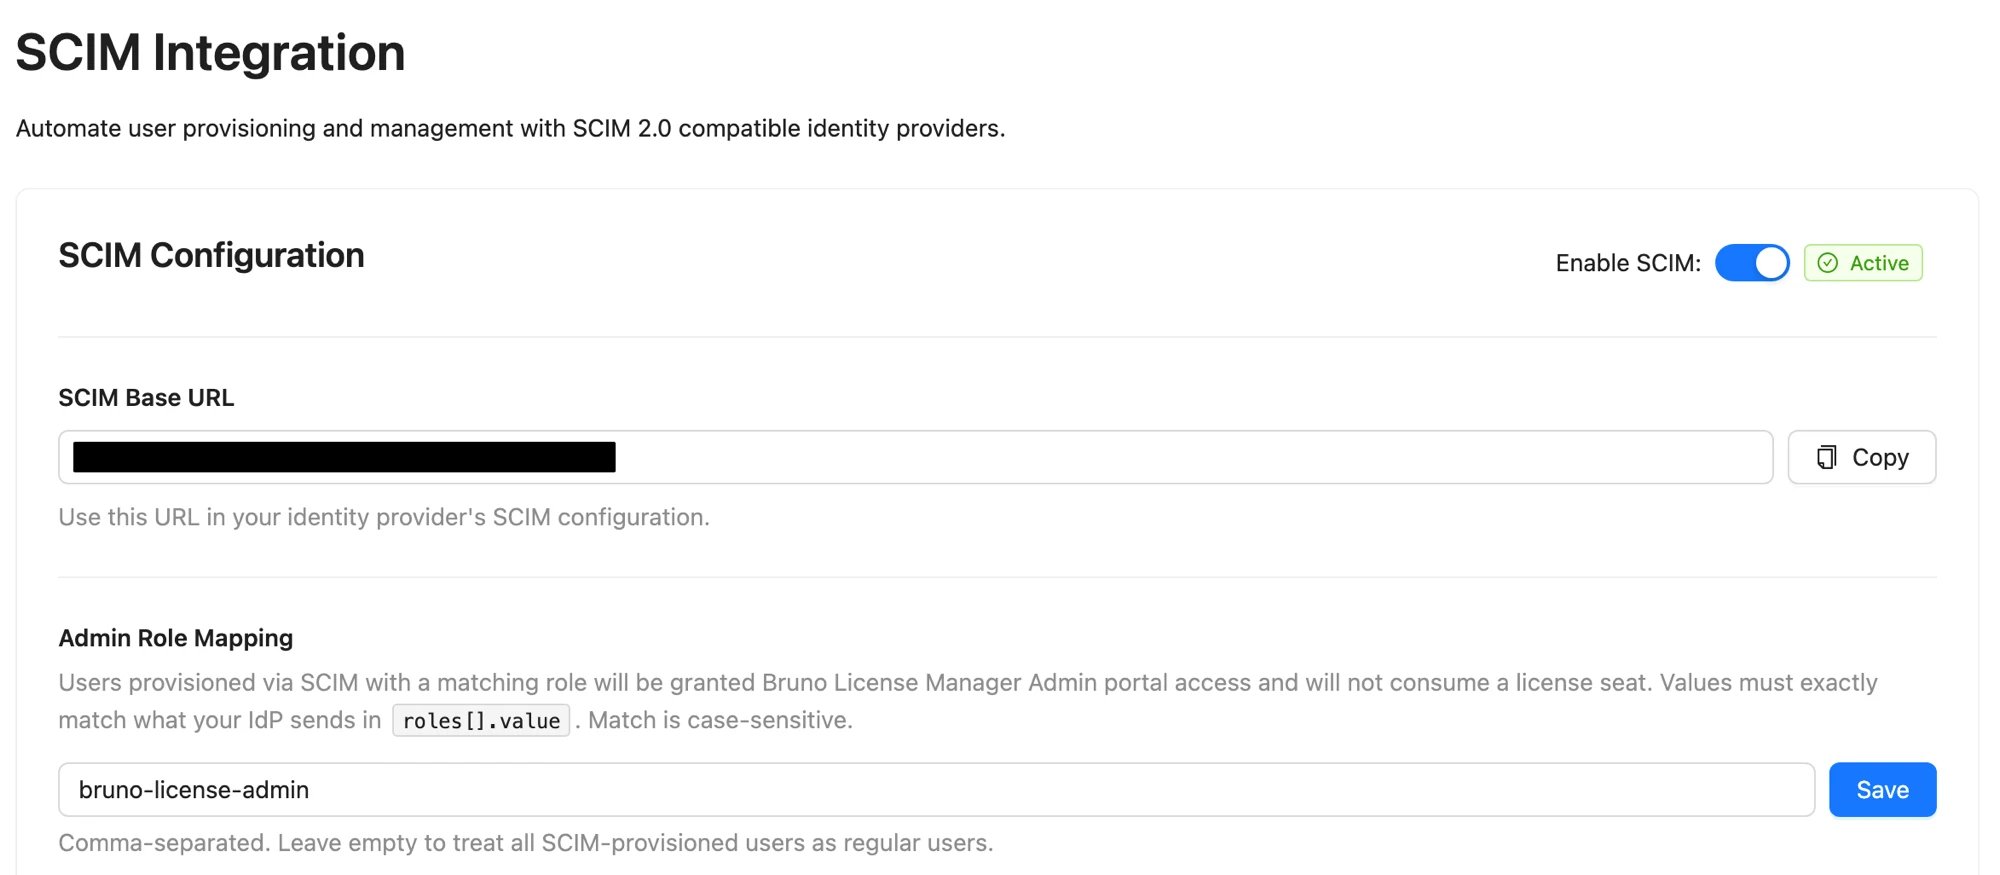
- In the Bruno License Manager portal, go to Settings → SCIM → Admin Role Mapping
- Enter the App Role Value you defined above, e.g.
bruno-license-admin - Multiple values are supported, comma-separated (e.g.
bruno-license-admin, bruno_admin) — any match grants admin access - Values must exactly match the App Role Value field in Entra (case-sensitive)
- Click Save
Configure provisioning settings
-
Under Settings, configure the Scope:
- Select Sync only assigned users and groups to provision only users and groups explicitly assigned to the Bruno application
- Or select Sync all users and groups to provision all users in your directory
- (Optional) Under Notification Email, enter an email address to receive provisioning error notifications
- Set Provisioning Status to On
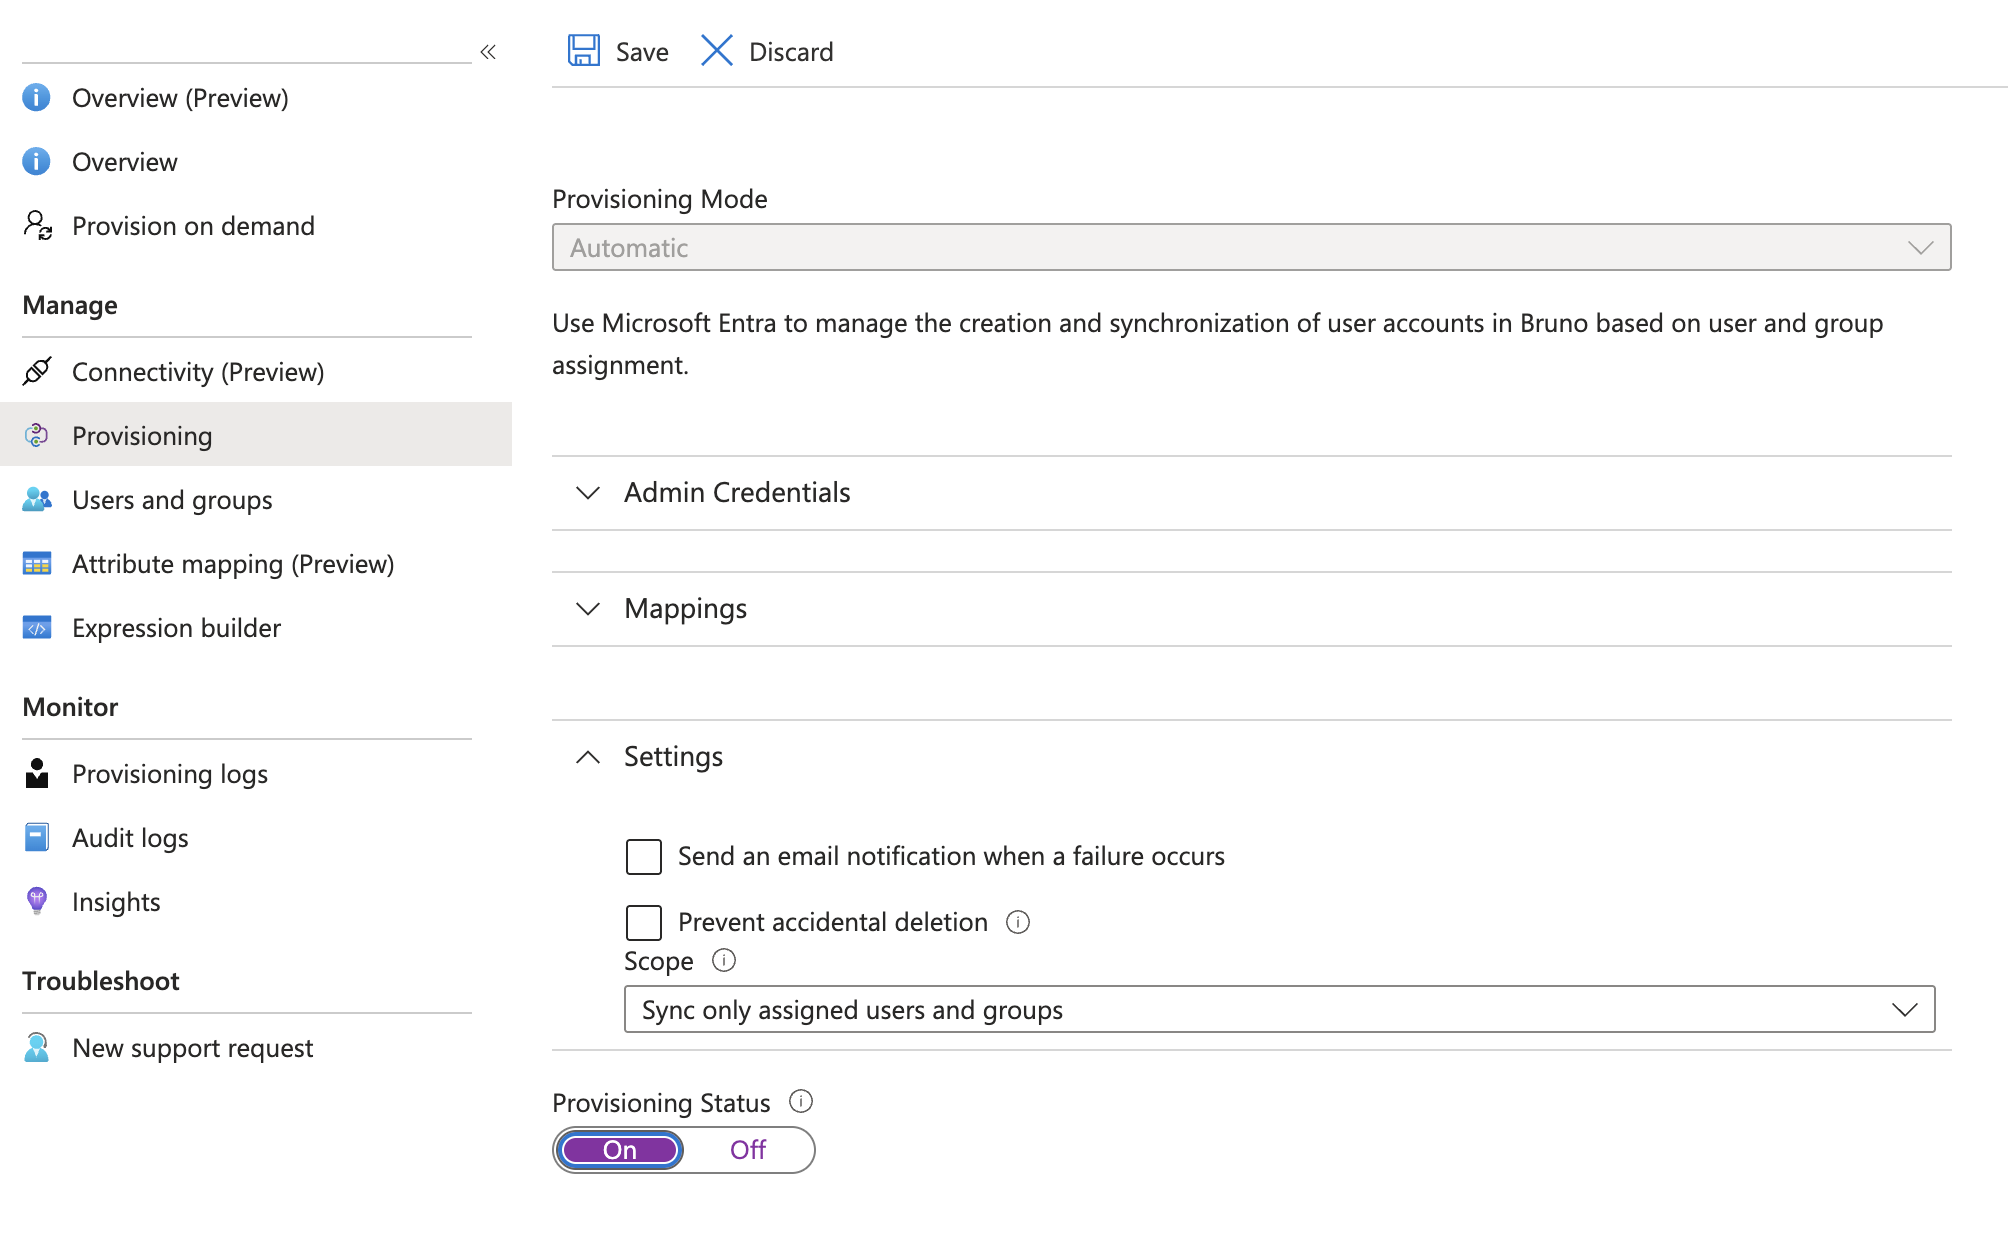
- Click Save
Assign users and groups to Bruno
- In your Enterprise Application, navigate to Users and groups from the left navigation menu
- Click + Add user/group
- Select the users or groups you want to provision with Bruno licenses. If you configured Admin Role Mapping and want a user provisioned as an admin, select that App Role under Select a role instead of the default access role
- Click Assign
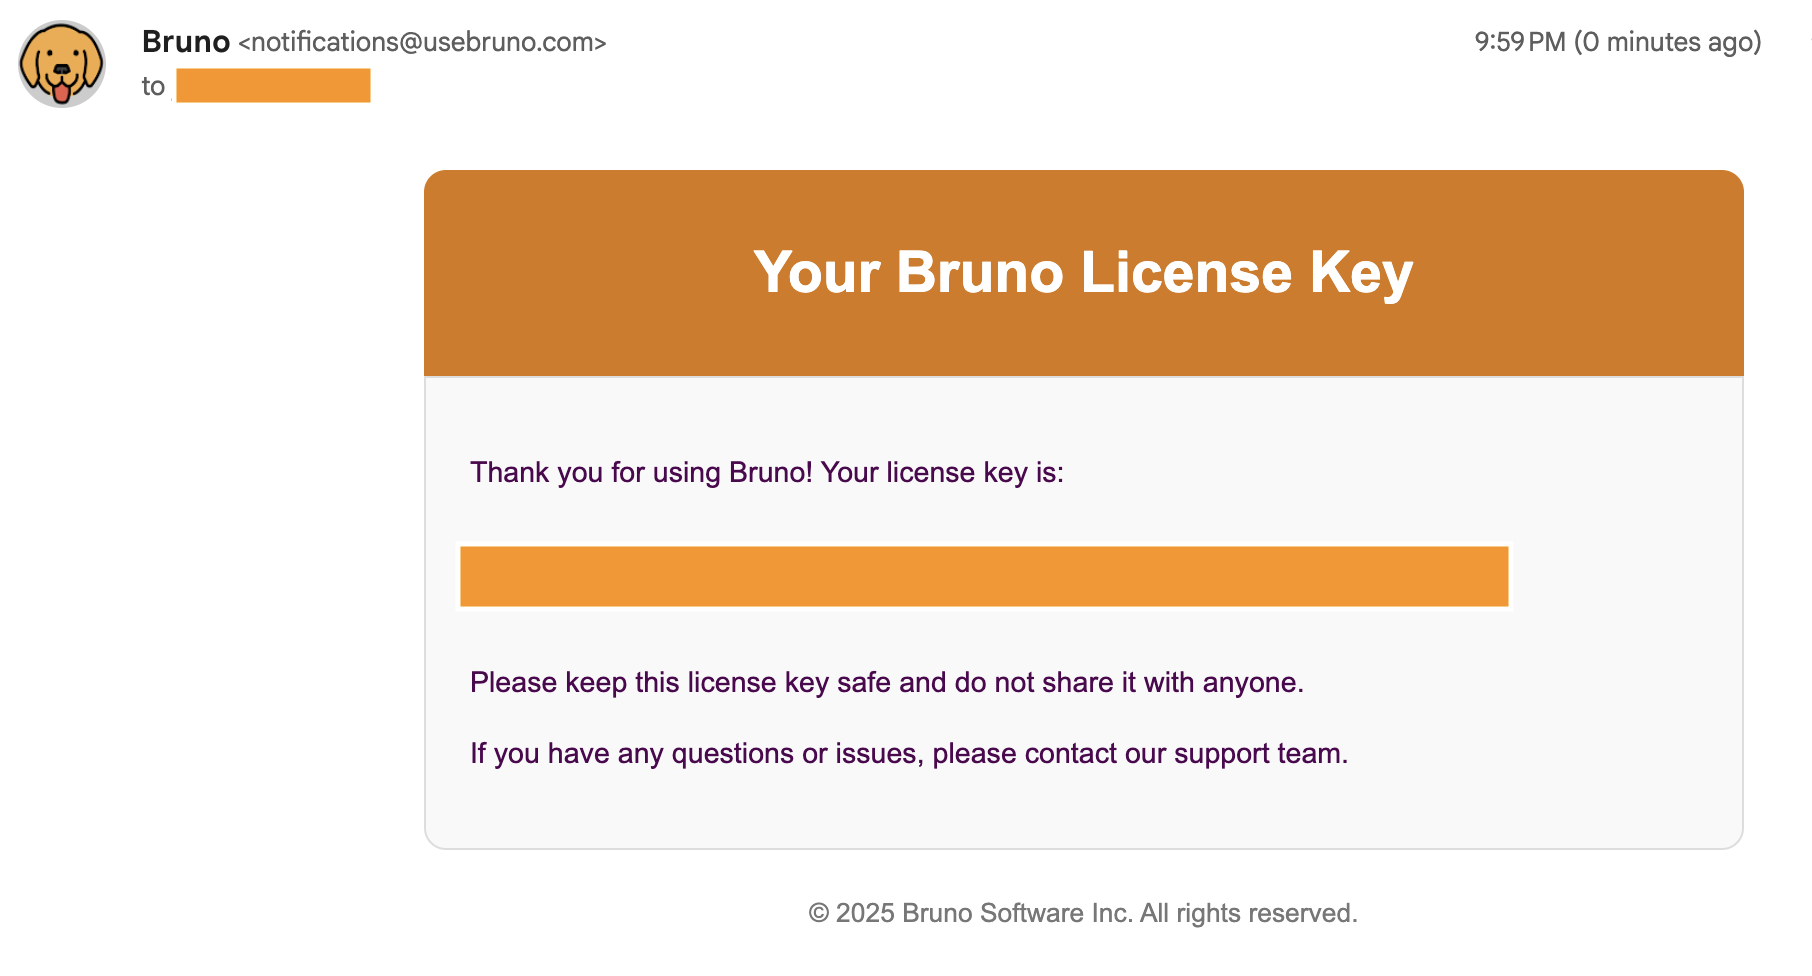
- Assigned users will receive an email with their License Key once the provisioning cycle completes. Users assigned the admin App Role instead get portal access directly, with no license key or email
Note: Microsoft Entra ID syncs changes every 40 minutes. For immediate provisioning of specific users, you can use the on-demand provisioning feature in Microsoft Entra ID.
Verify an administrator provisioned correctly
After assigning the user:- In the Bruno portal, confirm they appear under Settings → Admins
- Confirm they do not appear in the Users list
Deprovision users from Bruno
- To remove a user’s access to Bruno, navigate to Users and groups in your Bruno application
- Select the user(s) you want to remove and click Remove
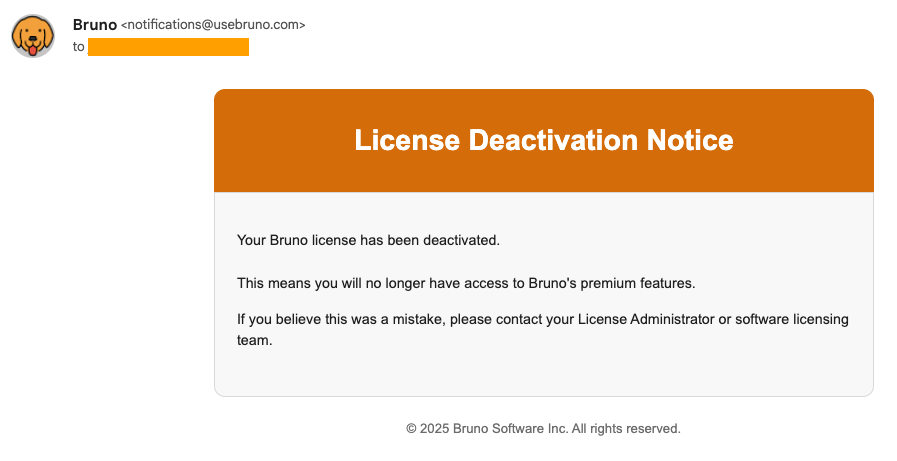
- The user’s license will be deactivated during the next provisioning cycle (within 40 minutes), and they will receive an email notification
Note: Microsoft Entra ID syncs changes every 40 minutes. For immediate provisioning of specific users, you can use the on-demand provisioning feature in Microsoft Entra ID.
Troubleshooting
Monitor provisioning activity
- To monitor provisioning activity, navigate to Provisioning in your Bruno application
- Click View provisioning logs to see detailed information about provisioning operations
-
The provisioning logs show:
- Users and groups that were created, updated, or deleted
- Any errors that occurred during provisioning
- Timestamps for each operation
Common issues
Connection test fails- Verify the SCIM Base URL is correct:
https://license.usebruno.com/scim/v2 - Ensure your SCIM API key is valid and hasn’t been revoked
- Check that SCIM is enabled in your Bruno license portal
- Verify users are assigned to the Bruno application
- Check the provisioning logs for specific error messages
- Ensure attribute mappings are configured correctly
- Confirm the provisioning status is set to On
- Ensure the
userNameattribute mapping uses a unique identifier (email address) - Check that no users with the same email already exist in Bruno
roles value appears in the request.
To correct an affected user, remove their license under Users in the Bruno portal. Re-provisioning through Entra ID does not remove an existing license.
For additional help, contact Bruno Support or visit the Bruno SCIM API documentation.
Related Resources
For more information about configuring SCIM provisioning with Microsoft Entra ID, refer to these Microsoft documentation resources:- SCIM synchronization with Microsoft Entra ID - Overview of SCIM protocol and how Microsoft Entra ID uses SCIM for provisioning
- What is automated app user provisioning in Microsoft Entra ID - Introduction to automated provisioning and SCIM
- Understand how Application Provisioning in Microsoft Entra ID works - Detailed explanation of the provisioning process and lifecycle
- Tutorial - Develop a SCIM endpoint for user provisioning - Guide for implementing SCIM endpoints and attribute mappings
- On-demand provisioning in Microsoft Entra ID - Provision specific users immediately without waiting for the sync cycle
- Troubleshoot provisioning to a Microsoft Entra gallery app - Common provisioning issues and troubleshooting steps
- Known issues for provisioning in Microsoft Entra ID - Known issues and limitations with application provisioning