> ## Documentation Index
> Fetch the complete documentation index at: https://docs.usebruno.com/llms.txt
> Use this file to discover all available pages before exploring further.
# Global Environment Variables
Global environment variables can be used across all collections and requests within a workspace. Think of them as a global store accessible throughout the app, eliminating the repetitive task of defining the same variables in every collection.
**Bruno 3.0.0+**: Global environments are now stored within each [workspace](/bruno-basics/create-a-workspace) in the `environments/` folder, making them version-controllable and workspace-scoped.
**Bruno 2.x and earlier**: Global environments are stored in the application's data folder. You can access them by visiting the About section from Preferences and navigating to the AppData path location.
## Storage Location
### Bruno 3.0.0+ (Workspace-based)
In Bruno 3.0.0 and later, global environments are stored as `.yml` files in the `environments/` directory within your workspace:
```
my-workspace/
├── workspace.yml
├── collections/
└── environments/
├── development.yml
├── staging.yml
└── production.yml
```
Each environment file contains the environment name and variables:
```yaml filename="development.yml" theme={null}
name: development
variables:
- name: api_url
value: http://localhost:3000
enabled: true
secret: false
type: text
```
This structure provides several benefits:
* **Version Control** - Global environments can be committed to Git alongside your workspace
* **Team Collaboration** - Share environments with team members through your repository
* **Workspace Isolation** - Each workspace maintains its own set of global environments
### Bruno 2.x and Earlier (Application-based)
In earlier versions, global environments are stored in Bruno's application data folder and are shared across all collections in the application.
## Create a Global Environment Variable
1. Go to the **Environments** section (top right corner).
2. Navigate to the **Global** tab and click on **Create**.
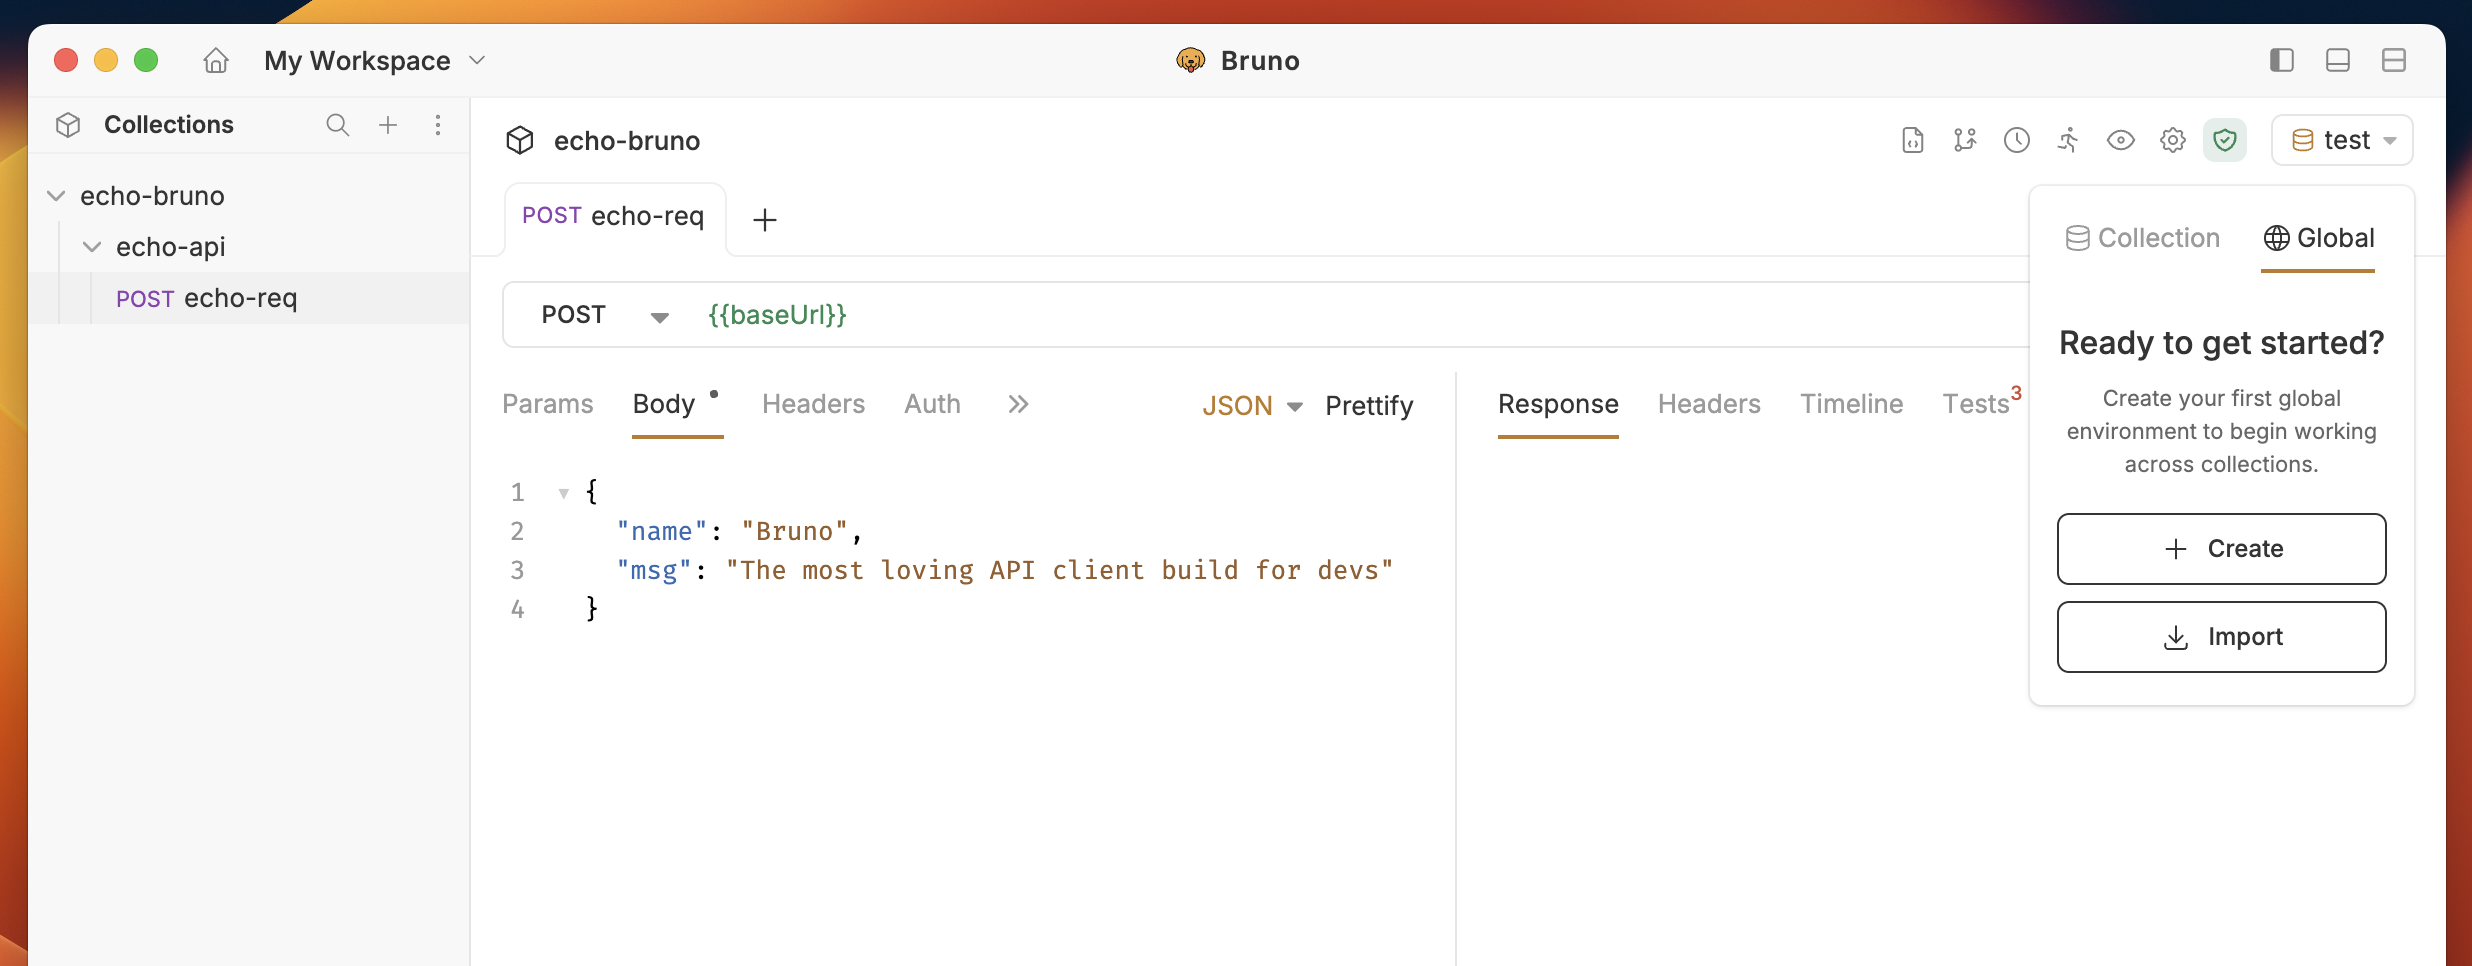 3. (Optional) If you need to import an existing environment, you can use the **Import Environment** option.
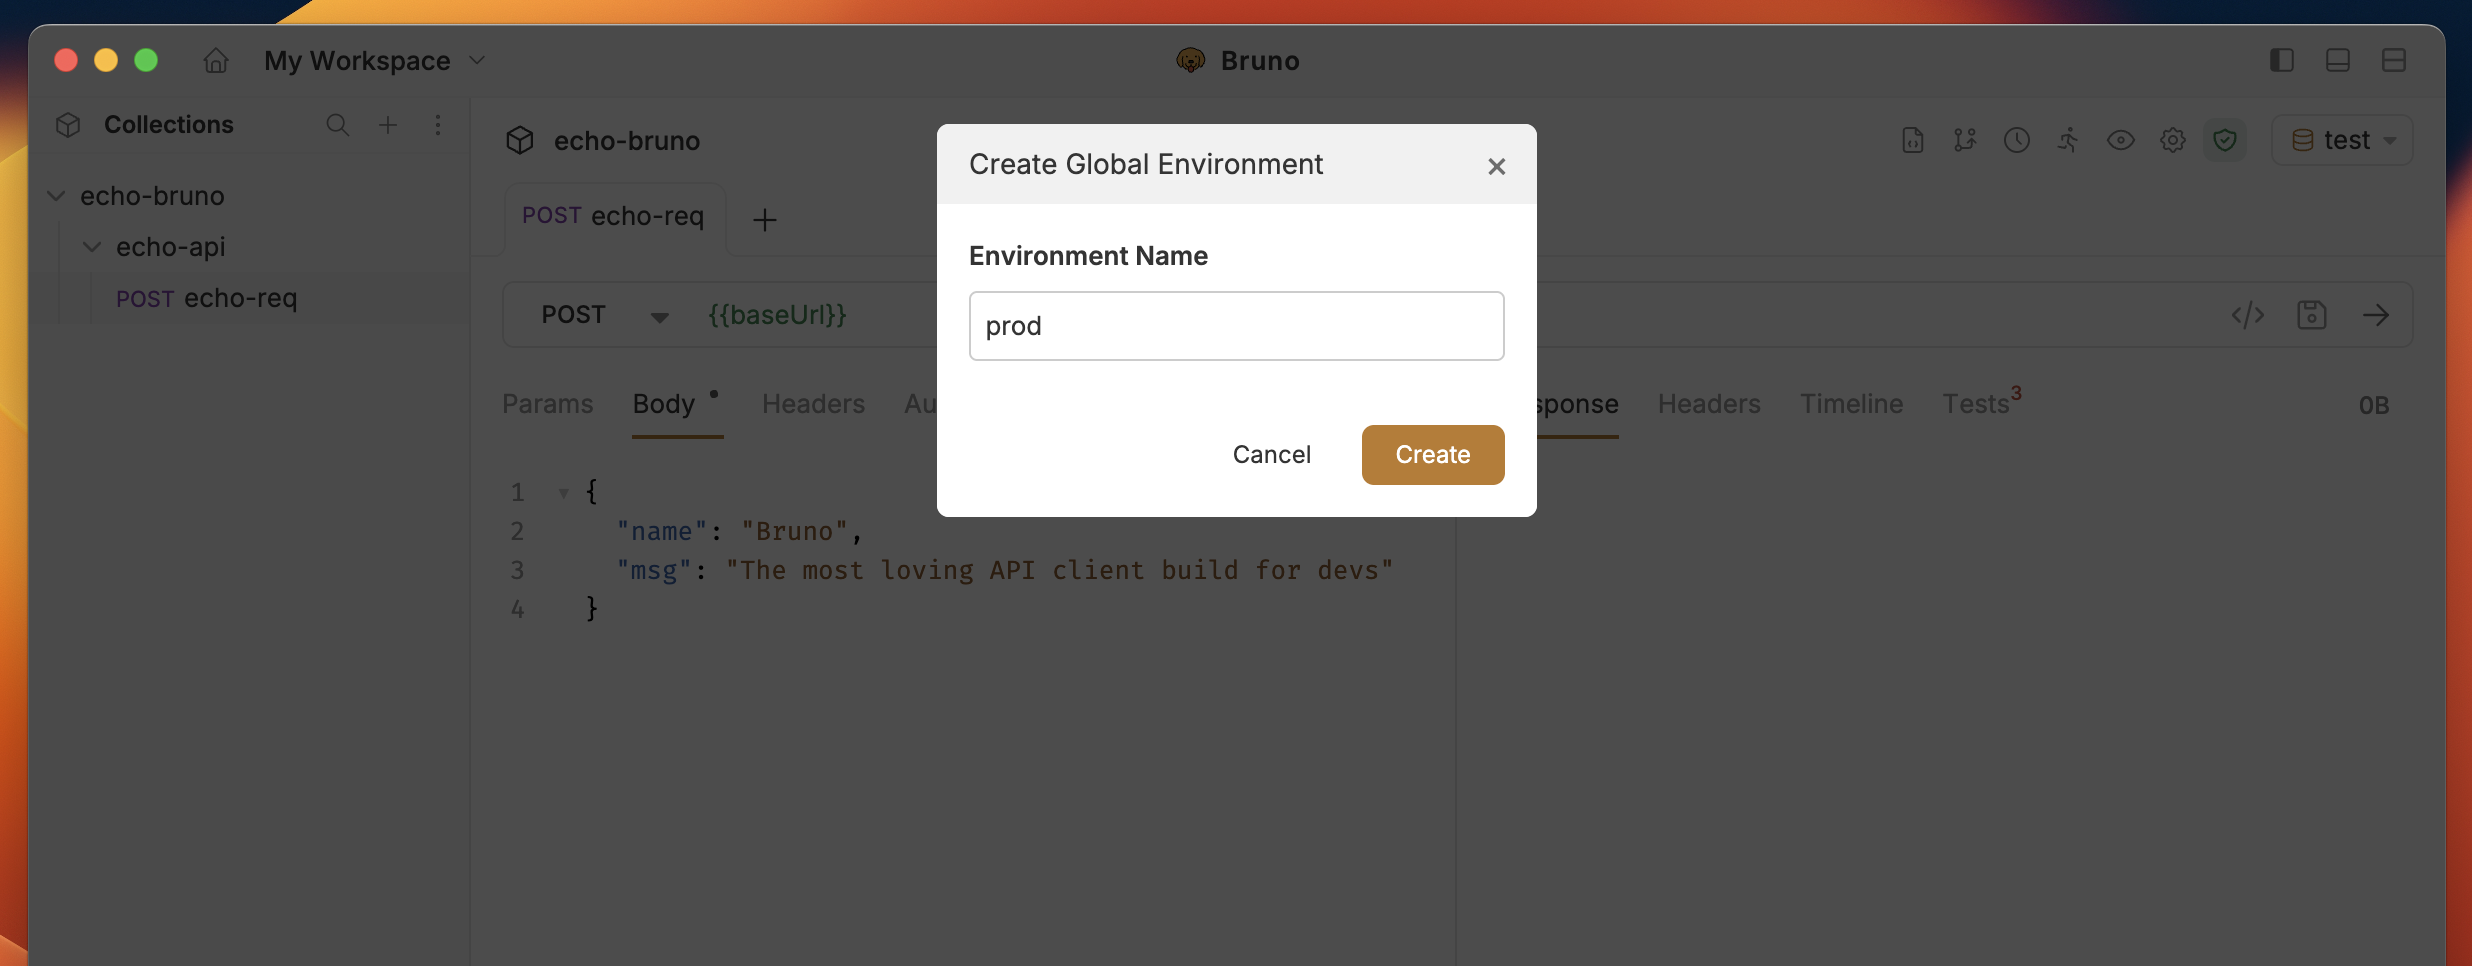
4. Enter a name for your environment and click **Create**.
3. (Optional) If you need to import an existing environment, you can use the **Import Environment** option.
4. Enter a name for your environment and click **Create**.
 5. Add a variable by specifying the **Name** and **Value**.
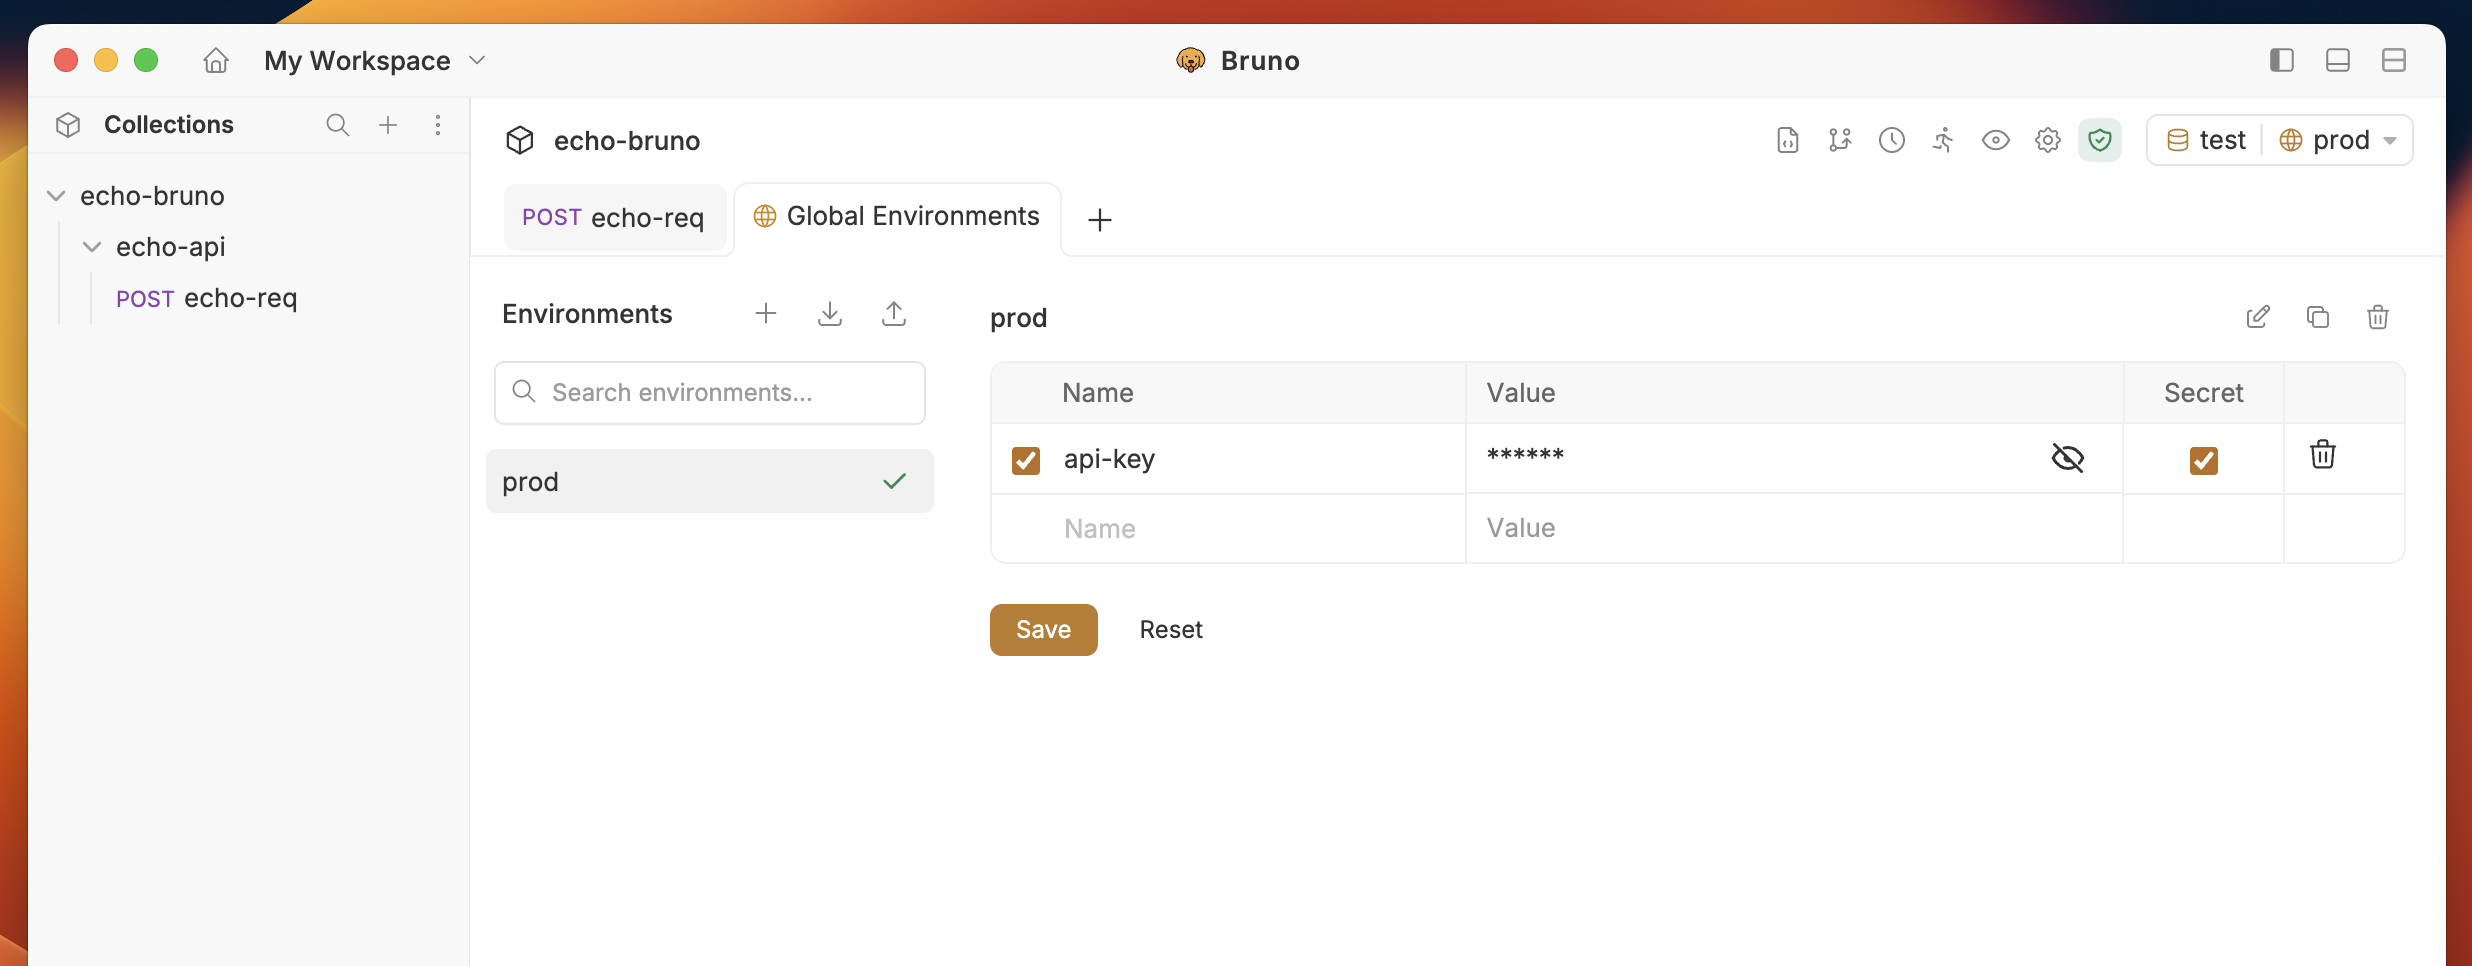 6. Click **Save**.
Your global environment variable is now created and can be accessed across your workspace.
You can click the secret checkbox to hide the values of variables while hovering over them. Secret values are stored securely and are not saved to the environment file.
## Using Global Environment Variables
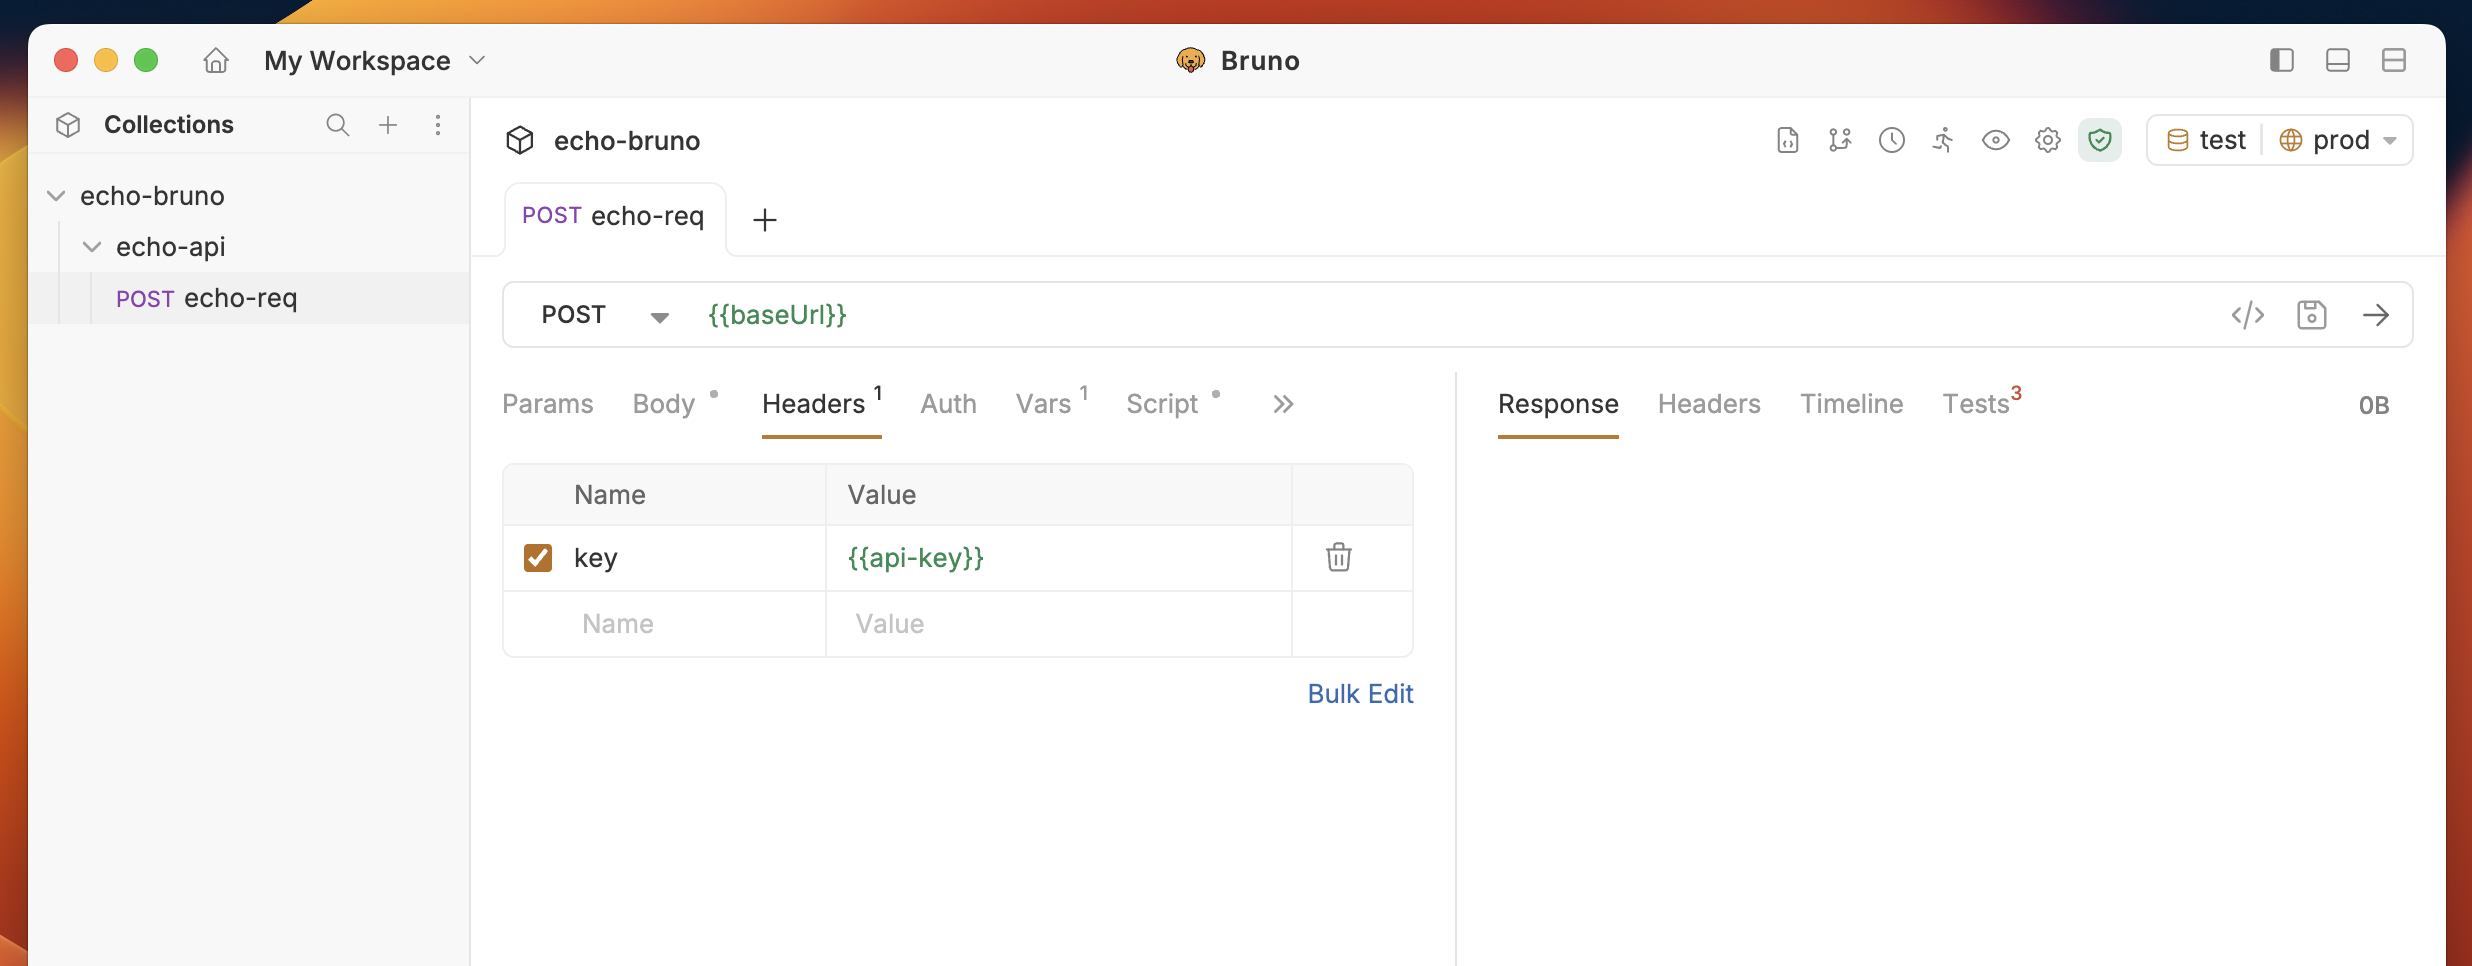
To use a global environment variable, reference it using the format `{{var_name}}` in any request or collection. These variables can be combined with other variables and used throughout your workspace, making them ideal for consistent value sharing.
6. Click **Save**.
Your global environment variable is now created and can be accessed across your workspace.
You can click the secret checkbox to hide the values of variables while hovering over them. Secret values are stored securely and are not saved to the environment file.
## Using Global Environment Variables
To use a global environment variable, reference it using the format `{{var_name}}` in any request or collection. These variables can be combined with other variables and used throughout your workspace, making them ideal for consistent value sharing.
 ## Selecting a Global Environment
To activate a global environment:
1. Click on the **Environments** dropdown in the top right corner
2. Navigate to the **Global** tab
3. Select the environment you want to activate
The active global environment selection is stored per-workspace in the application's internal settings. This means your environment selection persists across app restarts and is maintained independently for each workspace.
## Upgrading from Bruno 2.x to 3.0.0
When you upgrade to Bruno 3.0.0, your existing global environments from the application data folder can be migrated to the Default Workspace automatically. Custom workspaces will start with no global environments.
If you have existing global environments in Bruno 2.x:
1. **Default Workspace** - Bruno will migrate your existing global environments to the Default Workspace's `environments/` folder
2. **Custom Workspaces** - You will need to manually recreate or import global environments for any new custom workspaces you create
3. **Export/Import** - You can export environments from one workspace and import them into another
## Import/Export Global Environment Variables
For detailed instructions on importing and exporting global environment variables, see the [Import/Export Environments](/import-export-data/import-export-environments) guide.
## Selecting a Global Environment
To activate a global environment:
1. Click on the **Environments** dropdown in the top right corner
2. Navigate to the **Global** tab
3. Select the environment you want to activate
The active global environment selection is stored per-workspace in the application's internal settings. This means your environment selection persists across app restarts and is maintained independently for each workspace.
## Upgrading from Bruno 2.x to 3.0.0
When you upgrade to Bruno 3.0.0, your existing global environments from the application data folder can be migrated to the Default Workspace automatically. Custom workspaces will start with no global environments.
If you have existing global environments in Bruno 2.x:
1. **Default Workspace** - Bruno will migrate your existing global environments to the Default Workspace's `environments/` folder
2. **Custom Workspaces** - You will need to manually recreate or import global environments for any new custom workspaces you create
3. **Export/Import** - You can export environments from one workspace and import them into another
## Import/Export Global Environment Variables
For detailed instructions on importing and exporting global environment variables, see the [Import/Export Environments](/import-export-data/import-export-environments) guide.