> ## Documentation Index
> Fetch the complete documentation index at: https://docs.usebruno.com/llms.txt
> Use this file to discover all available pages before exploring further.
# Create WebSocket Request
Creating a WebSocket request in Bruno allows you to establish real-time connections and test bidirectional communication with WebSocket servers.
## Creating a WebSocket Request
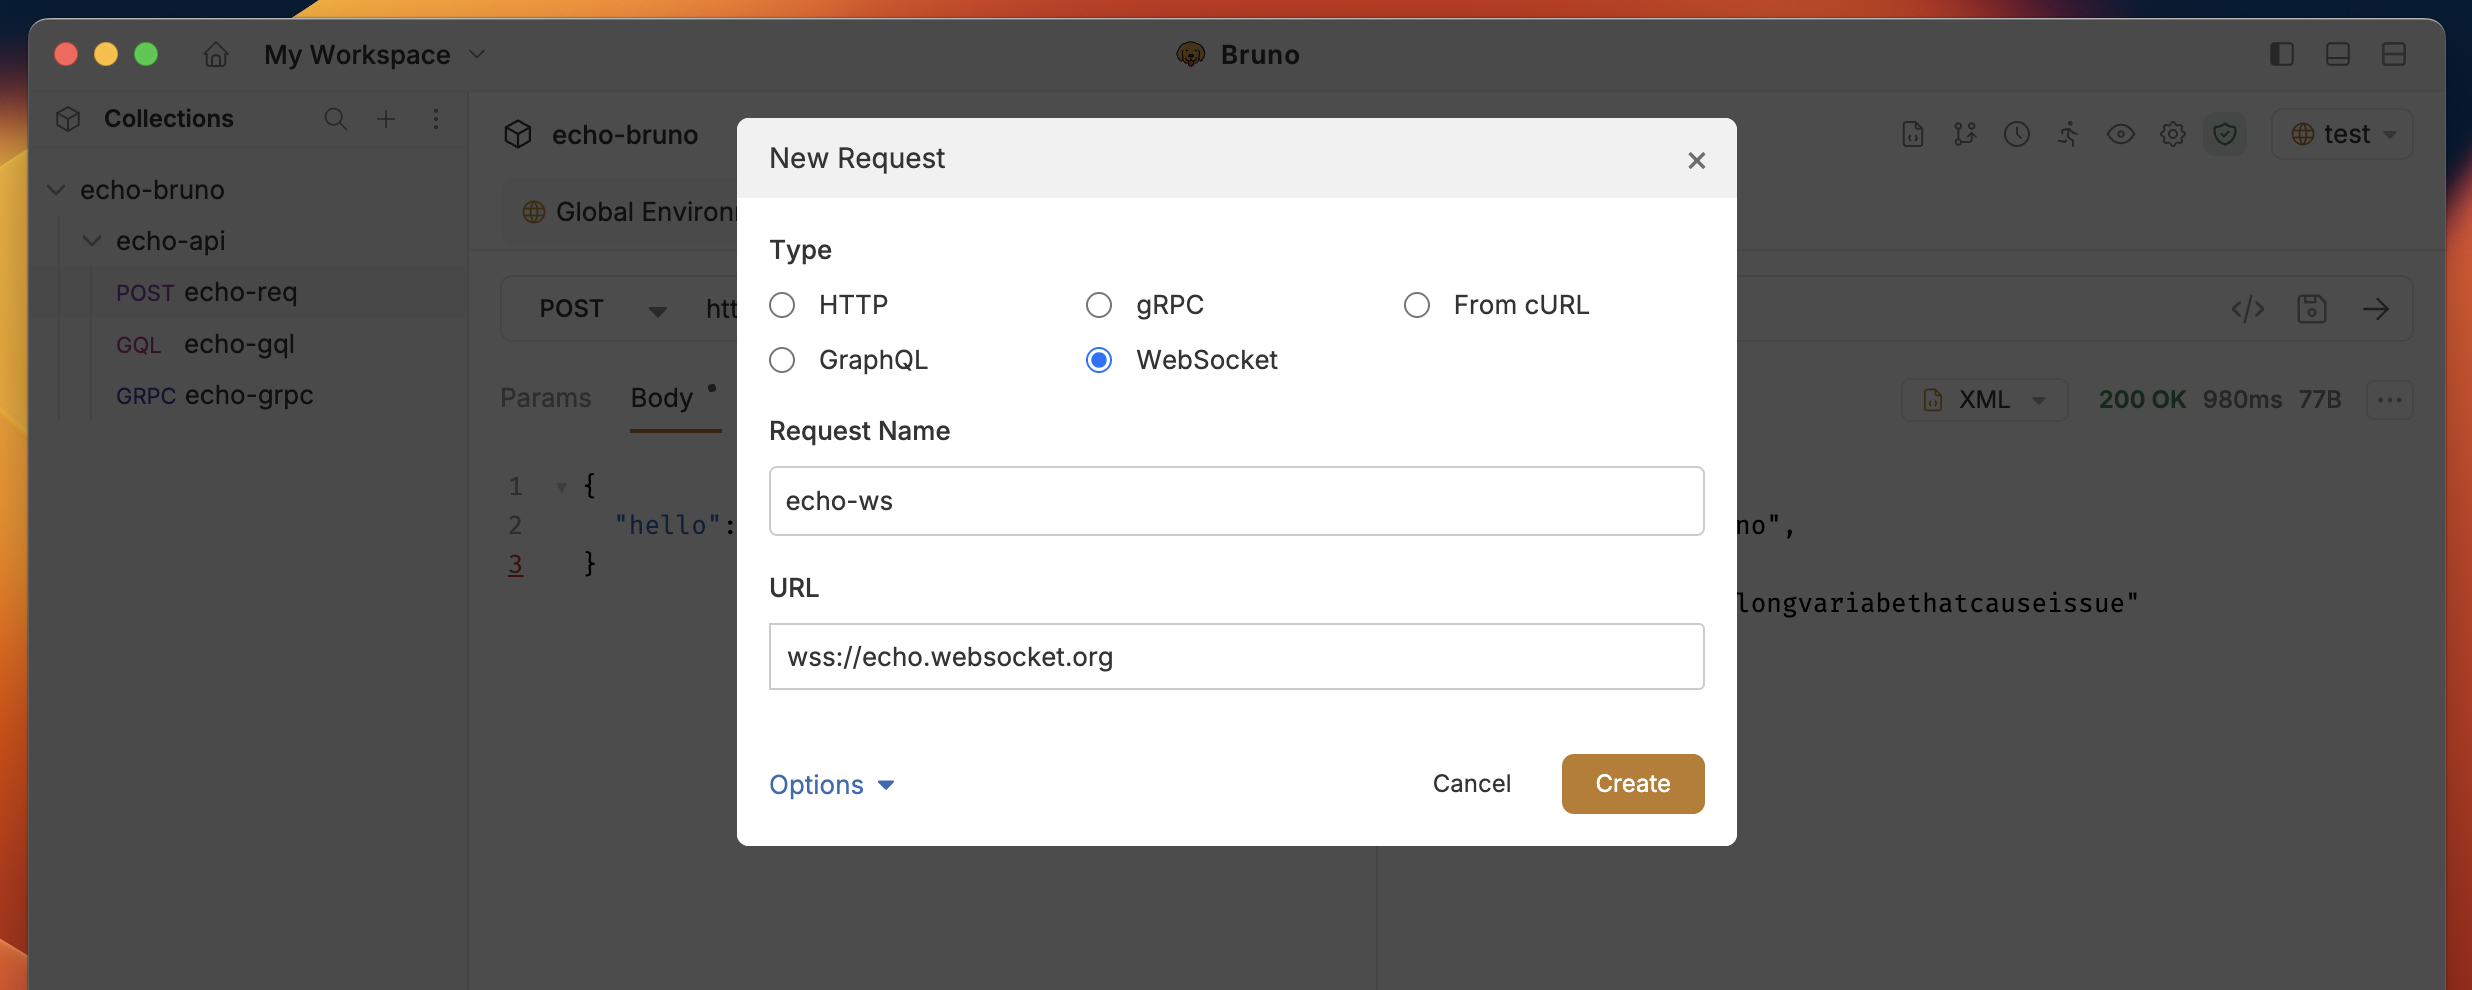
### Step 1: Add New Request
1. **Open your collection** in Bruno
2. **Right-click** on the collection or folder where you want to add the request
3. **Select "New Request"** from the context menu
4. **Choose "WebSocket"** as the request type
 ### Step 2: Configure WebSocket URL
1. **Enter the WebSocket URL** in the address bar
* Use `ws://` for unsecured connections
* Use `wss://` for secured connections (recommended for production)
**Example URLs:**
```
wss://echo.websocket.org
```
### Step 3: Configure Headers
1. **Click the Headers tab**
2. **Add custom headers** as needed:
* **Authorization**: Bearer tokens, API keys
* **Custom Headers**: Any additional metadata
* **User-Agent**: Custom user agent strings
**Common Headers:**
```
Authorization: Bearer your-token-here
X-API-Key: your-api-key
User-Agent: Bruno-WebSocket-Client
```
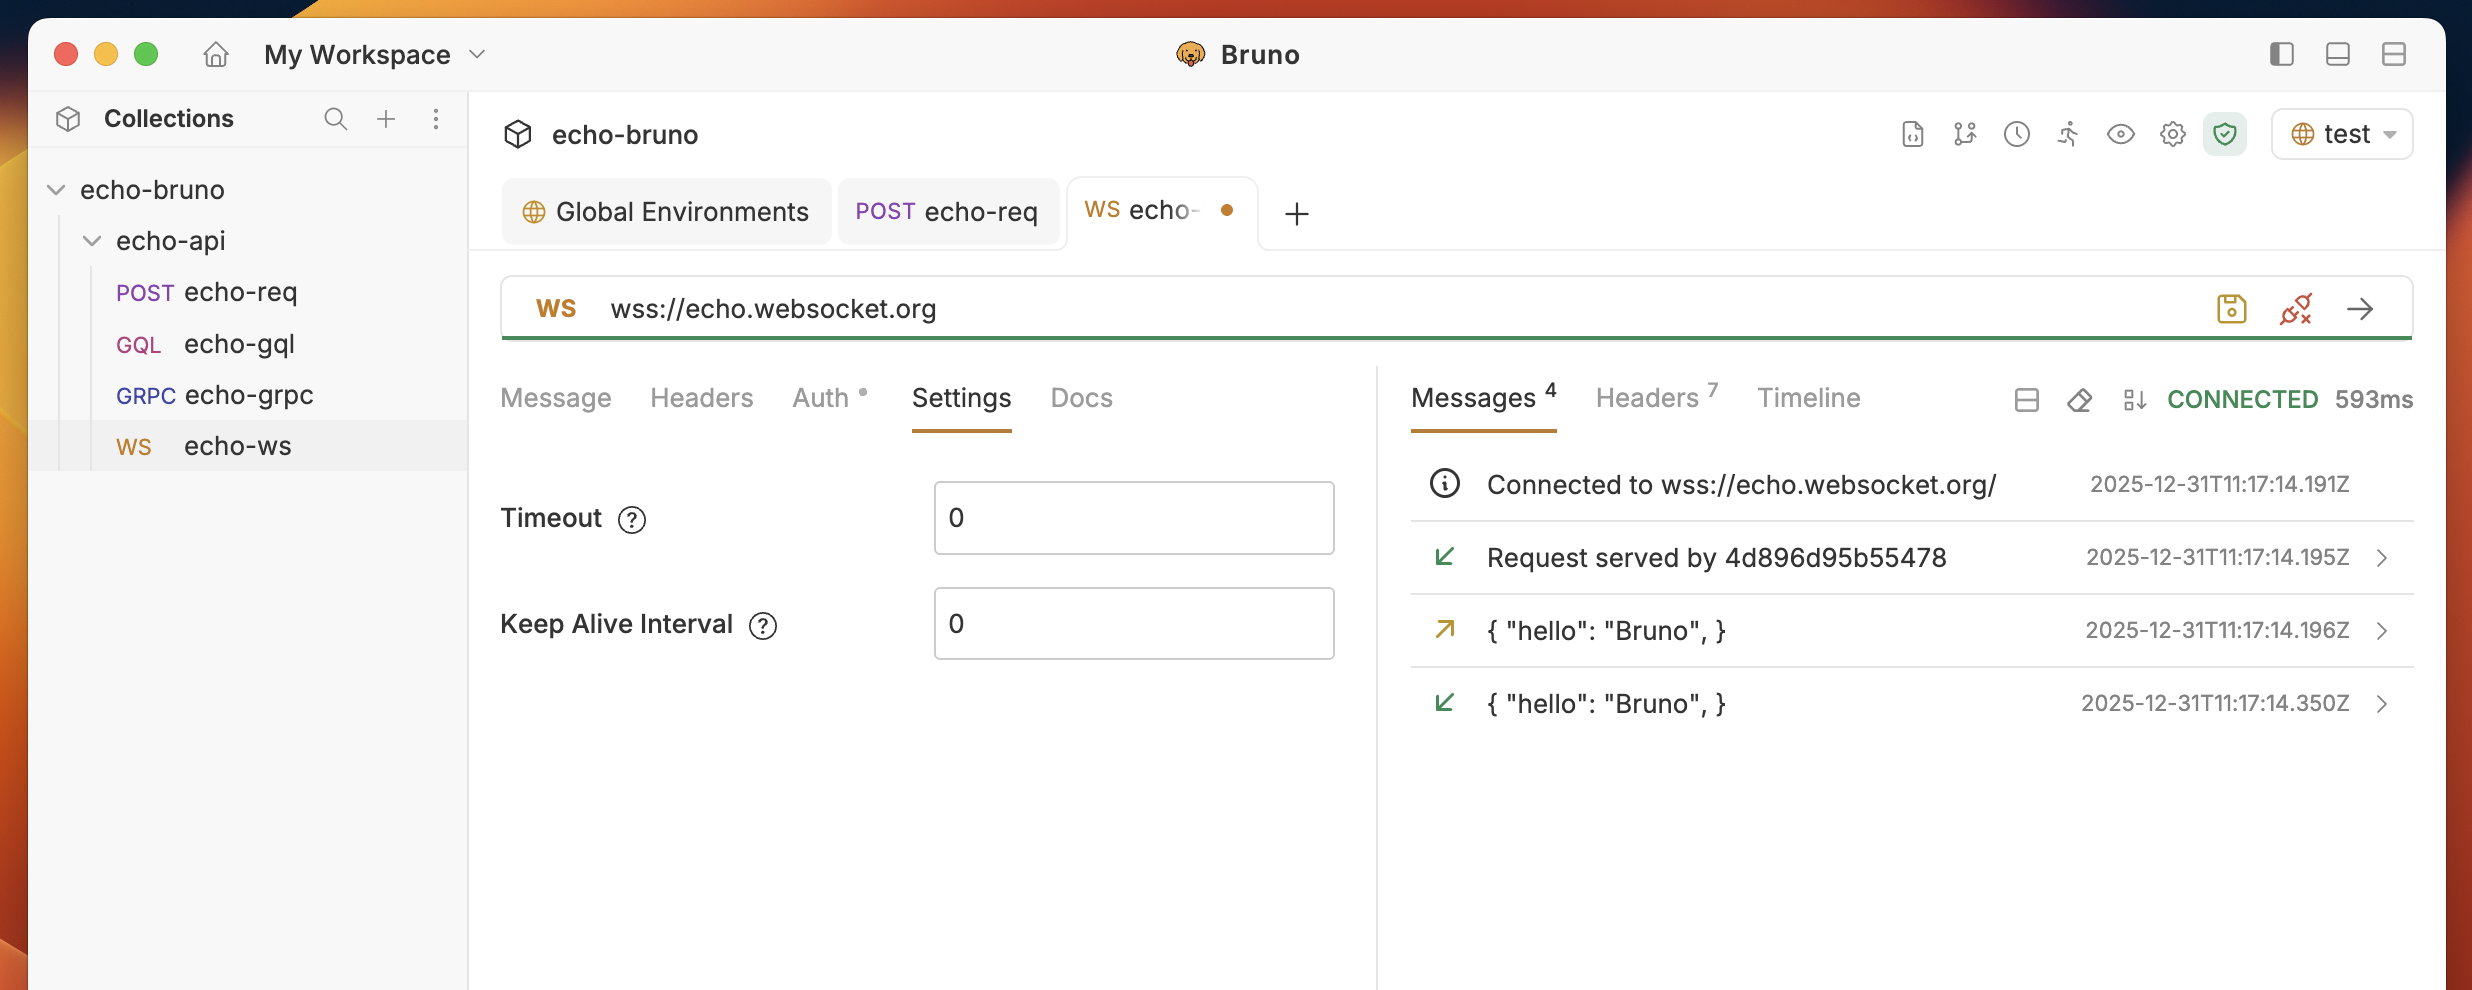
### Step 4: Set Connection Options
1. **Click the Settings tab**
2. **Configure connection settings**:
**Connection Timeout**
* Set the maximum time to wait for connection establishment
* Default: 30 seconds
* Range: 1-300 seconds
**Auto-reconnect**
* Enable automatic reconnection on connection loss
* Useful for testing resilient WebSocket implementations
### Step 2: Configure WebSocket URL
1. **Enter the WebSocket URL** in the address bar
* Use `ws://` for unsecured connections
* Use `wss://` for secured connections (recommended for production)
**Example URLs:**
```
wss://echo.websocket.org
```
### Step 3: Configure Headers
1. **Click the Headers tab**
2. **Add custom headers** as needed:
* **Authorization**: Bearer tokens, API keys
* **Custom Headers**: Any additional metadata
* **User-Agent**: Custom user agent strings
**Common Headers:**
```
Authorization: Bearer your-token-here
X-API-Key: your-api-key
User-Agent: Bruno-WebSocket-Client
```
### Step 4: Set Connection Options
1. **Click the Settings tab**
2. **Configure connection settings**:
**Connection Timeout**
* Set the maximum time to wait for connection establishment
* Default: 30 seconds
* Range: 1-300 seconds
**Auto-reconnect**
* Enable automatic reconnection on connection loss
* Useful for testing resilient WebSocket implementations
 ### Step 5: Configure Subprotocols (Optional)
Bruno supports WebSocket subprotocols, allowing you to specify the application-level protocol to use over the WebSocket connection.
**Setting a Subprotocol**
WebSocket subprotocols enable your client to specify which protocol variant it wants to use. To set a subprotocol in Bruno:
* Add the `Sec-WebSocket-Protocol` header in the Headers tab
* Specify one or multiple subprotocols
**Example:**
```
Sec-WebSocket-Protocol: mqtt, wamp
```
**Setting WebSocket Version**
You can specify the WebSocket protocol version using the `Sec-WebSocket-Version` header. This is useful when testing compatibility with servers that support multiple WebSocket versions:
```
Sec-WebSocket-Version: 13
```
WebSocket protocol version 13 (RFC 6455) is the current standard. Most modern servers use this version by default.
**Server Rejections**
If the server doesn't support the requested subprotocol or version:
* The connection will be rejected
* You'll see a **400 Bad Request** response
* Check the response details to understand why the server rejected the connection
**Advanced Header Overrides**
Bruno allows you to override other `Sec-WebSocket-*` headers if needed for testing specific scenarios:
* `Sec-WebSocket-Key`: Custom key for handshake (auto-generated by default)
* `Sec-WebSocket-Extensions`: Specify compression or other extensions
Simply add these headers in the Headers tab like any other custom header.
### Step 5: Configure Subprotocols (Optional)
Bruno supports WebSocket subprotocols, allowing you to specify the application-level protocol to use over the WebSocket connection.
**Setting a Subprotocol**
WebSocket subprotocols enable your client to specify which protocol variant it wants to use. To set a subprotocol in Bruno:
* Add the `Sec-WebSocket-Protocol` header in the Headers tab
* Specify one or multiple subprotocols
**Example:**
```
Sec-WebSocket-Protocol: mqtt, wamp
```
**Setting WebSocket Version**
You can specify the WebSocket protocol version using the `Sec-WebSocket-Version` header. This is useful when testing compatibility with servers that support multiple WebSocket versions:
```
Sec-WebSocket-Version: 13
```
WebSocket protocol version 13 (RFC 6455) is the current standard. Most modern servers use this version by default.
**Server Rejections**
If the server doesn't support the requested subprotocol or version:
* The connection will be rejected
* You'll see a **400 Bad Request** response
* Check the response details to understand why the server rejected the connection
**Advanced Header Overrides**
Bruno allows you to override other `Sec-WebSocket-*` headers if needed for testing specific scenarios:
* `Sec-WebSocket-Key`: Custom key for handshake (auto-generated by default)
* `Sec-WebSocket-Extensions`: Specify compression or other extensions
Simply add these headers in the Headers tab like any other custom header.