> ## Documentation Index
> Fetch the complete documentation index at: https://docs.usebruno.com/llms.txt
> Use this file to discover all available pages before exploring further.
# Collaboration via Bitbucket
Bitbucket is a Git hosting web-based platform created by Atlassian. It's a popular choice for teams and organizations for collaborating and maintaining software projects. It's easy to integrate with Jira, Wiki, and other Atlassian products to manage everything in one place.
Bruno's Git functionality allows you to work with Bitbucket to manage, collaborate, and maintain your API development workflow.
## Configure Bitbucket
You need to set up an SSH key with Bitbucket. While you can also set up app passwords (HTTPS), this requires you to enter your password on every operation. SSH is a more convenient and secure way to work with Bitbucket.
### Create Repository on Bitbucket
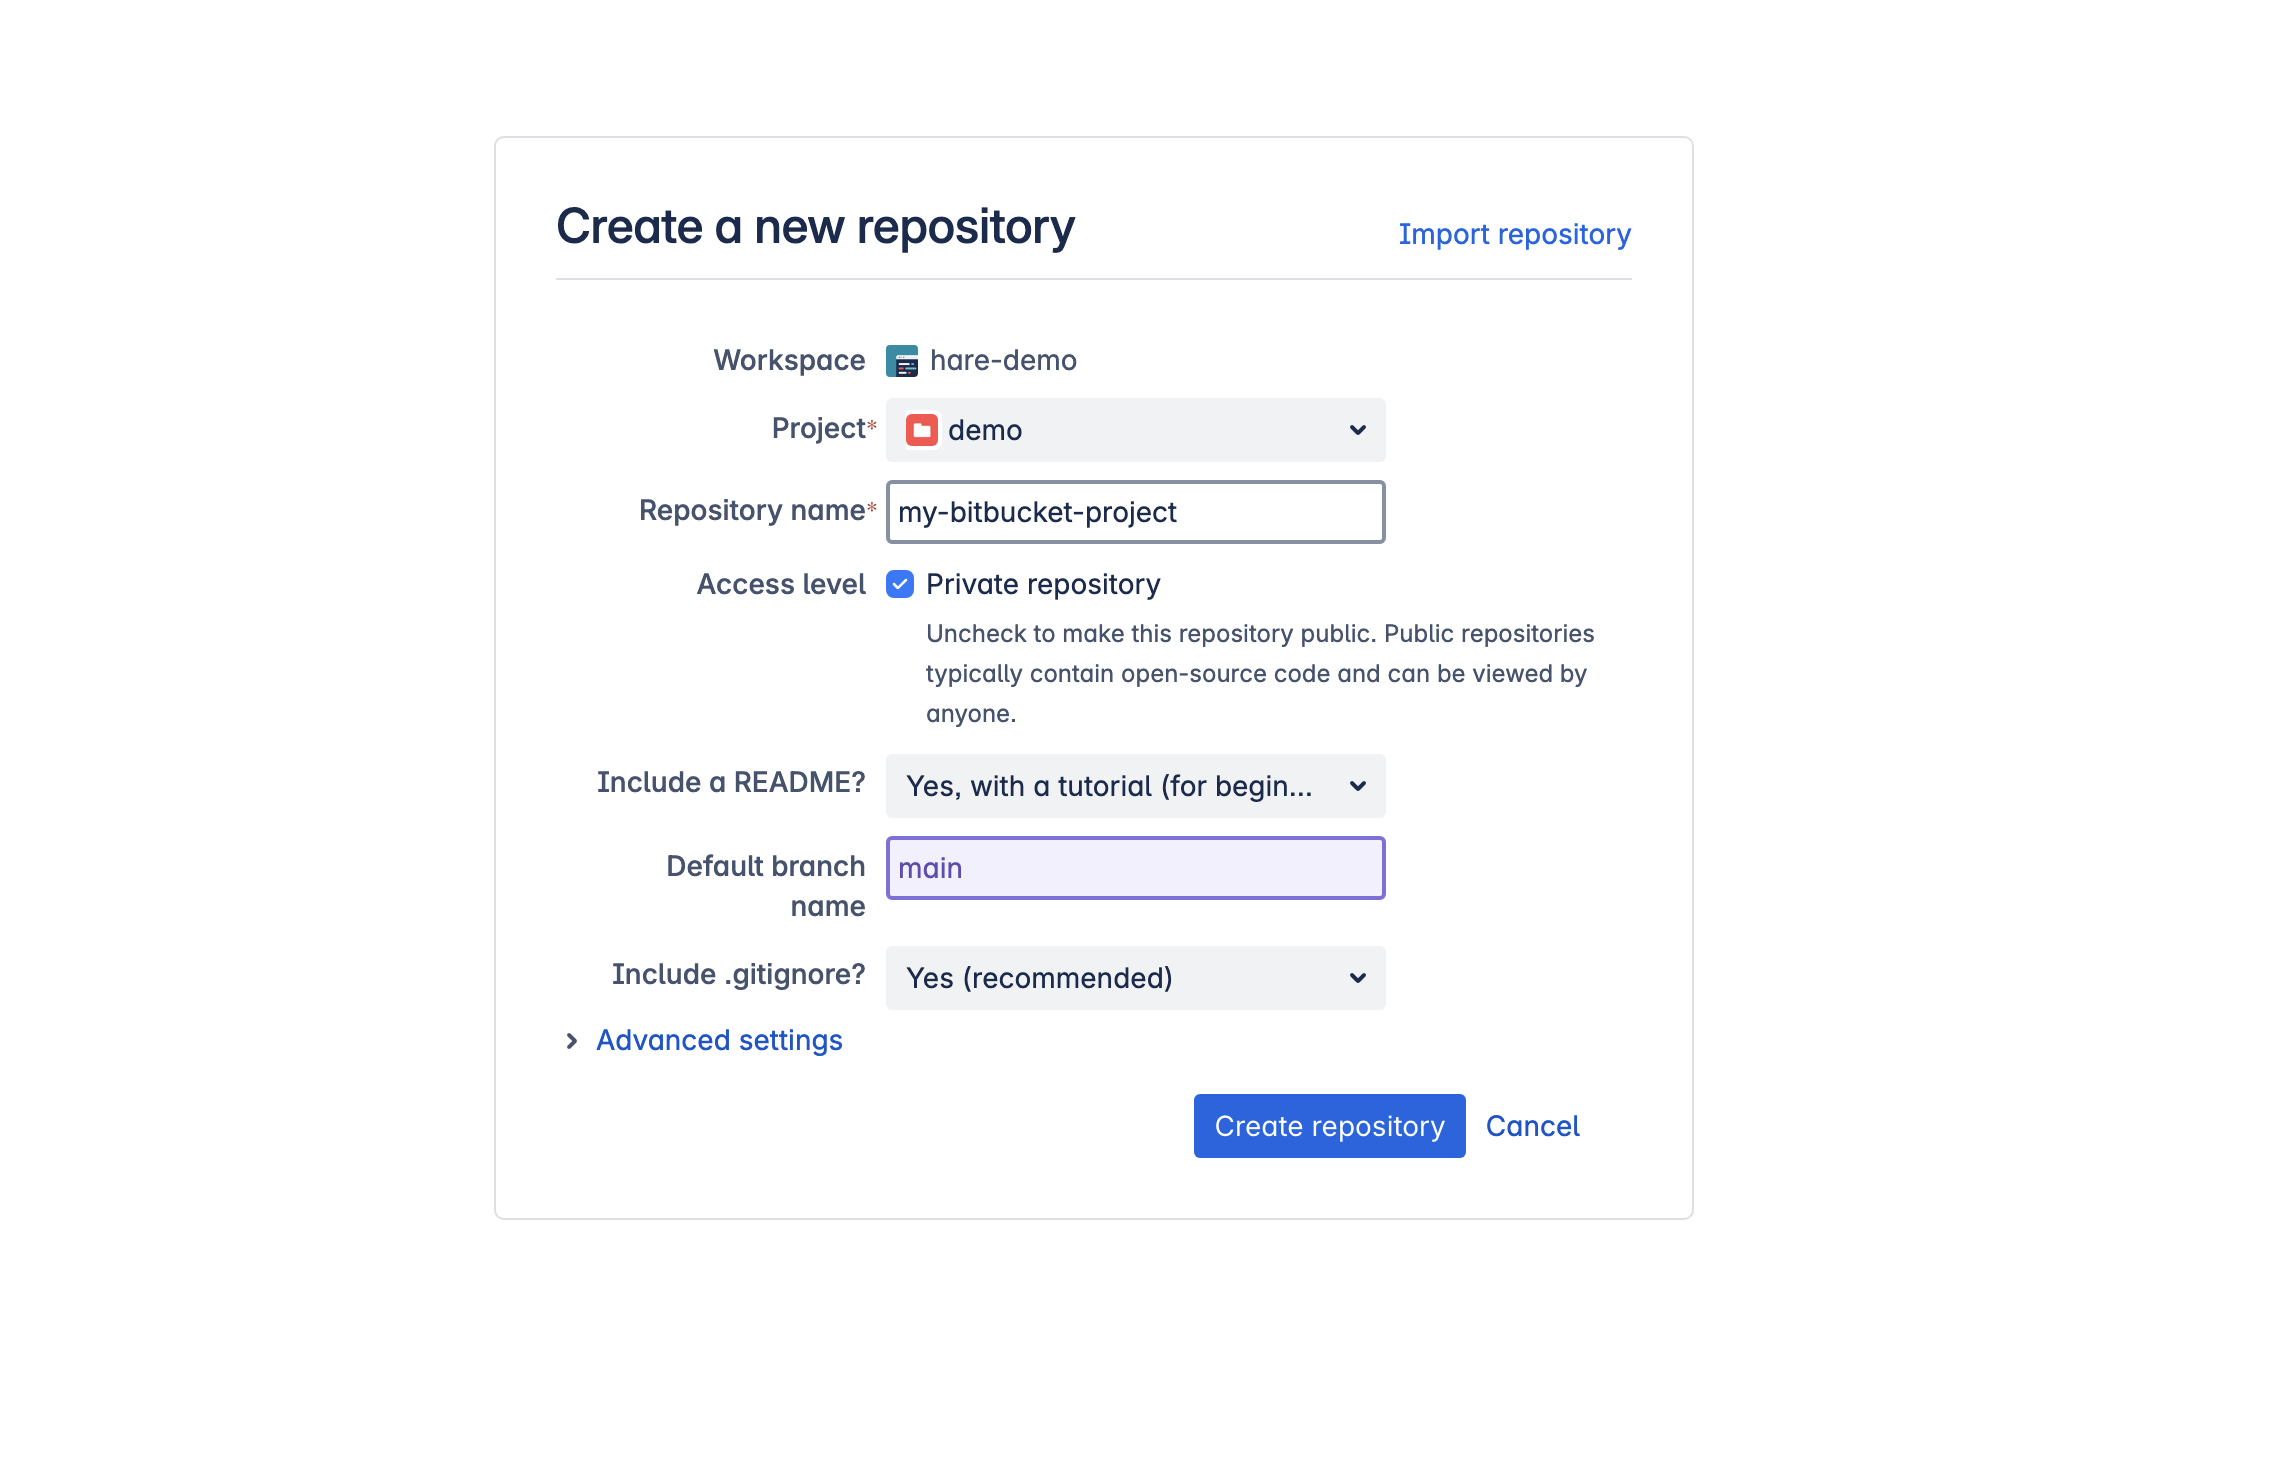
To get started, you have to create a project/repository on Bitbucket. Follow these steps:
1. Log into your Bitbucket account (create one if you don't have one)
2. Click on the **Create** button and select **Repository** from the dropdown list
3. Fill in all required fields and click **Create Repository**
 Once you create a repository, click on the **Clone** button and copy the URL, which looks similar to:
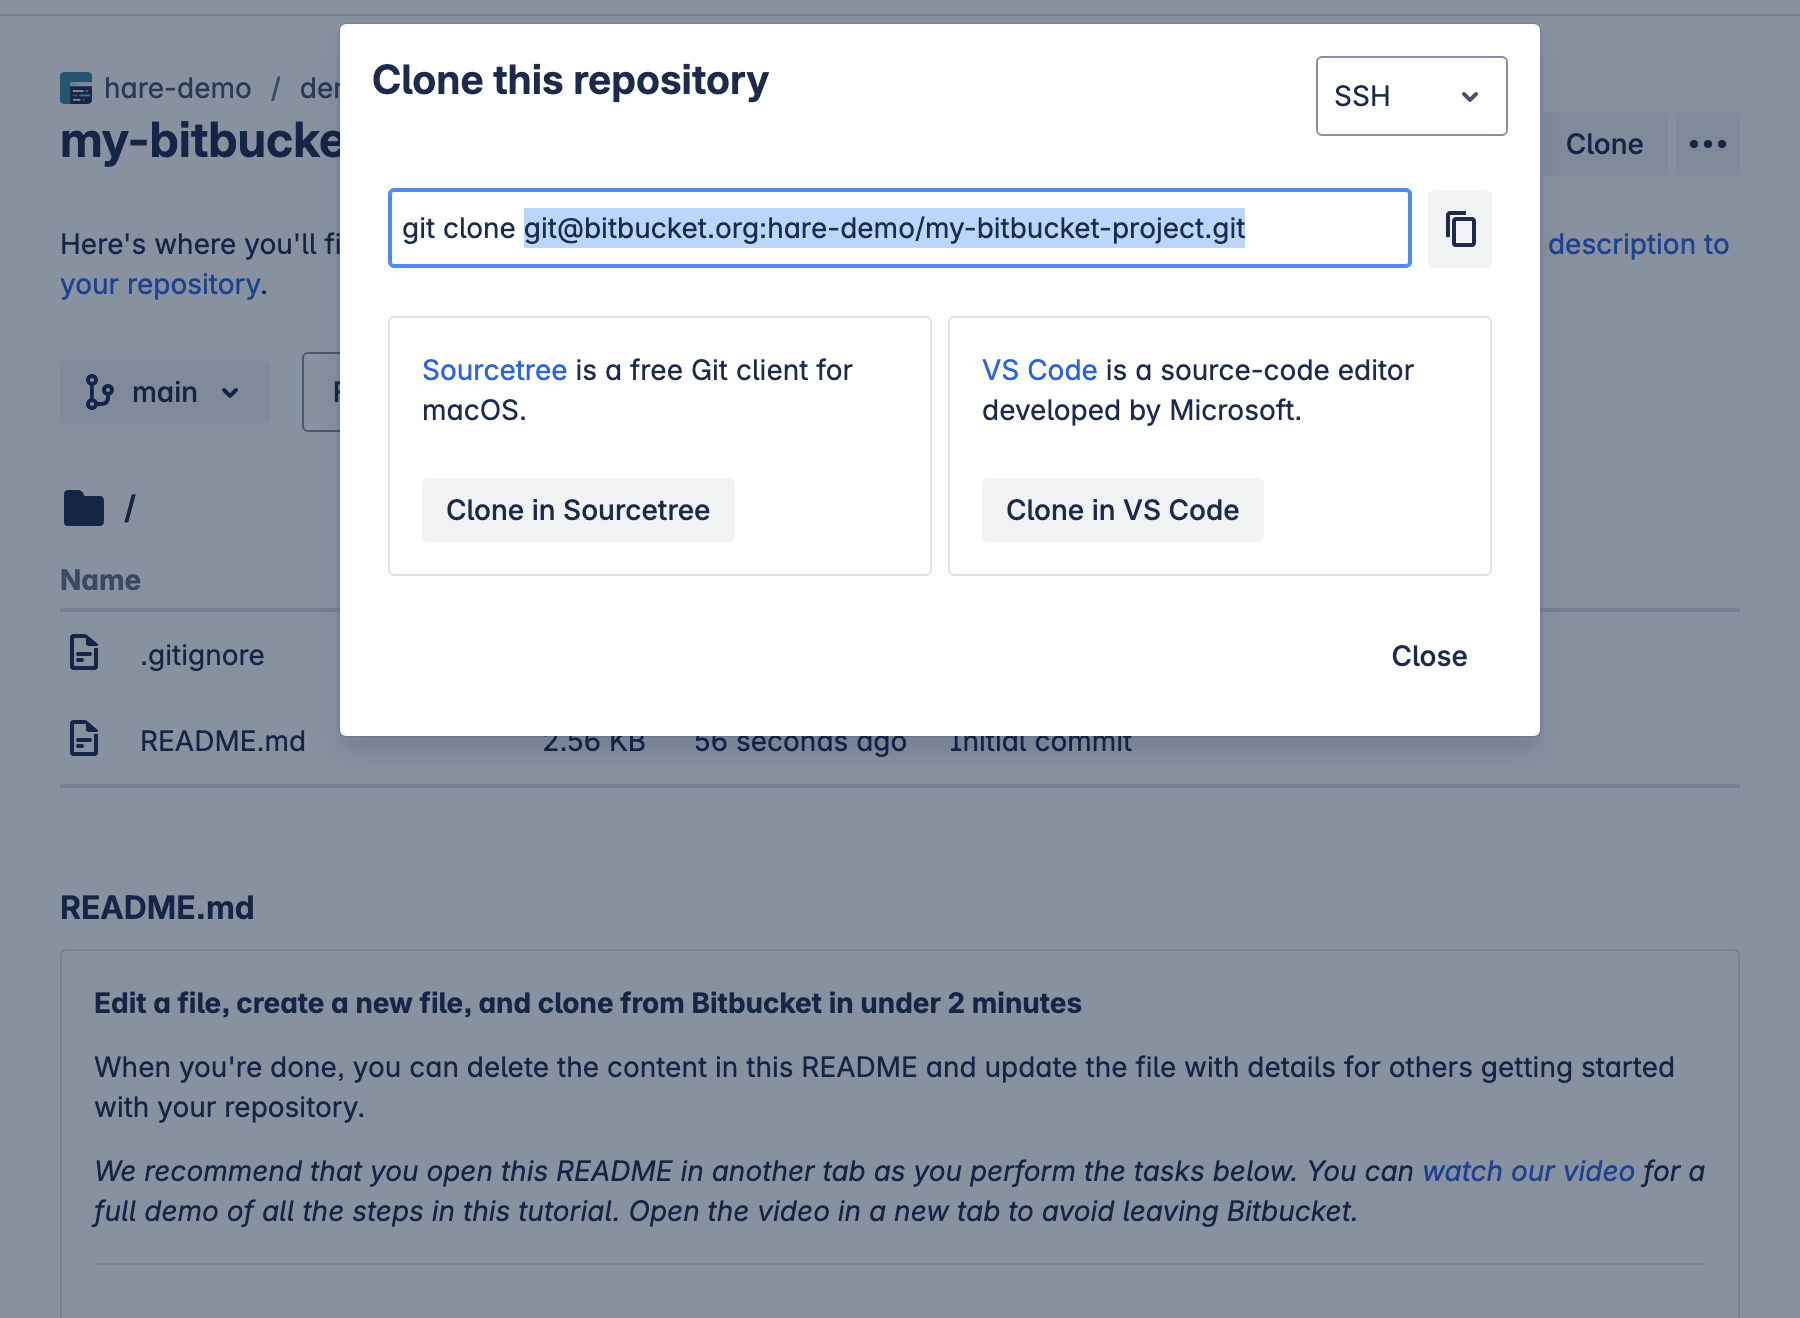 ```bash theme={null}
git@bitbucket.org:/.git
```
### Configure SSH Key
Follow these steps to configure an SSH key on your local system:
#### 1. Generate SSH Key
Open your terminal and execute:
```bash theme={null}
ssh-keygen -t ed25519 -C "your_email@example.com" -f ~/.ssh/id_ed25519_bitbucket
```
#### 2. Add SSH Key to SSH Agent
Add the SSH key to your SSH agent so it can be used for authentication:
```bash theme={null}
ssh-add ~/.ssh/id_ed25519_bitbucket
```
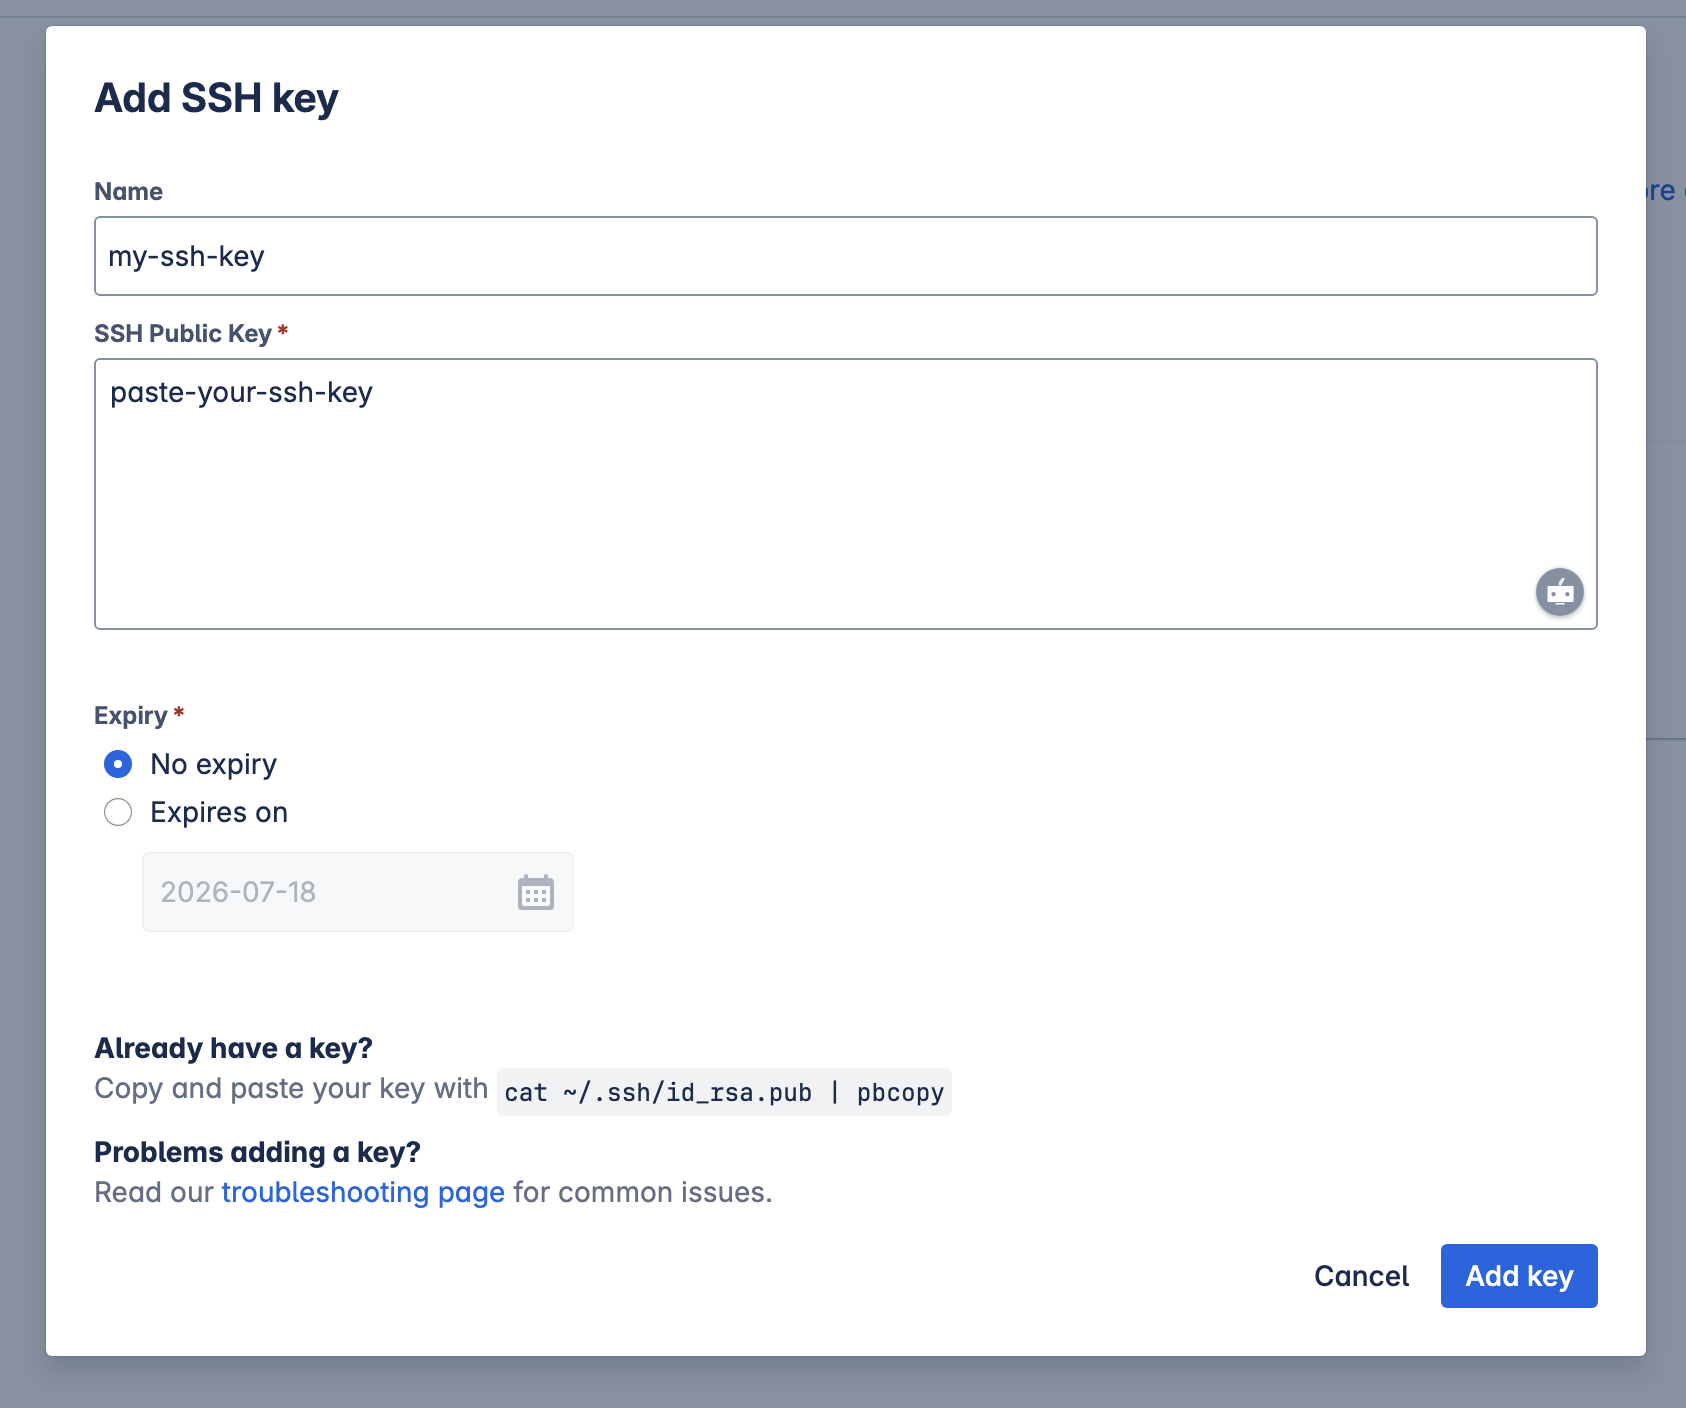
#### 3. Add the SSH Key to Your Bitbucket Account
1. Go to **Bitbucket** > **Personal Settings** > **SSH Keys**
2. Click **Add Key**
3. Paste your `id_ed25519_bitbucket.pub` content
```bash theme={null}
git@bitbucket.org:/.git
```
### Configure SSH Key
Follow these steps to configure an SSH key on your local system:
#### 1. Generate SSH Key
Open your terminal and execute:
```bash theme={null}
ssh-keygen -t ed25519 -C "your_email@example.com" -f ~/.ssh/id_ed25519_bitbucket
```
#### 2. Add SSH Key to SSH Agent
Add the SSH key to your SSH agent so it can be used for authentication:
```bash theme={null}
ssh-add ~/.ssh/id_ed25519_bitbucket
```
#### 3. Add the SSH Key to Your Bitbucket Account
1. Go to **Bitbucket** > **Personal Settings** > **SSH Keys**
2. Click **Add Key**
3. Paste your `id_ed25519_bitbucket.pub` content
 ## Use Bitbucket with Bruno
1. Create a Collection inside Bruno (if you haven't already)
2. Click on the **Git** icon (next to Safe Mode) and select **Initialize repo**
3. Click on **main** and select **Remotes** from the dropdown
4. Add **origin** as the name of the remote and paste your repository URL (copied previously)
Now you can perform push, pull, and other Git operations directly from Bruno.
For more detailed information about Git operations in Bruno, check out the [Collaboration via GUI documentation](/git-integration/using-gui/intro).
## Use Bitbucket with Bruno
1. Create a Collection inside Bruno (if you haven't already)
2. Click on the **Git** icon (next to Safe Mode) and select **Initialize repo**
3. Click on **main** and select **Remotes** from the dropdown
4. Add **origin** as the name of the remote and paste your repository URL (copied previously)
Now you can perform push, pull, and other Git operations directly from Bruno.
For more detailed information about Git operations in Bruno, check out the [Collaboration via GUI documentation](/git-integration/using-gui/intro).