> ## Documentation Index
> Fetch the complete documentation index at: https://docs.usebruno.com/llms.txt
> Use this file to discover all available pages before exploring further.
# Using Bruno AI
Bruno AI is available from **v4.0.0** and higher. Make sure you have at least one provider configured before using these features. See [Configuration](/ai/bruno-ai/configuration).
## AI Assistant
The AI Chat Sidebar lets you ask questions and get AI assistance directly from anywhere in your workspace, without needing to open a specific request first.
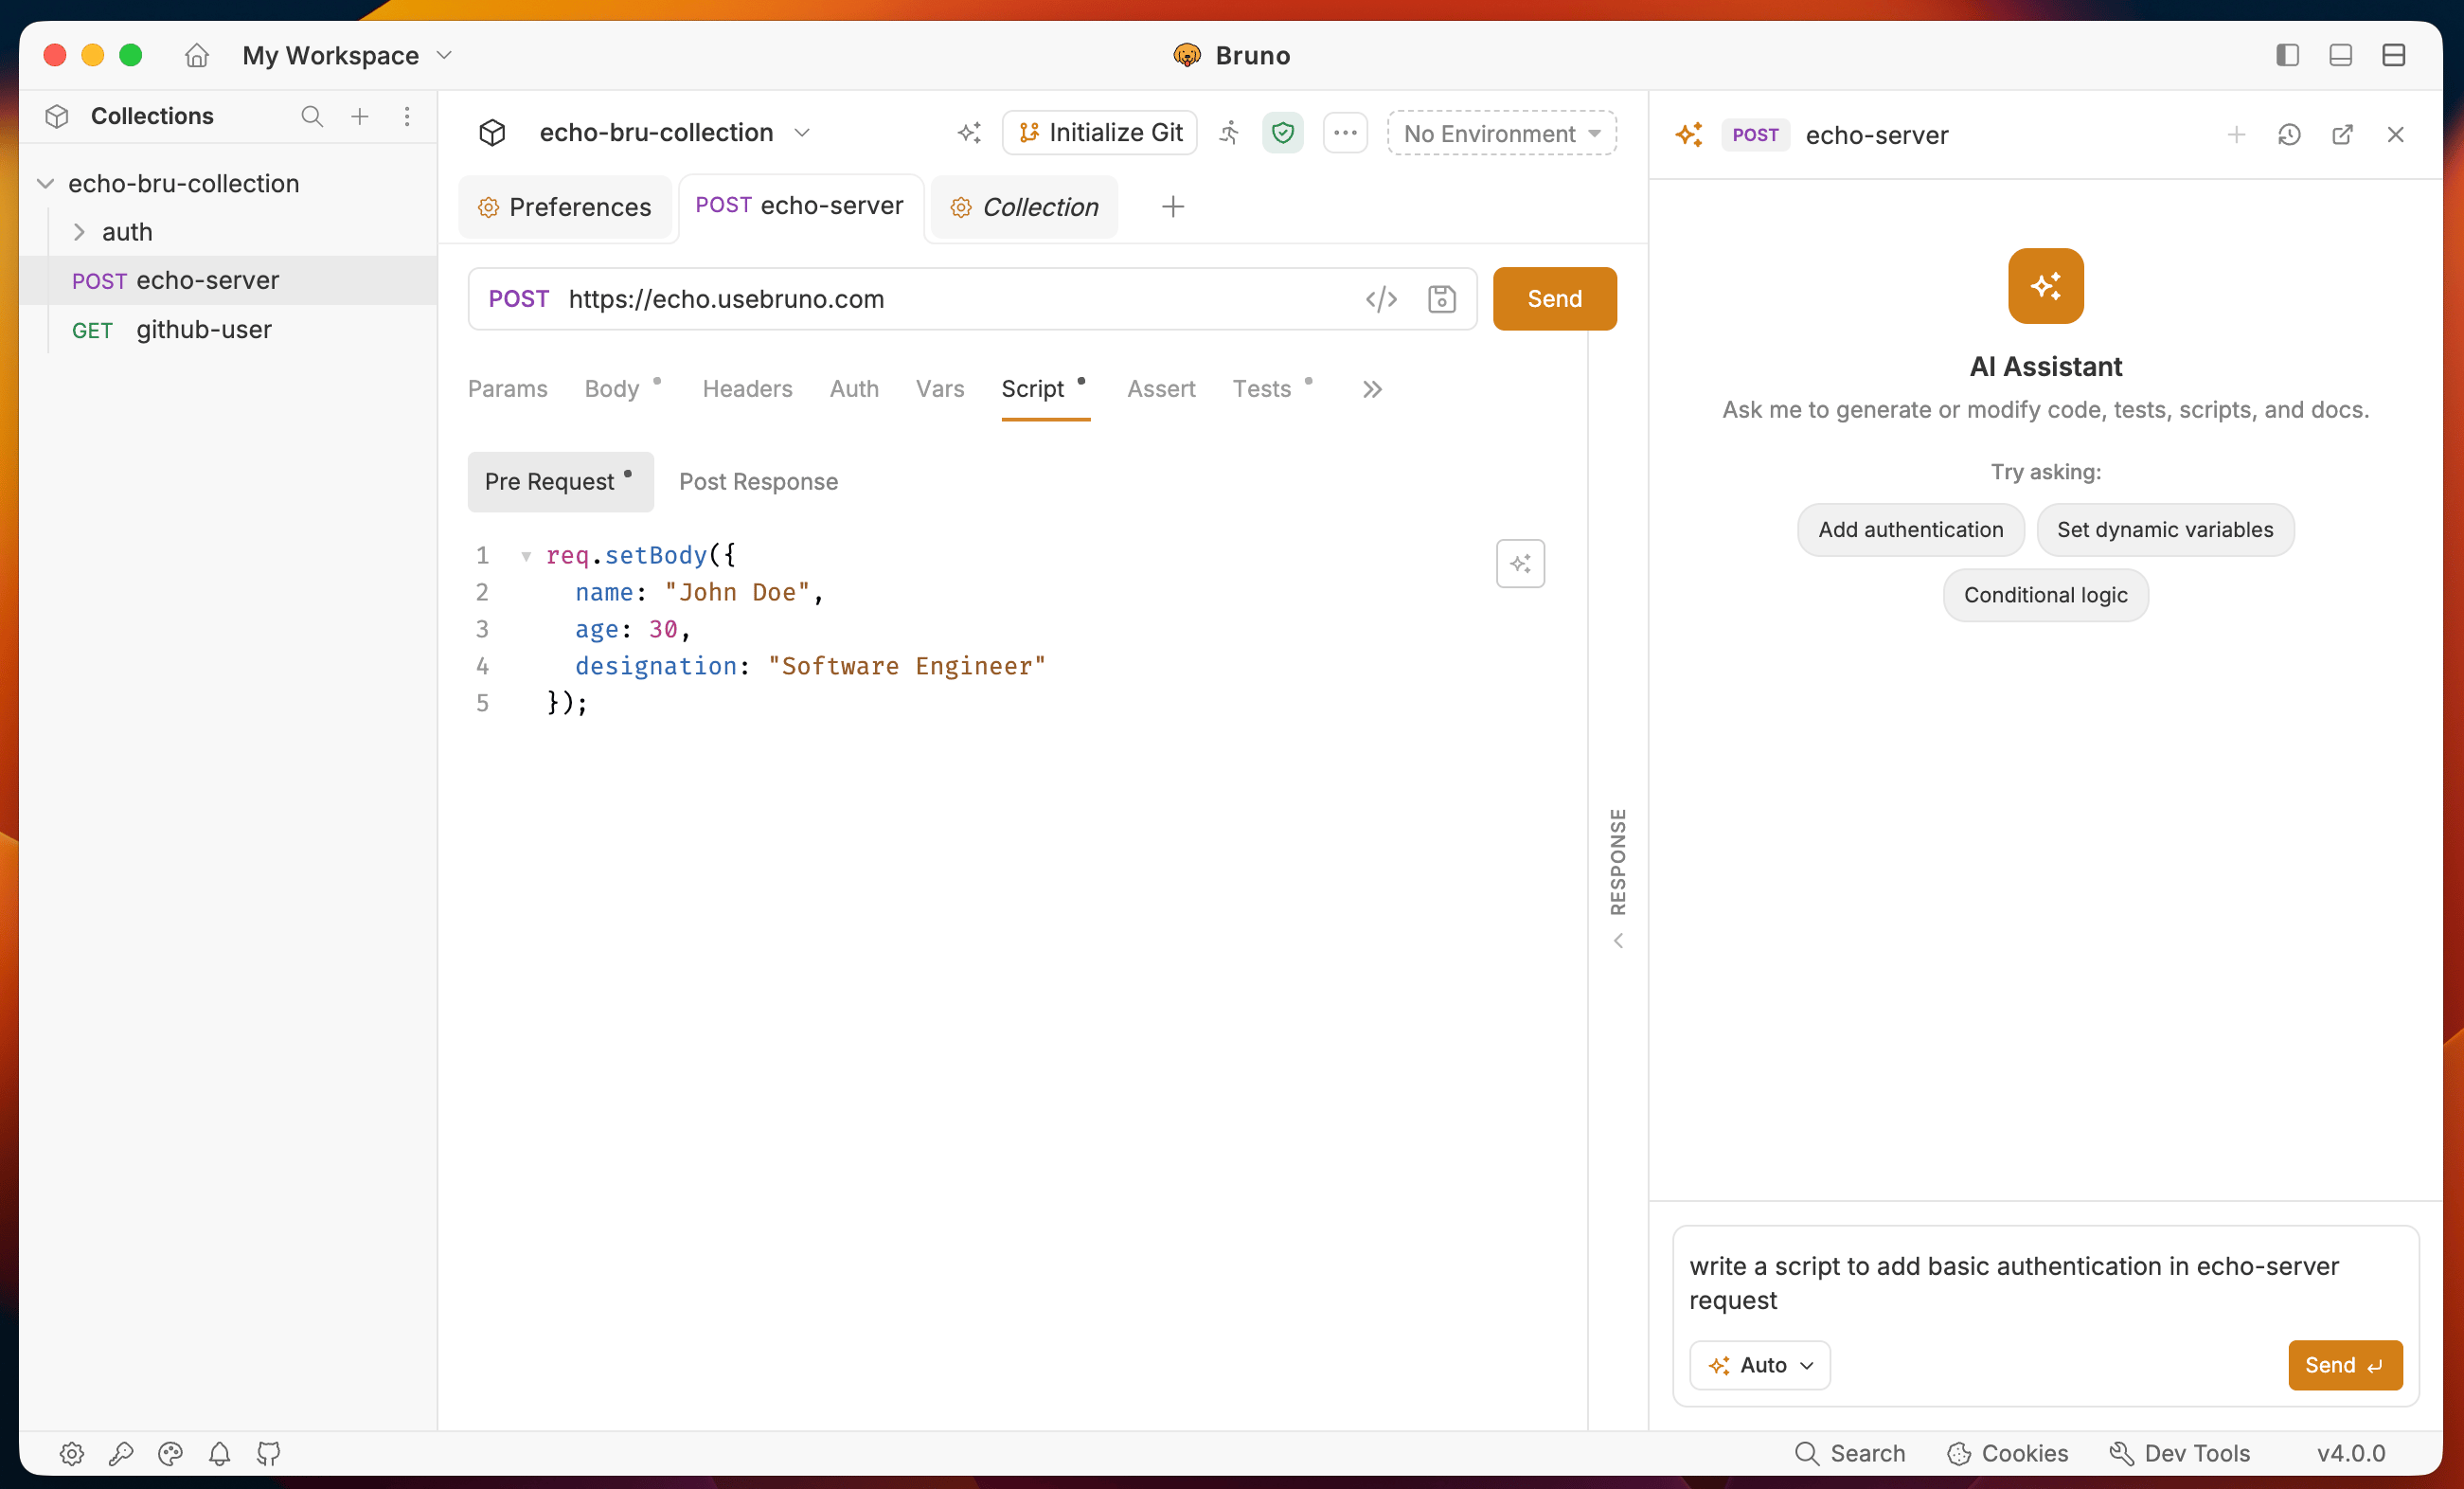 **Where it works:** Workspace level and inside any request.
**How to use it:**
1. Open a workspace in Bruno.
2. Click the **AI icon** in the top sidebar.
3. The AI Chat panel opens on the right.
4. Type your question or describe what you need (for example: "How do I set up OAuth2 for my collection?" or "Write a test that checks the response time is under 500ms.").
5. Click **Apply** to insert the response.
You can also select a different model from the model picker at the bottom of the chat.
You can keep the chat open and navigate to other requests, the chat stays available throughout your session.
**Accessible from the top sidebar for quick access.**
* **History icon**: View all your previous chat interactions.
* **Popout icon**: Open the AI Chat as a separate pop-out window for more flexibility.
The workspace chat is great for general Bruno questions, planning test strategies, or drafting scripts before opening a specific request. Switch to the request-level AI features when you are ready to insert generated code directly.
## Inline Autocomplete
Autocomplete provides ghost-text suggestions as you write in script and test editors.
**Where it works:** Pre-Request scripts, Post-Response scripts, Tests scripts.
**Where it works:** Workspace level and inside any request.
**How to use it:**
1. Open a workspace in Bruno.
2. Click the **AI icon** in the top sidebar.
3. The AI Chat panel opens on the right.
4. Type your question or describe what you need (for example: "How do I set up OAuth2 for my collection?" or "Write a test that checks the response time is under 500ms.").
5. Click **Apply** to insert the response.
You can also select a different model from the model picker at the bottom of the chat.
You can keep the chat open and navigate to other requests, the chat stays available throughout your session.
**Accessible from the top sidebar for quick access.**
* **History icon**: View all your previous chat interactions.
* **Popout icon**: Open the AI Chat as a separate pop-out window for more flexibility.
The workspace chat is great for general Bruno questions, planning test strategies, or drafting scripts before opening a specific request. Switch to the request-level AI features when you are ready to insert generated code directly.
## Inline Autocomplete
Autocomplete provides ghost-text suggestions as you write in script and test editors.
**Where it works:** Pre-Request scripts, Post-Response scripts, Tests scripts.
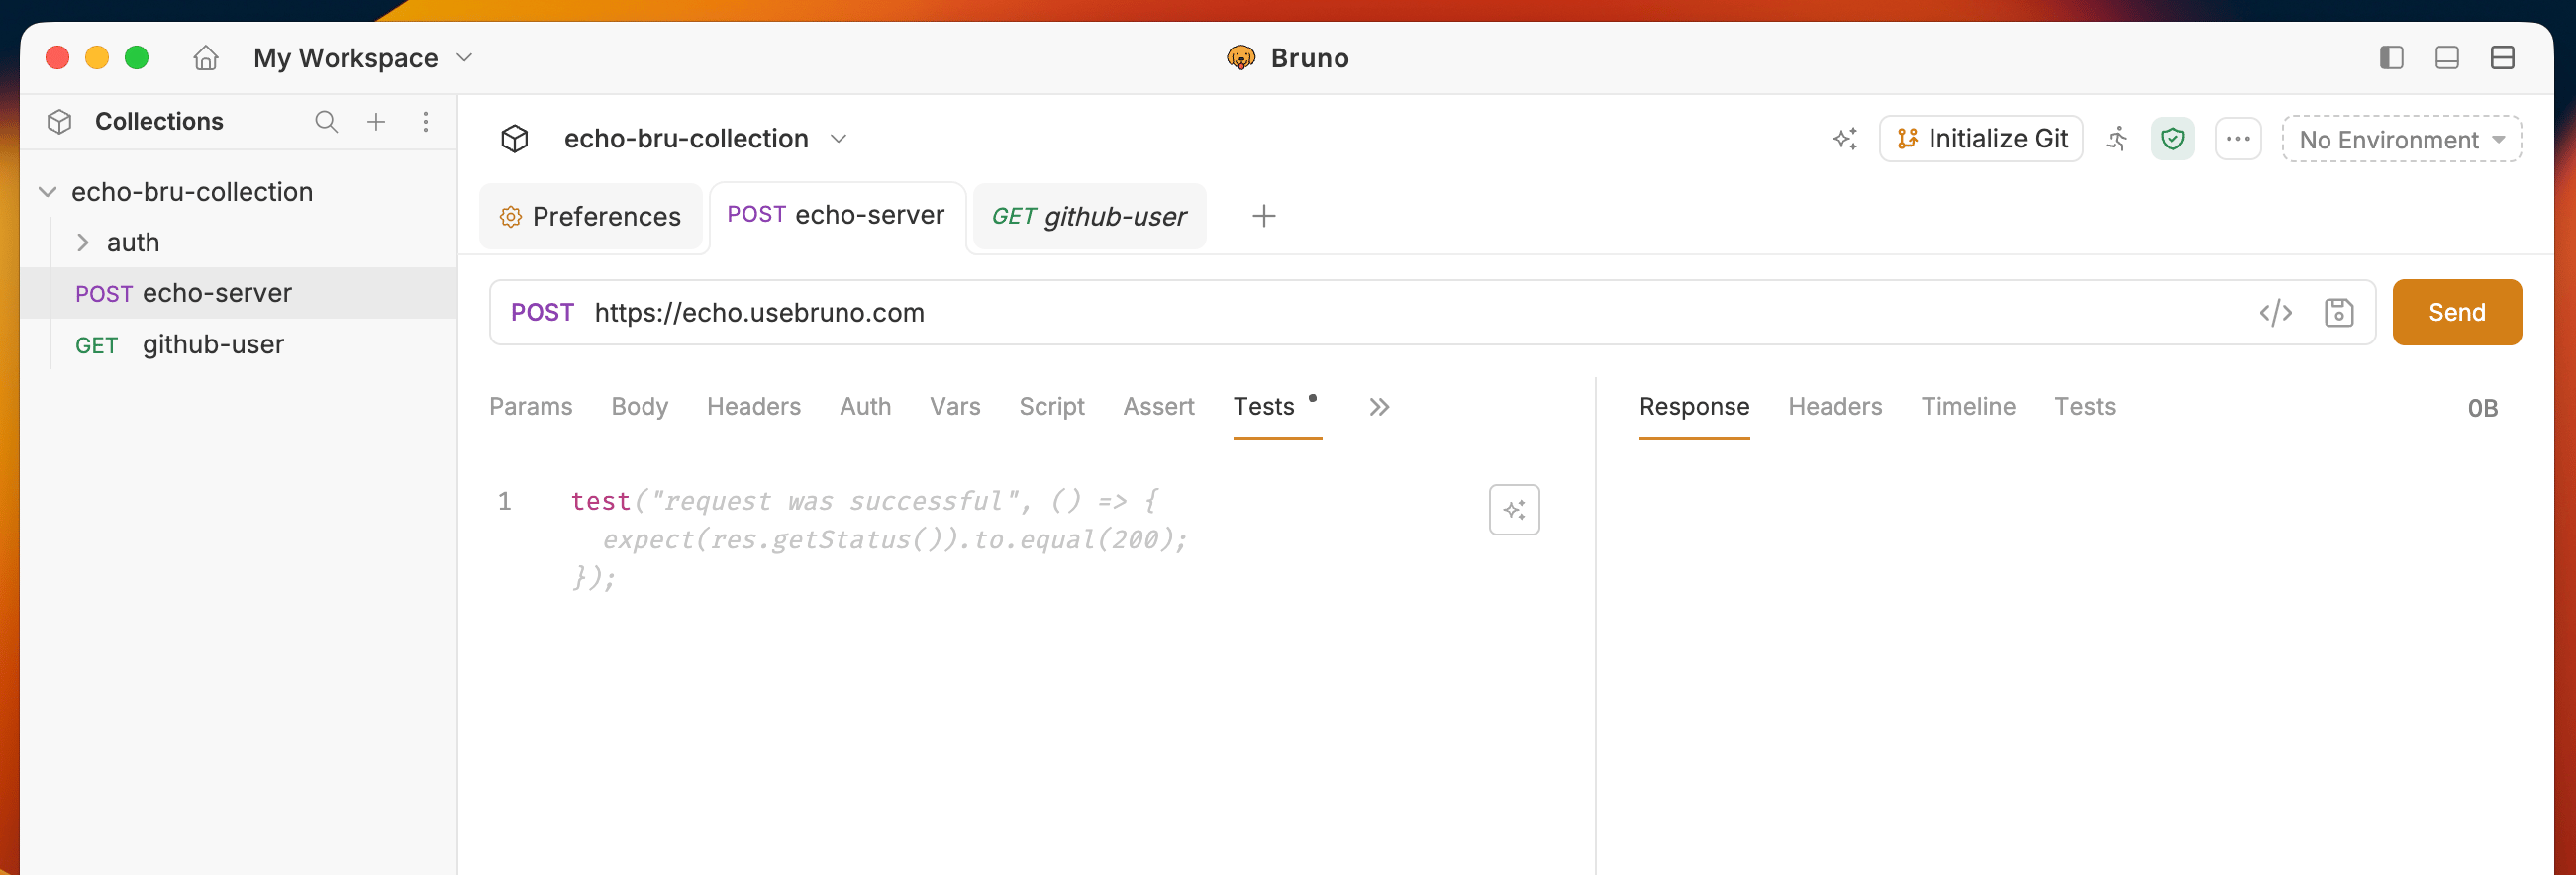 **How to use it:**
1. Start typing in any script or tests editor.
2. A ghost-text suggestion appears inline.
3. Press `Tab` to accept the full suggestion.
4. Press `⌘ →` to accept one word at a time.
5. Press `Esc` to dismiss without accepting.
6. Press `⌘ \` to trigger a suggestion manually.
**Trigger modes** (set in Preferences → AI → Autocomplete):
| Mode | Behavior |
| ---------- | -------------------------------------- |
| Aggressive | Suggests on every keystroke |
| Debounced | Suggests after a short pause (default) |
| Manual | Only suggests when you press `⌘ \` |
***
## Generate Script
Use AI to generate a full script from a plain-language description.
**Where it works:** Scripts tab on requests, folders, and collections.
**How to use it:**
1. Start typing in any script or tests editor.
2. A ghost-text suggestion appears inline.
3. Press `Tab` to accept the full suggestion.
4. Press `⌘ →` to accept one word at a time.
5. Press `Esc` to dismiss without accepting.
6. Press `⌘ \` to trigger a suggestion manually.
**Trigger modes** (set in Preferences → AI → Autocomplete):
| Mode | Behavior |
| ---------- | -------------------------------------- |
| Aggressive | Suggests on every keystroke |
| Debounced | Suggests after a short pause (default) |
| Manual | Only suggests when you press `⌘ \` |
***
## Generate Script
Use AI to generate a full script from a plain-language description.
**Where it works:** Scripts tab on requests, folders, and collections.
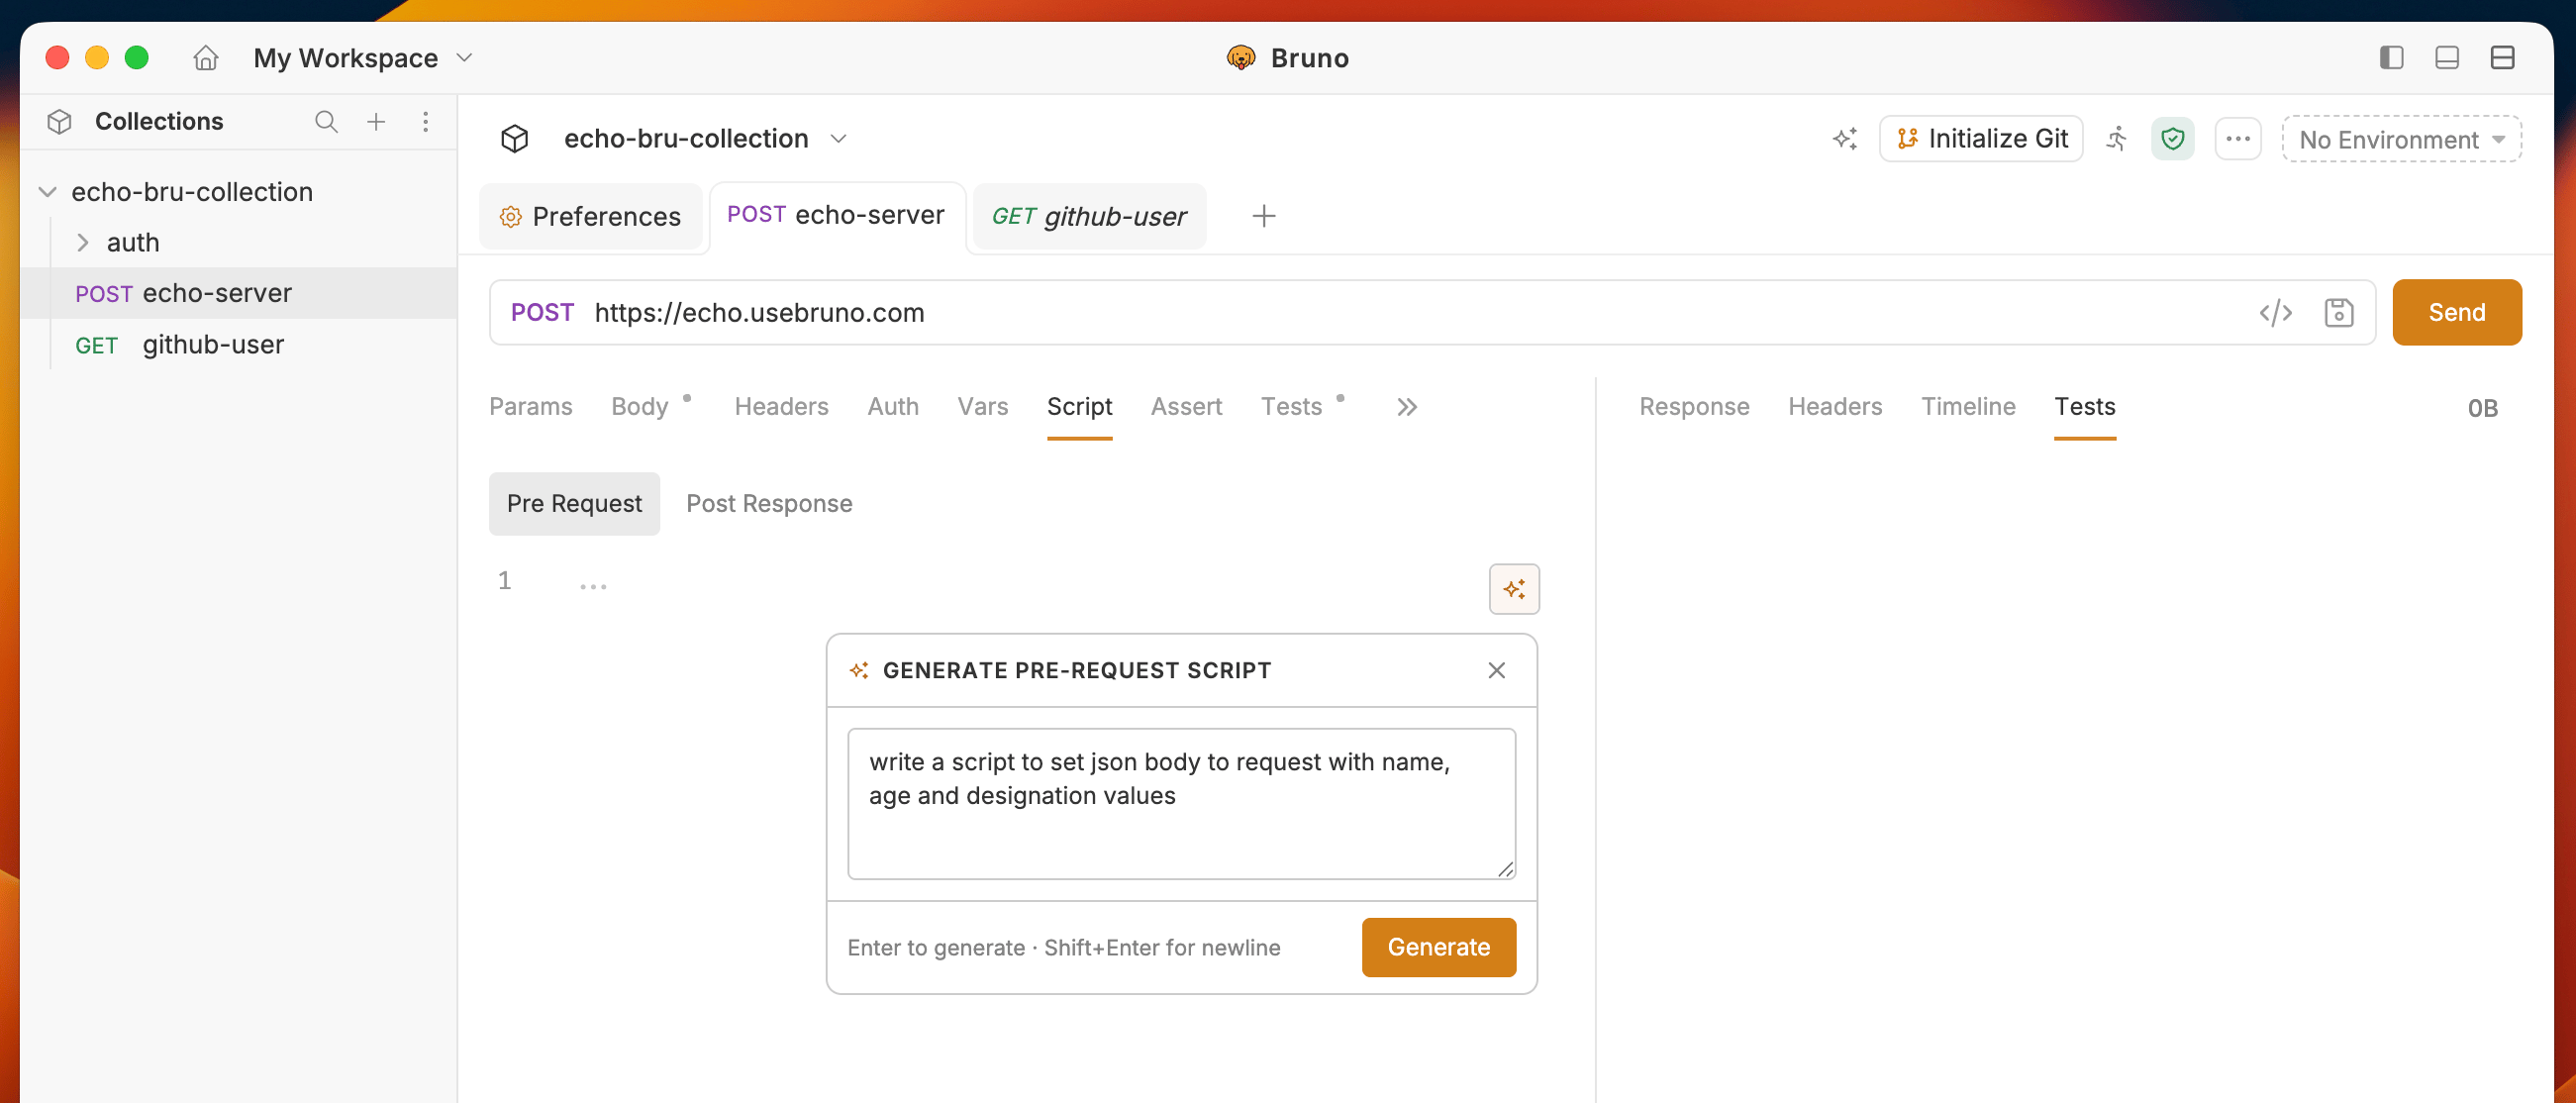 **How to use it:**
1. Open a request, folder, or collection.
2. Go to the **Script** tab.
3. Click the **AI icon**.
4. A popover opens - describe the script you want (for example: "Set the Authorization header using the token from the response body").
5. Click **Generate** to generate the script.
6. Review the result and click **Apply** to insert it, or **Back** to discard the changes.
***
## Generate Tests
Use AI to generate test assertions from a description.
**Where it works:** Tests tab on requests, folders, and collections.
**How to use it:**
1. Open a request, folder, or collection.
2. Go to the **Script** tab.
3. Click the **AI icon**.
4. A popover opens - describe the script you want (for example: "Set the Authorization header using the token from the response body").
5. Click **Generate** to generate the script.
6. Review the result and click **Apply** to insert it, or **Back** to discard the changes.
***
## Generate Tests
Use AI to generate test assertions from a description.
**Where it works:** Tests tab on requests, folders, and collections.
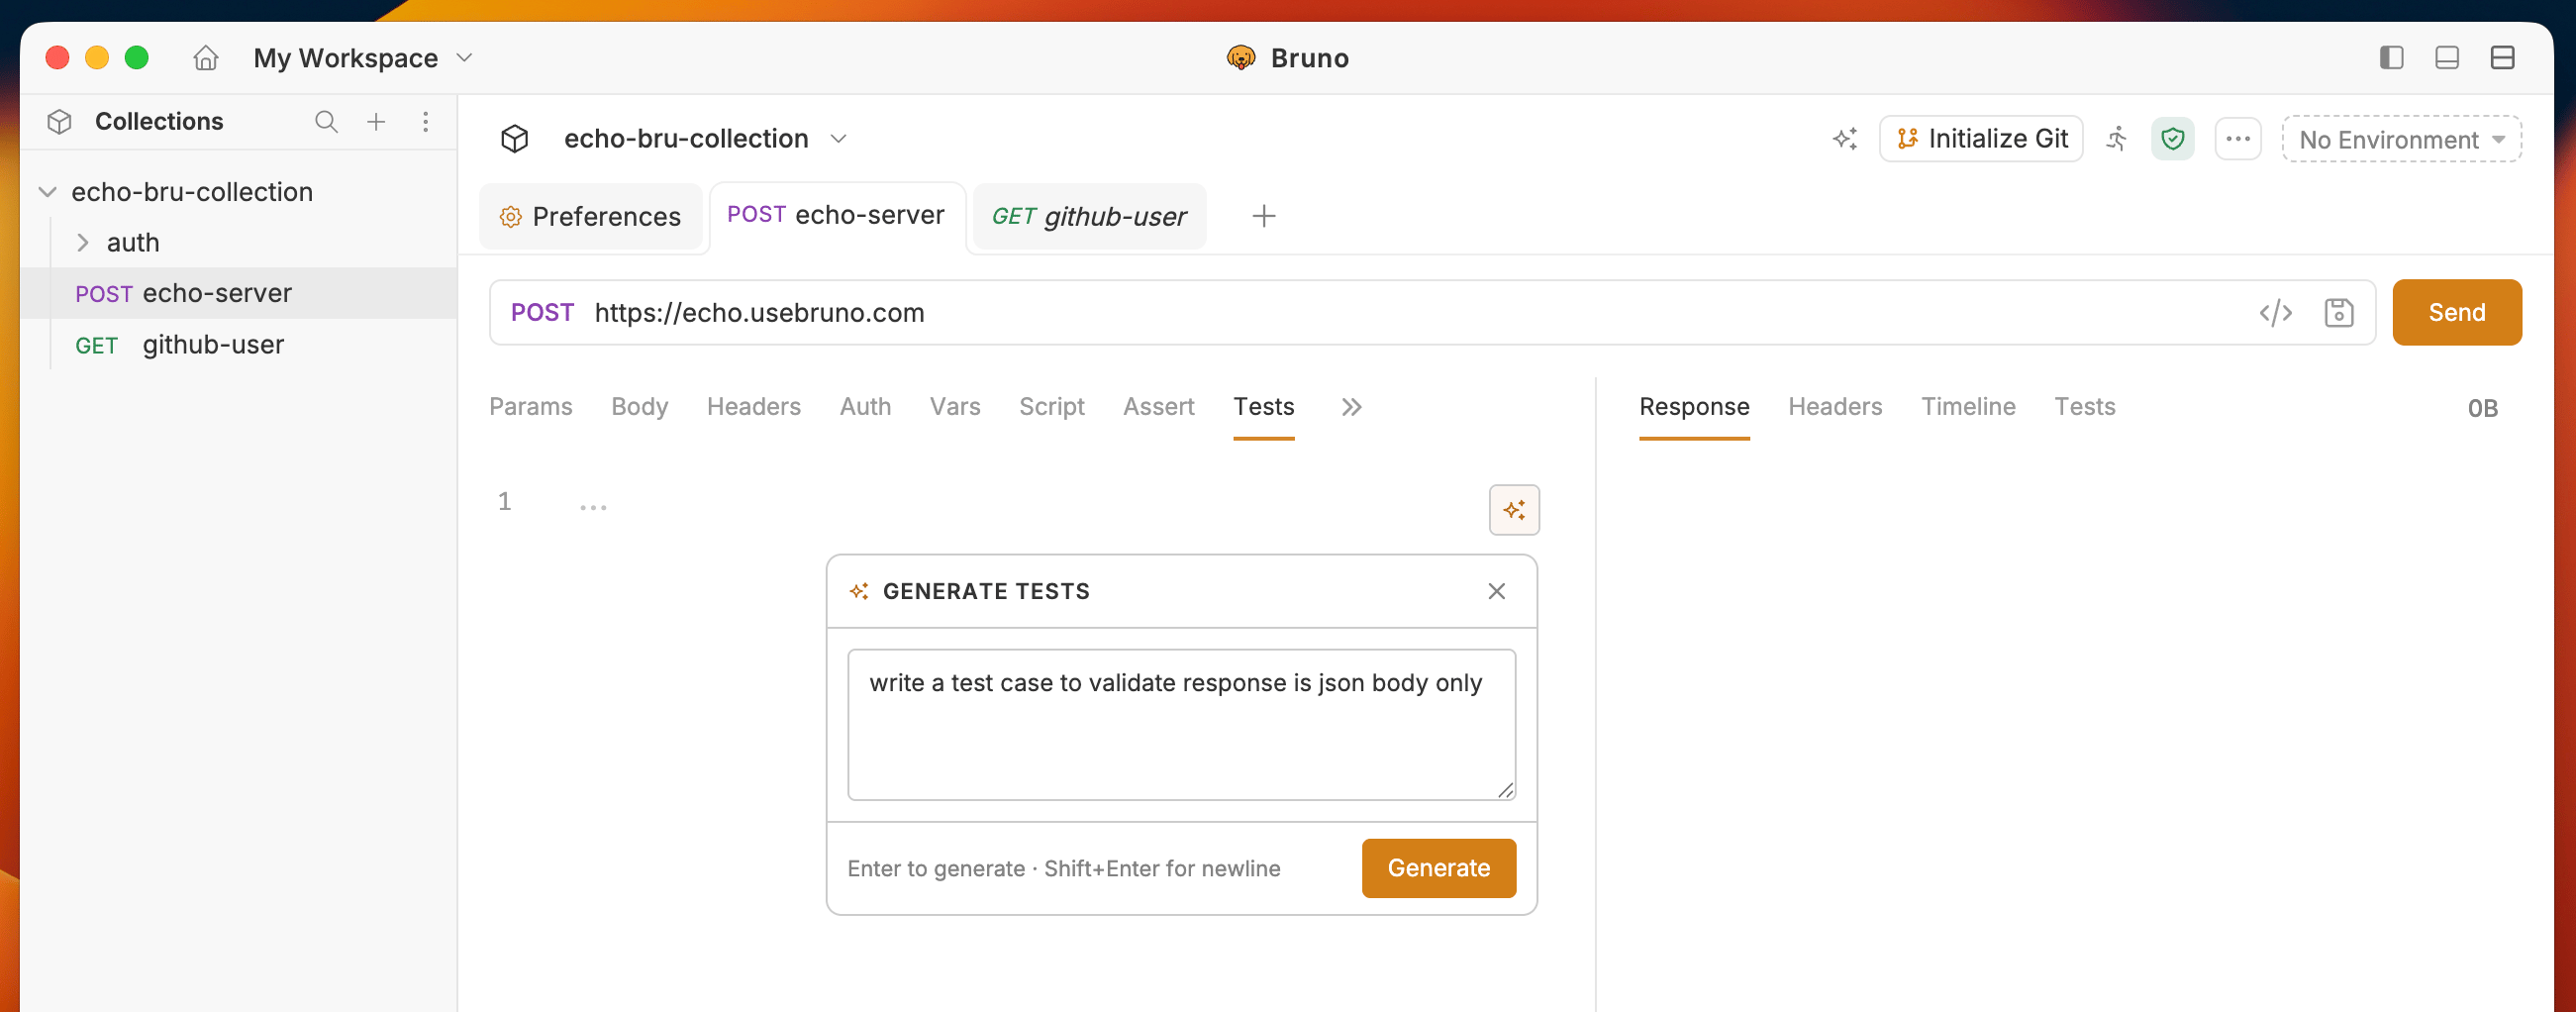 **How to use it:**
1. Open a request, folder, or collection.
2. Go to the **Tests** tab.
3. Click the **AI icon**.
4. Describe the tests you need (for example: "Check that the status is 200 and the response contains a user id").
5. Click **Generate** to generate the test code.
6. Review the result and click **Apply** to insert it, or **Back** to discard the changes.
***
## Generate Documentation
Use AI to write documentation for a request, folder, or collection.
**Where it works:** Docs tab on requests, folders, and collections.
**How to use it:**
1. Open a request, folder, or collection.
2. Go to the **Tests** tab.
3. Click the **AI icon**.
4. Describe the tests you need (for example: "Check that the status is 200 and the response contains a user id").
5. Click **Generate** to generate the test code.
6. Review the result and click **Apply** to insert it, or **Back** to discard the changes.
***
## Generate Documentation
Use AI to write documentation for a request, folder, or collection.
**Where it works:** Docs tab on requests, folders, and collections.
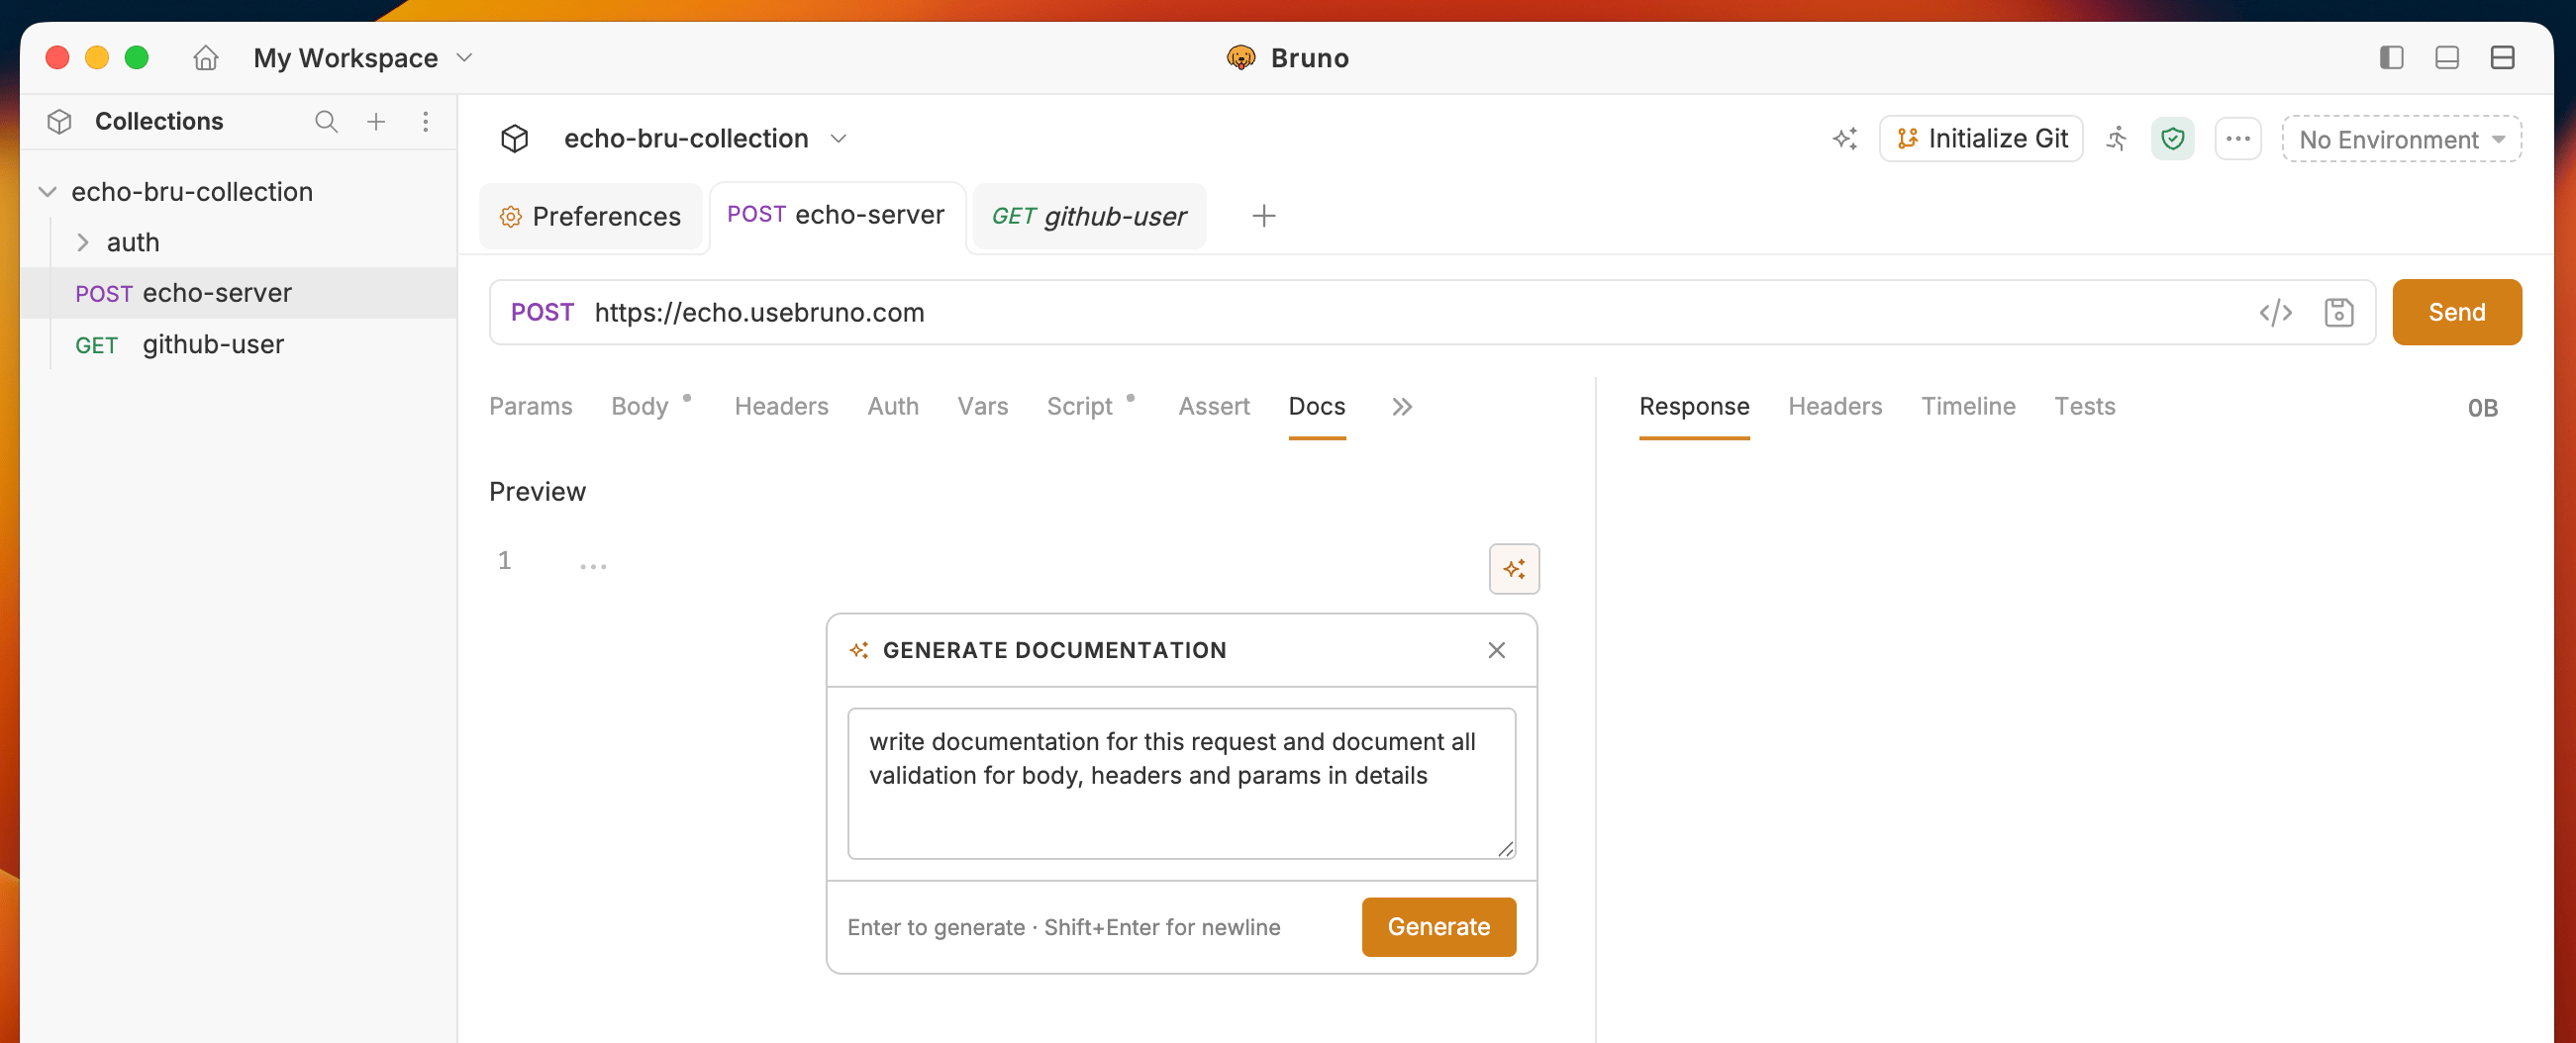 **How to use it:**
1. Open a request, folder, or collection.
2. Go to the **Docs** tab.
3. Click the **AI icon**.
4. Describe what this endpoint or workflow does (for example: "Creates a new user and returns the created user object").
5. Click **Generate** to generate the documentation.
6. Review the result and click **Apply** to insert it, or **Back** to discard the changes.
***
**How to use it:**
1. Open a request, folder, or collection.
2. Go to the **Docs** tab.
3. Click the **AI icon**.
4. Describe what this endpoint or workflow does (for example: "Creates a new user and returns the created user object").
5. Click **Generate** to generate the documentation.
6. Review the result and click **Apply** to insert it, or **Back** to discard the changes.
***